Загрузка видео...

Не удалось загрузить видео

На главную

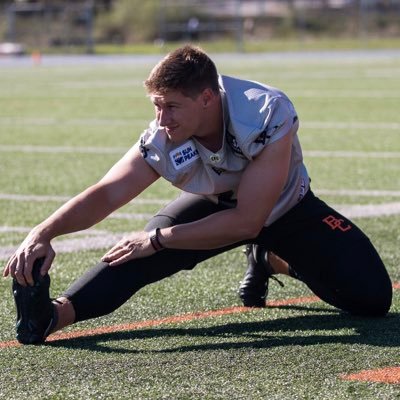
Decided to give a little demonstration on what I teach when going directional. Main points: - Plant foot, hips, and ball set towards target. -Tight knees down your line. -Relaxed upper body/shoulders slightly forward -HOLD ONTO THE BALL! Adam briggs bourgeois
27,352 просмотров • 2 лет назад •via X (Twitter)

Комментарии: 0

Нет доступных комментариев

Здесь появятся комментарии из оригинального поста

Похожие видео

Most people can’t hold a Reverse Plank because their nervous system doesn’t feel safe being that exposed. Collapsed shoulders and tight hips are postures of defense. This pose invites the body to leave that state. One minute a day can begin to reverse years of silent tension. If you want the fitness results you see in your mind to become real, you’ll need to teach your body how to relax first. Otherwise, forget the great transformation. You'll burn out before coming close to changing. At first, you may need to adjust the position or do shorter sets. You will notice slight improvements each time, whether it is strength, mobility, or endurance. One day, you will unlock the posture and feel much lighter within. Form Cues: - Hands shoulder-width apart, fingers pointing toward feet or slightly outward - Press palms firmly into the ground to engage shoulders - Lift hips in line with shoulders and heels - Squeeze glutes and push hips up, avoid letting them drop. - Keep legs straight and active, heels grounded - Draw shoulder blades down and together - Open the chest. - Gaze slightly upward or keep neck neutral - Breathe steadily, through the nose if possible - Hold tension evenly through arms, core, and legs Here are three adjustments you could make to ease into the Reverse Plank: 1. Bend the knees slightly - What it does: Reduces the load on tight hip flexors and stiff shoulders. - How to do it: Instead of keeping the legs fully straight, maintain a small bend at the knees and press through the heels. Focus on lifting the hips and opening the chest. 2. Use yoga blocks under the hands - What it does: Elevates the wrists and reduces wrist extension strain, especially for people with limited mobility or wrist pain. - How to do it: Place yoga blocks (or low, stable books) under your palms to give your shoulders more space and reduce the pressure on the wrists. 3. Turn the fingers outward slightly - What it does: Opens up tight shoulders and reduces internal rotation. - How to do it: Instead of pointing the fingers directly toward the feet, turn them slightly outward (about 30–45 degrees). This gives the shoulders more room to move and helps you stay open. You're not reading this by accident. Start using Reverse Planks to take your quality of life to the next level.

Alex Bernier

71,160 просмотров • 1 год назад

I created a dance movement sheet by using a reference image to animate every 16 panels from the reference image I provided. GPT Image 2 + See Dance 2.0 on Yapper Tutorial Below Prompt Here’s every step with the text under each heading: 1. Basic Stance Stand with your feet shoulder-width apart. Relax your knees. Keep your upper body relaxed. Get ready. 2. Step to the Right Step to the right. Move your body in the direction of the step. Keep your knees soft. Keep your gaze forward. 3. Step to the Left Step to the left. Move your body in the direction of the step. Keep your knees soft. Return to the starting position. 4. Two Steps Take two steps in sequence. Step to the right first. Then step to the left. Connect smoothly. 5. Body Wave Start the wave from your chest. Move through your ribs and hips. Finish with your lower body. Make the motion smooth like a wave. 6. Hip Sway Move your hips side to side. Shift your weight with the motion. Use your body naturally. Keep your upper body relaxed. 7. Arm Swing Swing your arms wide. Step to beat with your feet. Coordinate your arms and steps. Return your arms to center. 8. Turn Preparation Prepare for a turn in place. Cross one foot over the other. Use your core to maintain balance. Spot in the direction of the turn. 9. Right Turn Turn to the right. Keep your core engaged. Pivot on the ball of your foot. Spot forward after the turn. 10. Left Turn Turn to the left. Keep your core engaged. Pivot quickly. Keep your posture upright. 11. Jump Up Bend your knees and jump up. Reach your arms overhead. Land softly on your feet. Connect to the next move. 12. Kick Pose Kick your leg forward. Keep your supporting leg stable. Engage your core for balance. Control your landing. 13. Side Lunge Step wide to one side. Bend one knee and lower your body. Keep the other leg straight. Show the direction of your strength. 14. Freeze Pose Hit a strong pose on the beat. Freeze your body momentarily. Create a powerful shape. Show your presence. 15. Finishing Pose Finish the dance gracefully. Keep your balance. Show your confidence. End with a clean, sharp pose. 16. Whole Flow Connect from the basic stance to the finishing pose. The steps, waves, and turns flow naturally together. Express your own style.

Sharon Riley

54,571 просмотров • 3 месяцев назад

This is the prompt for figure 4 head lock: Begin with a low three-quarter view from Honoka’s left side, showing Arisa standing behind her head. Move closer gradually while keeping Arisa’s hips, knees, ankles, and Honoka’s defensive movements fully visible. 0.0–1.5 sec: Honoka lies facing upward, breathing heavily, with both knees slightly bent and her gloves near her chest. Arisa stands behind Honoka’s head with a wide, balanced stance. She studies Honoka briefly, then bends her knees and lowers into a controlled squat. 1.5–3.0 sec: Arisa sits onto the canvas directly behind Honoka’s head. She places both palms on the mat beside Honoka’s shoulders for balance, without grabbing Honoka’s wrists or arms. Honoka reacts by lifting her head and shoulders slightly and raising both gloves defensively. 3.0–4.8 sec: Arisa shifts onto her left hip and slides her right thigh beneath the back of Honoka’s neck and upper shoulders. Arisa’s right knee points diagonally toward Honoka’s left shoulder, while her right lower leg extends along the canvas beside Honoka’s head. Honoka tries to turn toward Arisa and pushes against Arisa’s thigh. 4.8–6.5 sec: Arisa swings her left leg across the front of Honoka’s upper chest and near shoulder. The back of Arisa’s left knee settles beside Honoka’s right cheek and shoulder line. Arisa keeps her left foot elevated briefly while adjusting the angle, preventing Honoka from sitting upright. 6.5–8.0 sec: Arisa bends her left knee more deeply and brings her left ankle toward the bend behind her right knee. At the same time, she lifts her right lower leg from the canvas and folds it inward, crossing it over the left ankle. Her knees close around Honoka’s head-and-shoulder line, creating a compact closed loop. 8.0–9.5 sec: Arisa secures the crossed-leg arrangement by placing the back of her right knee firmly over her left ankle. She flexes both feet, draws her heels closer to her hips, and rotates her torso slightly toward Honoka’s right side. One hand remains posted on the canvas while the other steadies her own shin. 9.5–11.5 sec: Honoka struggles fiercely. She grips Arisa’s lower leg with both gloves, bridges her hips high, twists her shoulders, and plants both feet against the canvas. She tries to turn onto her side and slide her chin and shoulder toward the open space. 11.5–13.2 sec: Arisa follows Honoka’s movement by scooting her hips backward several inches, keeping her knees tightly connected. She lowers onto one forearm, slightly straightens her upper leg, and pulls the opposite heel inward to stop Honoka from rotating free. 13.2–15.0 sec: Honoka continues resisting without surrendering. She bridges again, kicks her heels against the canvas, pushes at Arisa’s knee, and twists her torso from side to side. Arisa maintains the secured leg configuration with steady posture and controlled pressure. End with Arisa holding the dominant position while Honoka remains conscious, active, and still refusing to tap.

Angel Combat

14,668 просмотров • 24 дней назад

I want parents to really think about this. Imagine paying good money for lessons because you care about your daughter’s long-term development… and the first thing you’re told is that “swinging down isn’t correct.” Instead it’s barrel depth, elite path, and swinging up because “that’s what the pros do.” That’s where development goes backwards. Most young athletes aren’t broken they’re underdeveloped in movement. They don’t understand shoulder angles, how to get on top of the ball, situational hitting, or how the body actually organizes a swing. That’s not their fault. That’s instruction skipping steps. In my cage, athletes do not swing up first. They have to earn the right to swing up by first owning the down. We stay at the top of the zone, learn how to find the down, and teach how the shoulders orient the swing. The up isn’t cued or forced it’s a byproduct of correct movement. What floors me is how often kids, especially in softball, are taught to swing up immediately. How do you start middle-down and swing up in a sport where the ball is traveling on an upward plane? It makes no sense. Baseball and softball mechanics are the same the body doesn’t change. But instruction must start differently because pitch plane is different. Baseball breaks down. Softball rise spins up. If a softball hitter can’t control the down out front, they’ll never handle elite rise. Once control is there, the femur turns down, the torso gets pulled up, and the natural up shows itself. No forcing. No manipulation. I can post videos like this all day. I’m not teaching a “style.” I’m teaching how the body is designed to move. I’m demanding because parents invest real time and money, and I won’t waste either. If you want game swings that hold up to velocity and plane find the down!

John Sangillo

47,117 просмотров • 8 месяцев назад