Loading video...

Video Failed to Load

Go Home

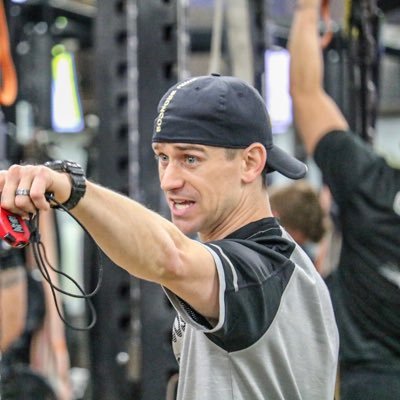
Bar core routine! Challenging core strength and stability work. 90 knee to elbow x10 Straight arm lateral tucks x10e 90 knee to elbow diagonal x5e Straight arm straight leg raise x10 Perform 1-2 sets (50-100 total reps) #EAT #Earned #Core
13,327 views • 1 year ago •via X (Twitter)

1 Comments

Naveen Sankar S's profile picture
Naveen Sankar S1 year ago

🏃‍♂️ A structured run-walk program may ease chronic lower back pain in adults under 45! 📈A 12-week trial showed a significant 15.3-point reduction in pain levels compared to usual care. 🔗 #BackPain #Fitness #PainRelief

Related Videos

People with weak cores struggle to stabilize their bodies when they walk. Every step you take sends a little punch up your leg into your hip and lower back. Planks with one or more support points removed to expose this weakness. Use these 12 exercises to strengthen your core: 1 - Bird-Dog (0:06) 3 x 10/side Beginners start with this exercise because removing two support points with your knees on the floor is easier. The goal is to straighten the opposing arm and leg. A client wobbled when she removed her two support points today, which humbled her. 2 - Front Plank with Leg Lift, Elbows (0:15) 3 x 10/side The second plank involves lifting one leg at a time. Being on your elbows is easier than your straightened arms, so I'll first have people familiarize themselves with this position. Lift your leg as high as you can without swinging too much. Hold at the top for a few seconds to increase the burn. 3 - Front Plank with Arm/Leg Lift, Elbows (0:20) 3 x 10 The third plank resembles the Bird Dog, except your knees are off the floor. Straighten the opposite arm and leg at the same time, and hold. You might struggle to reach a full lengthening, so do your best and practice. Removing one hand off the floor also strengthens your shoulder blade muscles. 4 - Front Rotation Plank, Elbows (0:28) 3 x 10/side The fourth plank engages different abdominal muscles with the rotation. Your arms should point toward the ceiling, something beginners might initially struggle with. 5 - Push-Up Plank (0:34) 3 x 10 The fifth plank is excellent for building upper body strength at home. You are bound to break a sweat and work your chest and triceps. I've had many clients struggle to do more than one rep. 6 - Spider Plank, Elbows (1:01) 3 x 10/side The sixth plank improves your hip mobility as well. You want to open the leg and bring your knee to hip level while keeping in the air. 7 - Lateral Raise Plank (1:09) 3 x 10-20/side The seventh plank is done in a push-up position with your arms straight. There is now more weight on your arms, making it harder to stabilize when you remove a support point. My client tried this variation and had to regress to the Bird Dog because she couldn't support herself. Work your way up to 20 reps/side for extra posture gains. 8 - Toe Taps, Straight Arms (1:22) 3 x 10/side The eight plank has you lifting one leg toward one side and touching the floor with your toes. The contact is brief - You're tapping, not resting. 9 - Mountain Climbers with Twist (1:29) 3 x 10/side The ninth plank is a twist on the classic mountain climbers exercise. You lift one leg and bring it toward the opposite elbow, then repeat on the other side. Increase the speed to add a cardio component, but ensure you can first go through the full range of motion. 10 - Arm/Leg Lift Plank, Straight Arms (1:42) 3 x 10 The tenth plank is the final evolution of the Bird Dog in this series. Straighten your opposite arm and leg, and hold for a few seconds to increase the burn. You can also hold the lengthened position for an extended period, like 30 to 60 seconds. 11 - Plank Jacks (1:54) 3 x 30-60s The eleventh plank is a variation of the classic Jumping Jack. This dynamic exercise adds a cardio component to your core workout. Shuffle both feet toward the side, then jump back to the starting position, Ensure you keep your hips aligned with your head and shoulders. You want to avoid your lower back crashing below them and potentially hurting yourself. 12 - Knee to Elbow Plank, Straight Arms (2:01) 3 x 10/side This series's twelfth and final plank requires the most stability and mobility. Most people are unable to reach their knee to the elbow. Enjoy practicing this one; you will feel stronger after three full sets. // Planks with one or more support points removed are excellent for building a more stable posture when you move. They can be done anywhere with enough space. Progress through the twelve variations in this series and watch how your core strength improves. Enjoy!

Alex Bernier

351,097 views • 2 years ago

HIIT Conditioning Routine Full-body conditioning circuit combining strength, coordination, and core stability. Every movement targets multiple muscle groups while keeping the heart rate elevated. 1. Lunge + Oblique Twist Step forward into a controlled lunge while holding a medicine ball. Rotate your torso toward the lead leg to activate the obliques and core. Return to center and alternate legs. 2. Goblet Squat + Bicep Curl to Alternating Overhead Press Hold a dumbbell at chest level and drop into a squat. As you stand, perform a curl and transition into alternating overhead presses. This sequence activates quads, glutes, biceps, shoulders, and core. 3. Waiter Curls + Frontal Press Hold the dumbbell vertically with both palms supporting the weight. Curl upward toward the chest, then press forward to engage the anterior deltoids and chest while stabilizing through the core. 4. Alternating Lunge + Iso Overhead Press Press one dumbbell overhead and hold it there while performing alternating lunges. This forces the shoulders and core to stabilize while the legs do the work. 5. Lateral Lunge Step wide to the side, sit into the hip, and keep the opposite leg extended. Push back to center. This movement develops glutes, inner thighs, and hip mobility. Protocol 3–4 Rounds 30–45 seconds per movement Minimal rest between exercises Designed to improve conditioning, muscular endurance, and full-body coordination. Train with intention. #HIIT #BodybuildingConditioning #YGFit #Fitness

Y A V

14,605 views • 4 months ago

This home lunge superset isn't for the faint of heart. The burning heat in your legs will beg you to stop, but the strength and growth you'll reap make it all worth it. 4 sets of 12 forward lunges, then 12 Reverse right away. Build a lower body that stands the test of time: Lunge Form Cues Set-Up: Stand tall with feet hip-width apart, hands on hips or at your sides. Alignment: Keep your chest up and shoulders back. Step: Take a big step forward, lowering your hips until both knees are bent at 90 degrees. Brace: Engage your core and maintain balance as your front foot lands to stabilize the movement. Push: Drive through your front heel to return to the starting position. Breathing: Inhale as you lower into the lunge, exhale as you push back up. 5 Lunge mistakes and how to avoid them 1. Taking Too Small a Step - What Happens: A short step limits the range of motion, reducing muscle activation in the glutes and quads. - Fix: Step far enough forward to allow both knees to bend at 90 degrees. 2. Rising Onto the Front Toes - What Happens: Lifting the heel shifts balance and reduces engagement of the glutes and hamstrings. - Fix: Keep your front foot flat, pressing firmly through the heel. 3. Poor Hip Alignment - What Happens: Tilting or rotating the hips reduces balance and proper muscle engagement. - Fix: Keep your hips square and aligned with your torso throughout the movement. 4. Feet Too Narrow or Wide - What Happens: Misaligned foot placement reduces stability and increases the chance of losing balance. - Fix: Keep your feet hip-width apart to maintain balance and proper alignment during the lunge. 5. Not Engaging the Core - What Happens: A weak core reduces balance and stability, increasing the risk of wobbling. - Fix: Brace your core upon landing to absorb the impact and keep your torso steady and aligned. Reverse Lunge Form Cues Set-Up: Stand tall with feet hip-width apart, hands on hips or at your sides. Alignment: Keep your chest lifted, core engaged, and shoulders back. Step: Step one leg back, lowering your hips until both knees are bent at 90 degrees. Land: Land on the top of your back foot with the toes pointed to stretch the ankle and prevent assistance from the toes. Push: Drive through your front heel to return to the starting position. Breathing: Inhale as you lower into the lunge, exhale as you push back up. 5 Reverse Lunge Mistakes and how to avoid them: 1. Using the Toes for Support on the Back Foot - What Happens: Relying on the back toes reduces the stretch in the ankle and shifts focus away from the front leg. - Fix: Land on the top of your back foot with the toes pointed to stretch the ankle and isolate the front leg fully. 2. Leaning Forward - What Happens: Leaning forward places unnecessary strain on the lower back and reduces engagement of the glutes and quads. -Fix: Keep your chest up and shoulders back to maintain an upright posture.Letting the Front Knee 3. Collapse Inward - What Happens: Knee valgus increases stress on the knee joint and reduces stability. - Fix: Ensure the front knee tracks over the middle of your foot throughout the movement. 4. Letting the Front Knee Collapse Inward - What Happens: Knee valgus increases stress on the knee joint and reduces stability. - Fix: Ensure the front knee tracks over the middle of your foot throughout the movement. 5. Pushing Off the Back Foot - What Happens: Using the back foot to assist reduces the workload on the front leg. - Fix: Focus on driving through the heel of the front foot to return to the starting position.

Alex Bernier

14,524 views • 1 year ago

This college senior has an insane transformation🤯⁠ ⁠ Craig Stem breaks down how he did it ⬇️⁠ ⁠ The mechanical breakdown showed a delivery full of compensations that were killing his velocity. Poor first move out of leg lift with almost no drift. Back knee dumping toward third base. Front leg swinging open way too early. Throwing arm getting stuck behind him in a "power T" position. ⁠Landing with his front foot wide open. Upper half having to overcomperate just to get back on line.⁠ ⁠ The fixes started simple during his spring season. Pendulum drill to relax the arm, getting off his quad, more linear direction to home plate. He topped 91 for a new PR in April.⁠ ⁠ May-June: Introduced elbow-driven arm action. Ethan had a hand-driven philosophy that created a long, inefficient path. Cueing elbow flip kept the arm short and captured momentum better.⁠ ⁠ Craig discovered that Ethan avoided external rotation. He wanted his hand on top of the ball. So he kept him in IR as long as possible, got to ER late. Late layback became his power move.⁠ ⁠ October: The lateral tilt piece changed everything. "Dip into the velo bucket" then explode out of it. Shorter arm action + more efficient lower half + ability to rotate fast and pull that arm through.⁠ ⁠ December: Ethan ran it up to 95 MPH multiple times.⁠ ⁠ January at Tread HQ: He came out sitting 96 and topped 98 indoors.⁠ ⁠ Potentially the coolest part? Ethan Hochendoner made 90% of these gains remotely.

Tread Athletics

13,294 views • 5 months ago

Perhaps the GREATEST 5 day workout split known to man is… DAY 1: Pull DAY 2: Push DAY 3: Lower DAY 4: Off/Zone 2 Cardio DAY 5: Upper DAY 6: Lower DAY 7: Off/Zone 2 Cardio And here are the workouts that go along with it: 𝗣𝗨𝗟𝗟 Exercise 1: Wide Grip Lat Pull-Down — 2x5-10 @ 0-1 RIR Exercise 2: Chest Supported Machine Rows W/ Neutral Grip — 2x5-10 @ 0-1 RIR Exercise 3: Single Arm Lat Pull-Down — 2x5-10 @ 0-1 RIR Exercise 4: Chest Supported T Bar Rows W/ Pronated Grip — 2x5-10 @ 0-1 RIR Exercise 5: Rear Delt Fly Machine — 3x5-10 @ 0-1 RIR Exercise 6: Single Arm Preacher Cable Curls — 2x5-10 @ 0-1 RIR Exercise 7: Seated Dumbbell Curls Neutral/Hammer Grip W/ Upper Arm Support — 2x5-10 @ 0-1 RIR 𝗣𝗨𝗦𝗛 Exercise1: Sternal Pecs Machine Press — 2x5-10 @ 0-1 RIR Exercise 2: Seated Cuffed Low to High Cable Flys — 2x5-10 @ 0-1 RIR Exercise 3: Pec Fly Machine — 2x5-10 @ 0-1 RIR Exercise 4: Seated Machine OHP — 2x5-10 @ 0-1 RIR Exercise 5: Cuffed Single Arm Cable Lateral Raises — 2x5-10 @ 0-1 RIR Exercise 6: Single Arm Tricep Push-Downs — 2x5-10 @ 0-1 RIR Exercise 7: Overhead Tricep Extensions — 2x5-10 @ 0-1 RIR 𝗟𝗢𝗪𝗘𝗥 𝗔 Exercise 1: Leg Extensions — 3x5-10 @ 0-1 RIR Exercise 2: Seated Leg Curls — 3x5-10 @ 0-1 RIR Exercise 3: Pendulum or Hack Squats — 2x5-10 @ 0-1 RIR Exercise 4: SLDLs — 2x5-10 @ 0-1 RIR Exercise 5: Calf Press — 2x5-10 @ 0-1 RIR (Partial reps from the dorsiflexed position to the neutral foot position) Exercise 6: Glute Bridge Machine — 2x5-10 @ 0-1 RIR Exercise 7: Ab Crunch Machine — 2x5-10 @ 0-1 RIR 𝗨𝗣𝗣𝗘𝗥 Exercise 1: Clavicular Pecs Machine Press — 3x5-10 @ 0-1 RIR Exercise 2: Chest Supported T Bar Rows W/ Pronated Grip — 3x5-10 @ 0-1 RIR Exercise 3: Seated Pec Fly Machine — 2x5-10 @ 0-1 RIR Exercise 4: Single Arm Lat Pull-Down — 2x5-10 @ 0-1 RIR Exercise 5: Seated Machine OHP — 3x5-10 @ 0-1 RIR Exercise 6: Seated BTB Cable Curls — 3x5-10 @ 0-1 RIR Exercise 7: Dip Machine — 2x5-10 @ 0-1 RIR 𝗟𝗢𝗪𝗘𝗥 𝗕 Exercise 1: Seated Leg Curls — 3x5-10 @ 0-1 RIR Exercise 2: Leg Extensions — 3x5-10 @ 0-1 RIR Exercise 3: 45° Extensions — 2x5-10 @ 0-1 RIR Exercise 4: Calf Press — 2x5-10 @ 0-1 RIR Exercise 5: Leg Press — 2x5-10 @ 0-1 RIR Exercise 6: Adduction Machine — 3x5-10 @ 0-1 RIR Exercise 7: Ab Crunch Machine — 2x5-10 @ 0-1 RIR NOTE: - All working sets are prescribed @ 0-1 RIR with 1 RIR being preferred - If you do NOT trust your ability to gauge RIR accurately, take sets to ~0 RIR/Failure to ensure you’re not sandbagging sets - Should you elect to do so, be sure NOT to take any 50/50 reps (reps you’re not sure you’ll get) on exercises like Hack Squats/SLDLs to avoid ending up in a susceptible position - 2 minutes rest between working sets is the FLOOR…3 or more is preferred - 60-90 seconds rest is fine between WARM UP sets

Dean Turner

164,677 views • 3 months ago