Video wird geladen...

Video konnte nicht geladen werden

Zur Startseite

Cats have extraordinary obstacle avoidance abilities There is also an obstacle memory for the back legs, It will remember the height of the front foot after lifting the front foot, and then raise the back foot to the same height 1/🧵

5,172,616 Aufrufe • vor 2 Jahren •via X (Twitter)

8 Kommentare

Profilbild von Daniel B.
Daniel B.vor 2 Jahren

I must have gotten a defective cat then. Still cute, though.

Profilbild von Tree of Knowledge
Tree of Knowledgevor 2 Jahren

That's true. Another example.

Profilbild von Gillian Roth
Gillian Rothvor 2 Jahren

Meanwhile... my cat.

Profilbild von IchiK🇯🇵
IchiK🇯🇵vor 2 Jahren

And me tripping down on nothing.

Profilbild von O.B.O. ₿ 🏴♦️ $LIZ
O.B.O. ₿ 🏴♦️ $LIZvor 2 Jahren

I have close to 10 cats in my home love them so much they are unique

Profilbild von Childhood Memories
Childhood Memoriesvor 2 Jahren

Cats are the coolest animals. It's soft and can get into very small things

Profilbild von Joseph Bender
Joseph Bendervor 2 Jahren

And yet there’s this

Profilbild von Namer
Namervor 2 Jahren

Cats are generally skilled at obstacle avoidance due to their keen senses, particularly their excellent vision and whiskers. Cats use their whiskers to gauge the width of openings, allowing them to navigate through tight spaces. Their well-developed sense of hearing also helps them detect obstacles or movement around them. In addition, cats are agile and have a flexible spine, allowing them to twist and turn easily, aiding in navigating obstacles. Their sharp senses and nimble movements make them adept at avoiding obstacles in various environments.

Ähnliche Videos

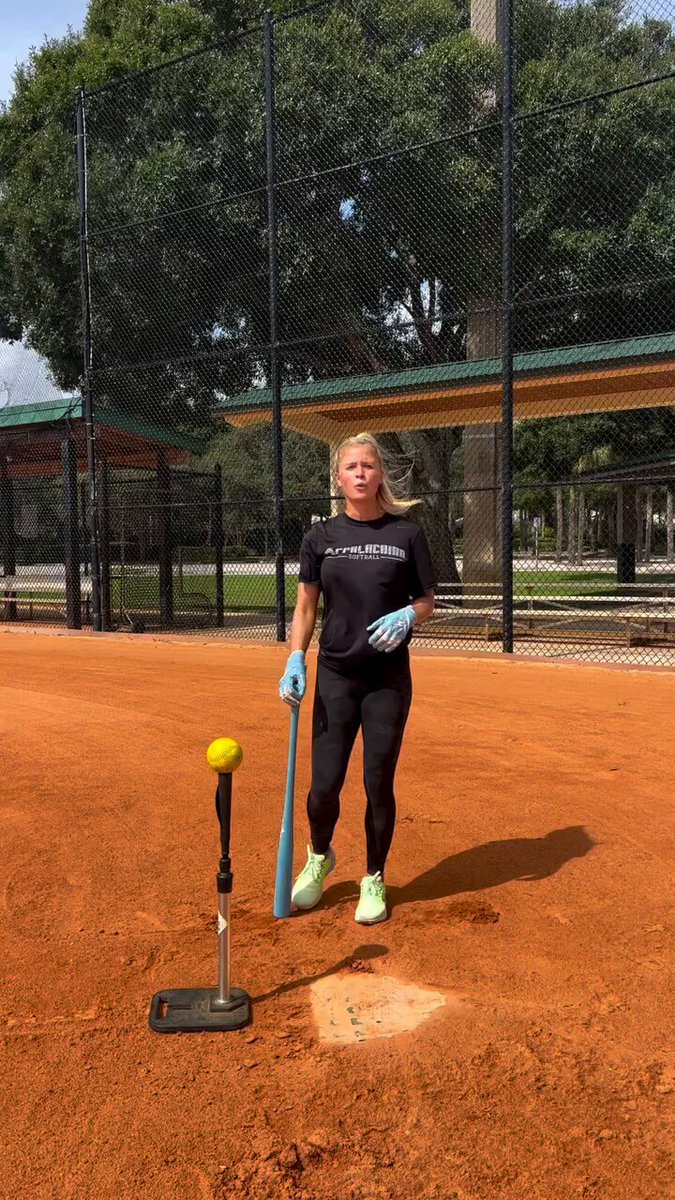
A common hitting flaw that is rarely corrected and can exposes certain hitters at higher levels, is “leaking” … the player’s front side is “running away” from contact prematurely. Sometimes also called “spinning off” the ball. This means energy is escaping the swing because of a chain of events that usually begins with the incorrect action of the stride foot. Correctly engaging the stride foot into the ground, called “foot-plant,” allows the body to efficiently sequence. As a result, the swing is shorter and barrel stays in the hitting zone longer. The BIG key is we have to be able to ***control our front knee*** before starting to swing. If a hitter can control their front knee and their front side a hair longer, stay behind contact, and attack the inside of the ball, it creates more whip.…(bat speed) and improves plate coverage. You might need to watch the video a couple times, because there are various ways to stride that allow the hitter to control their front knee. It is not a one size fits all action. And hitters who have sick power and want to pull the ball intentionally might actually “leak and clear” on purpose. But players who like to stay to middle of the field, might want to see what the initial movement into foot plant looks like. **** Remember, what happens to the front foot (stride foot) AFTER contact has little consequence. Often heavy torque causes it to fly open, or roll on side of foot. That’s all ok.

Trent Mongero

106,068 Aufrufe • vor 3 Jahren

This home lunge superset isn't for the faint of heart. The burning heat in your legs will beg you to stop, but the strength and growth you'll reap make it all worth it. 4 sets of 12 forward lunges, then 12 Reverse right away. Build a lower body that stands the test of time: Lunge Form Cues Set-Up: Stand tall with feet hip-width apart, hands on hips or at your sides. Alignment: Keep your chest up and shoulders back. Step: Take a big step forward, lowering your hips until both knees are bent at 90 degrees. Brace: Engage your core and maintain balance as your front foot lands to stabilize the movement. Push: Drive through your front heel to return to the starting position. Breathing: Inhale as you lower into the lunge, exhale as you push back up. 5 Lunge mistakes and how to avoid them 1. Taking Too Small a Step - What Happens: A short step limits the range of motion, reducing muscle activation in the glutes and quads. - Fix: Step far enough forward to allow both knees to bend at 90 degrees. 2. Rising Onto the Front Toes - What Happens: Lifting the heel shifts balance and reduces engagement of the glutes and hamstrings. - Fix: Keep your front foot flat, pressing firmly through the heel. 3. Poor Hip Alignment - What Happens: Tilting or rotating the hips reduces balance and proper muscle engagement. - Fix: Keep your hips square and aligned with your torso throughout the movement. 4. Feet Too Narrow or Wide - What Happens: Misaligned foot placement reduces stability and increases the chance of losing balance. - Fix: Keep your feet hip-width apart to maintain balance and proper alignment during the lunge. 5. Not Engaging the Core - What Happens: A weak core reduces balance and stability, increasing the risk of wobbling. - Fix: Brace your core upon landing to absorb the impact and keep your torso steady and aligned. Reverse Lunge Form Cues Set-Up: Stand tall with feet hip-width apart, hands on hips or at your sides. Alignment: Keep your chest lifted, core engaged, and shoulders back. Step: Step one leg back, lowering your hips until both knees are bent at 90 degrees. Land: Land on the top of your back foot with the toes pointed to stretch the ankle and prevent assistance from the toes. Push: Drive through your front heel to return to the starting position. Breathing: Inhale as you lower into the lunge, exhale as you push back up. 5 Reverse Lunge Mistakes and how to avoid them: 1. Using the Toes for Support on the Back Foot - What Happens: Relying on the back toes reduces the stretch in the ankle and shifts focus away from the front leg. - Fix: Land on the top of your back foot with the toes pointed to stretch the ankle and isolate the front leg fully. 2. Leaning Forward - What Happens: Leaning forward places unnecessary strain on the lower back and reduces engagement of the glutes and quads. -Fix: Keep your chest up and shoulders back to maintain an upright posture.Letting the Front Knee 3. Collapse Inward - What Happens: Knee valgus increases stress on the knee joint and reduces stability. - Fix: Ensure the front knee tracks over the middle of your foot throughout the movement. 4. Letting the Front Knee Collapse Inward - What Happens: Knee valgus increases stress on the knee joint and reduces stability. - Fix: Ensure the front knee tracks over the middle of your foot throughout the movement. 5. Pushing Off the Back Foot - What Happens: Using the back foot to assist reduces the workload on the front leg. - Fix: Focus on driving through the heel of the front foot to return to the starting position.

Alex Bernier

14,524 Aufrufe • vor 1 Jahr