Video yükleniyor...

Video Yüklenemedi

Ana Sayfaya Dön

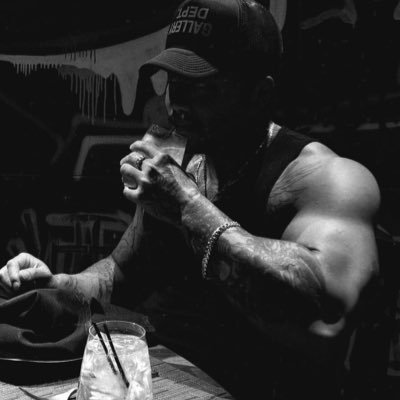
My 7 Day Aesthetic Split Mon: Upper Chest + Side Delts + Biceps Tue: Back Width + Triceps Wed: Delts Only Thu: Legs + Core Fri: Pump Day Sat: Arms + Cardio Sun: Light Legs + Recovery (Below will be my entire workout / weight lifting plan + nutrition...

11,503 görüntüleme • 4 ay önce •via X (Twitter)

0 Yorum

Yorum bulunmuyor

Orijinal gönderinin yorumları burada görünecek

Benzer Videolar

October 2025 - 265lbs May 2026 (today) - 185lbs Down 80lbs in 8months. Goal: 10% body fat and lower by the end of Q1 2027. Nowhere near where I want to be yet with my body composition. Still a long road ahead. I want to lean out 10x more. Goal is deep striations and every muscle group looking carved out Macros (currently): 190grams protein 150-160grams carbs (training days) 100-90grams carbs (non training days) 40-50grams fats I’m adjusting carbs as I progress, learning about my body and its reactions. Foods I eat to achieve my macros: Top sirloin filet mignon, ground beef / chicken (leanest options), chicken, shrimp, eggs, white rice, potatoes, fruits with my yogurt. I rotate them to enjoy my meals. Don’t be afraid of seasoning and hot sauce. Training days I keep jasmine white rice around my workouts for fuel, performance, and recovery. Sweet potatoes are usually away from my workouts to keep me fuller longer throughout the day. White rice = faster digesting carbs. Sweet potatoes = slower digesting carbs with more volume and satiety Peptide Stack: Retatrutide - Appetite suppression and fat loss. Long-term: major weight reduction, improved insulin sensitivity, lower food cravings. Tesamorelin - Increases growth hormone. Long-term: reduced visceral fat, improved recovery, fuller muscle appearance. MOTS-c - Supports metabolism and energy. Long-term: improved endurance, insulin sensitivity, fat metabolism, cellular energy production. BPC-157 - Recovery and healing peptide. Long-term: improved tendon/joint recovery, reduced inflammation, better gut support. GHK-Cu - Skin and hair regeneration peptide. (I mainly use for beard growth) Long-term: healthier skin, thicker hair, improved healing, collagen support. DSIP - Sleep and relaxation peptide. Long-term: deeper sleep, reduced stress, improved recovery and nervous system balance.

AYCE

19,874 görüntüleme • 3 ay önce

Chest Workout Routine To build a great chest, you need the right workout routine. This routine will help you effectively target your chest muscles and build strength and size. Warm-up (5-10 minutes) It is important to warm up before starting any workout. This prevents injury and prepares the muscles for the workout. * Light cardio (such as jumping jacks or skipping) * Dynamic stretching (such as arm circles, torso twists) Main Workout Perform the following exercises in 3-4 sets, with 8-12 repetitions in each set. Rest 60-90 seconds between each set. * Barbell Bench Press * This is one of the most effective exercises for the chest. It targets the upper, middle and lower chest muscles. * How to do: Lie on your back on a bench, feet firmly planted on the floor. Hold the barbell slightly wider than shoulder-width apart. Bring the barbell down to your chest and then push it up. * Incline Dumbbell Press * This exercise especially helps develop the upper chest muscles. * How to do: Sit on an inclined bench (about 30-45 degrees). Hold a dumbbell in each hand. Push the dumbbells up above your chest, then slowly bring them down. * Dumbbell Fly * This exercise helps stretch the chest muscles and give a deep cut. * How to do: Lie on the bench on your back, holding a dumbbell in each hand. With your arms slightly bent, stretch the dumbbells above your chest as if you were hugging someone. Slowly bring them back to the starting position. * Cable Crossover * This exercise focuses on the inner chest muscles and provides a better definition. * How to do: Stand in the middle of the cable machine. Hold a handle with each hand. Bring your arms to the front, as if you are bringing your hands together. * Push-ups * Push-ups are a great bodyweight exercise that strengthens the chest, shoulders and triceps. * How to do: Come down on your palms and toes, keeping the body straight. Lower your chest close to the ground and then push up. If normal push-ups are difficult, you can do them on your knees. Cool-down (5-10 minutes) Cooling down and stretching after a workout is important for muscle recovery. * Do static stretches of the chest, shoulders and triceps. Hold each stretch for 20-30 seconds. Important tips * Progressive overload: Slowly increase the weight or increase the number of repetitions over time so that your muscles are constantly challenged. * Correct Form: Always focus on maintaining correct form. Incorrect form can lead to injuries and muscles not being targeted properly. * Nutrition: Adequate protein and a balanced diet are important for muscle growth. * Rest: Getting enough sleep and giving your chest a rest before the next workout is essential for muscle recovery and growth. This routine can help you build a strong and well-developed chest. Remember, consistency is key to seeing results!

Dev Fitness Expert

11,052 görüntüleme • 1 yıl önce

Struggling to improve your bench press? Here’s how to identify and fix your weaknesses to increase your bench Let’s start with some form tips Big Arch - Retract your shoulder blades and drive your traps into bench by digging them into the pad. Maintain that tightness throughout the duration of the lift Bend the Bar - Act like you’re trying to bend the bar before you lift off. This causes you to externally rotate elbows to engage your lats which is crucial for a heavy bench Deep Breath - Take a deep breath before lift off and hold it in until you lift the bar where you’ll blow the air out on the way up Keep wrists straight - Wrap up your wrists tight with some wrist wraps. Don’t let wrists go limp on the concentric (lifting portion of the press). You’re losing poundage if you do Lower the bar with control - This is where lats and rear delts come into play. Nice and controlled descent and hit just below pecs Keep the arch - don’t let the bar sink into your chest and lose your arch. Keep air in and core tight the entire lift. This shortens the range of motion and allows you to stay tight and in control of the bar Leg drive and act like you’re standing up off the bench - As you explode up, drive your feet and push the bar back as if you’re trying to stand up off the bench. Weak off the chest? Likely an issue with pec strength. Here’s some exercises to help with that: -Pause Bench (1-3 seconds) -Wide Grip Bench -Incline Barbell Press -Spoto Presses -Weighted Dips -DB Flat/Incline Presses Weak with the lockout portion of the lift? Likely a weakness in your triceps or shoulders. Exercises to help with that: -Close Grip Bench -Board Presses -Pin Presses -Floor Presses -Skullcrushers -Weighted Dips -Military Presses -Slingshot Press -JM Presses -Overhead Presses Few other pieces of advice: 1) Get that back as big and strong as you can! Makes it a helluva lot easier to control the weight and add stability if our lats can support the weight. This will also carry over into your squat and deadlift. Row, row, and then row some more. Pullups/Pulldowns like crazy especially before you bench to get blood flowing back there which will help you feel and engage your lats before you lift. 2) Get a mini bicep pump from some curls before you press. Nothing heavy but having some blood in the biceps can help with tendonitis issues and help protect your joints. 3) Warm up the shoulders using a resistance band to get blood flowing to the rear delts and loosen up the shoulders. Take a foam roller and scrub the hell out of your lats as well to loosen up your shoulders.

Bailey Schober | Men’s Fitness & Nutrition Coach

26,038 görüntüleme • 8 ay önce

Took 2 months off of the gym and as you can see it doesn’t look like it at all. That is because how you look is MAJORLY impacted by what you eat. In the 2 months off, I tracked my meals everyday and made sure to stay active by taking over 12,000 steps per day. I did feel noticeably smaller but I wasn’t concerned because my body is known to bounce back pretty damn fast when I lock in. And that takes us to, ‘Chapter 2026. The Lock In.’ This year in my off season I plan to pack on an OD amount of size. I say size instead of muscle because in putting on size, I’m guaranteed to pack on body fat as well. Not as much as I would if I ate whatever I wanted and claimed I was “dirty bulking.” I spent way too much time getting lean last year to lose it all recklessly. How I’m going to do it is simple and straight forward. 1. Track my macros. 2. Prioritize protein and increase calories gradually by increasing my carb intake and keeping fat at a moderate level. 3. Training on a 5 day split. 4. Keeping light cardio a part of my routine. 5. Focusing on my recovery. That’s it. There’s no secret sauce or formula. It’s simply doing what you’re supposed to do consistently and making it a non negotiable habit. Once you start to see progress it becomes addicting and you begin to love the process. If you wait until you “get there” you’re going to miss out on the real fun and journey. I’m going to be documenting the entire year with the core of the content I produce and release be to educate you guys on what I am doing in fun creative ways. I don’t want this to be a year of, “watch me do it.” I’d rather it be a, “here, do it with me.” Which is why all my workout plans and meal guides are available for download on my website. Simply pick a program that fits your goals, download, follow along and repeat. And if you want to take it a step further and personally get trained by me 1-on-1, bet on yourself and Apply for coaching while on the site. You know you’re going to upgrade to a new phone this year. Might as well get a REAL upgrade and upgrade your body and mind. You deserve it. ⚔️

FOUSEY

33,321 görüntüleme • 6 ay önce

Losing weight is ridiculously easy in 2025. But if your insulin is high, your body can't burn fat. Ever worse? High insulin wrecks testosterone and quietly drives your blood pressure through the roof. Here are 6 ways to lower it naturally👇 1. Lower your carbohydrate intake Carbs break down into glucose the fastest, forcing your pancreas to pump out insulin to control the spike. When you reduce daily carb load, your blood sugar stays stable. Stable blood sugar = less insulin released = easier fat-burning mode 2. Walk after every meal (even inside the house) A 5-minute walk acts like a glucose sponge. Your muscles pull sugar out of your bloodstream for energy, which lowers the insulin needed to process that meal. Even slow indoor walking reduces post-meal glucose by up to 30% in some studies. 3. Eat protein & fat before carbs Protein and fat slow stomach emptying. When carbs hit your bloodstream more slowly, insulin rises gently instead of spiking. This “food order” trick can reduce the insulin response by 20–40% with the same exact meal. Crazy, right? 4. Fasting. When you’re not eating, your insulin drops. And the longer insulin stays low... The more your body shifts into burning stored fat for energy. Want to supercharge your fasting and knock down blood sugar faster? Berberine might help. It doesn’t simply lower blood sugar and insulin the “natural way”. It activates the enzyme AMP‑activated protein kinase (AMPK) — a fat-burn accelerator. Find it here (Black Friday Amazon Deals) 👇 I also created a FULL-GUIDE on how to use Berberine properly (even if you have never taken it before). Comment "Send" and I'll send it over. (must Follow so I can DM) 4. Strength training. Your muscles act like insulin sponges. The more muscle you have, the more glucose you can store without needing high insulin. Even a single strength workout can increase insulin sensitivity for up to 24–48 hours. 5. Get 7–8 hours of sleep. Poor sleep raises cortisol, and cortisol tells your body to pump out more glucose. More glucose = more insulin. Good sleep resets your hormones overnight and improves insulin sensitivity the next day by 20–30%. 6. Get enough sunlight. Sunlight triggers nitric oxide release in the skin, which helps improve glucose uptake. - Lowers cortisol - Reduces cravings - Stabilizing blood sugar - Sets your circadian rhythm More sunlight = lower insulin throughout the day. My DMs are always open for ANY questions you might have. Thanks for reading until the end, see you in the next one. *Every body works differently, this is not medical advice, just what worked on me." *Always consult a health expert before following any protocols." *Affiliate links included.*

Achilleas

60,565 görüntüleme • 9 ay önce

Everyone thinks losing weight is just about eating less. But most people: - Starve themselves - Kill their metabolism... And don´t even lose weight anyway. So here are 10 metabolism cheat codes to melt stubborn fat (without eating less): 🧵 1. Do NOT go Vegan. The vegan diet completely lacks 12 different nutrients that only exist in animal-based foods. These nutrients are vital for your metabolism and hormones. Steak and eggs are two of the best foods in the world for metabolism, weight loss and health. 2. Resistance train Muscle is the #1 fat-burning organ. It burns calories 24/7, even while you sleep. - Go close to failure - Train 3 hours a week - Focus on compound exercises 3. Eat more protein. You burn off 20-30% of the calories you get from protein just by digesting it. It also lowers hunger and helps maintain and build muscle to burn even more calories too. Eat 1g per lb of bodyweight everyday. 4. Don´t cut out carbs too much. Low-carb = lower thyroid and testosterone. You´ll also feel more sluggish which reduces your calorie-burn from NEAT. Eat as much fruit as you want and potatoes instead of bread and pasta. 5. Improve your sleep. Poor sleep crushes your metabolism. Think about how more physically tired you feel after a night of bad sleep. Don´t eat late in the evening, keep your bedroom cooler and supplement magnesium glycinate. 6. Cold exposure. It´s not a fad - it´s scientifically proven. It boosts your metabolism and activates brown fat oxidation. All you need to get the benefits is 2-minute cold showers 7. Manage stress. High cortisol slows your metabolism and makes your body want to hold onto fat. The best way to reduce stress? Improve your physical health. Healthy diet. Exercise. Better sleep. 8. Fuel your thyroid. It´s the organ that literally runs your metabolism but nobody thinks about it. Even worse? Very low-calorie diets actually slow it down making it even harder to lose fat. Make sure you: - Get enough iodine & selenium - Improve your sleep & manage stress. 9. Eat as much fruit as you want. Certain influencers will claim that fruit is bad due to the sugar... As if people are overweight due to eating a lot of fruit... But nobody got fat from fruit. It was from a ton of calories from processed junk and a lack of exercise. Fruit is still low in calories as it´s mostly water and the sugar and vitamins help keep you healthy and your metabolism firing. The best fruits for metabolism and weight loss are berries and watermelon. The Bottom Line: The best way to lose weight is NOT eating way less. It´s boosting your metabolism so you can eat enough and still lose weight. Imagine how easy it would be to lose weight if you could eat a lot and not be too hungry? If you liked this post: 1. Follow me here Ábris Babicz | The Demi Cycle Protocol 🧬 2. Retweet the tweet below and comment below any questions you have 👇

Ábris Babicz | The Demi Cycle Protocol 🧬

63,588 görüntüleme • 11 ay önce

Fitness Update: End of 3 months of Bulking. Starting a 3 month cut tomorrow, my last cut of 2026. I lost about 50 pounds from January 2025 till the end of March 2026 with a 13 month straight cut aided by Retatrutide and Tirzepatide. Counted calories and ran a deficit and lifted weights the whole time. My body needed a break and a reset from the stress of cutting for that long and constant downregulating of my metabolism. I decided to take April off and just do more calories and more lifting, and that turned into deciding to do May and June as well. So for 3 months straight I've been eating a lot more and lifting a LOT. I've gained about 5 pounds. Abs are not very visible anymore. But I've put on some muscle and strength as well and increased my base metabolic rate by several hundred calories. This is positioning me to be able to better be able to run a deficit again and continue into another cut with more energy and success possible. So this is me thicc boi mode ready to start a cut and get lean and mean. I'm sitting at ~195 right now and ~16-18% body fat. Goal of my cut is to get to the 180 or so range over the next 3 months and be in the 12-13% BF range, at which point I'll do a slow patient bulk through Oct-January and enjoy the fall and Holidays with lots of calories and strength training. Starting tomorrow I'm going to add 30-45 minutes of daily fasted zone 2 cardio first thing in the morning to burn an extra 150-300 cals. And I will drop my daily calorie allowance about 400 calories from what I've been eating the last few months. (2500-2800 down to 2200 to start, lowering later to 2100 and 2000 lowest if necessary to keep rate of loss where I want) This should get me the 1+ pound per week rate of loss I'm looking for. And I'll continue to prioritize lifting and protein as well to preserve the muscle mass I've built up and get as much of the loss to be fat as possible. I'm also going zero alcohol the whole cut as well. If I execute well, I'll be by far the fittest and leanest I've ever been at the end of September and I'm excited to see what that looks and feels like when I get there. Going from 70+ pounds overweight to building your dream physique isn't a quick process, people. Give yourself a couple of years to work on it systematically. It took you years to get out of shape, so you can take a couple years to get into great shape. But once you're there it's easier to stay there than it was to get there thankfully. The work continues. Let me know if you have any questions about anything. I'm documenting the whole process and will keep y'all up to speed. Open book. Building in public for accountability and hopefully to help others with their journey as well. 4th pic is me at my fattest in 2024. Embarrassing to post but necessary conext. I was in a sad, sad state you guys and heading towards diabetes and an early grave. If I can do this, you can do this!

Clint Fiore 🦬 DM for Biz Deals

81,578 görüntüleme • 2 ay önce

Strong legs are the foundations of a stable posture, yet many let theirs weaken over time. You lose your ability to move and stand upright. Much of my work with chronic pain clients involves strengthening the legs. This video shows 8 essential lower body motions: 1- Hip Extensions Standing upright involves straightening your torso to align it with your lower body, an extension of your hips executed by your Glutes and Hamstrings. The problem is you sit on these muscles all day, weakening them over the years to the point where they fail to do their job. Your lower back picks up the slack against its will and becomes overworked. I'll start chronic pain clients with Hip Bridges on the floor to ensure everything is balanced, then progress to Hip Thrusts and eventually Standing exercises like the Romanian Deadlift. As for the Deadlift off the floor, those are great if you can access a barbell or kettlebell. - Hip Bridge (0:05) - Hip Thrust (0:11) - Romanian Deadlift (0:17) - Deadlift (0:23) 2- Split Squats Split Squats are excellent for strengthening the knees. In the case of a chronic pain client, I use them to stretch the quad and Hip Flexors of the back leg, which are often extremely stiff due to sitting. This stiffness makes the body collapse forward and is often the limiting factor when people try this exercise for the first time. I'll start someone with the Front Foot elevated because it's easier on the front leg and gives a great stretch, then progress to flat and rear foot elevated. - Front foot elevated (0:30) - Flat (0:36) - Rear-foot elevated (0:42.2) 3- Lunges Lunges are the dynamic version of the Split Squat. Besides being excellent for strengthening your leg muscles, the one thing I love about this exercise is that it teaches you how to brace yourself as your foot lands. Many people lack the core strength to absorb an impact. Lunges develop that shock absorption capacity, especially when done with weights. Ensure you have mastered the Split Squats before doing them, and use different directions to target your muscles differently. - Forward (0:48) - Back (0:54.7) - Side (1:07) 4- Squats The king of all exercises is crucial for your ascension. The vertical motion improves your ability to overcome the world's weight crashing down upon you. It's also an amazing Glute and Quad stretch in the bottom position. I'll start chronic pain clients with the bodyweight variation before progressing them to weighted and eventually one-legged, also known as Pistol Squats. Doing one leg at a time is one of the best ways to balance your body's left and right sides from head to toe. - Body weight (1:12.5) - Loaded (1:19) - Pistol (1:25.5) 5- Step-ups Step-ups are amongst my favorite one-sided exercises to strengthen the Glutes and Quads. They are excellent for improving the stability of your hips and abdominal muscles. Use the Front and Lateral variations to maximize your results. - Front (1:31.5) - Lateral (1:38) 6 - Leg Curls Leg Curls strengthen the lower attachment of your Hamstrings. They are an integral part of my knee and lower back recovery programs because many people are weak due to sitting. I'll have chronic pain clients use a towel to create muscle resistance, though you can do them standing to get some much-needed blood flow. The best way to benefit from this exercise is by using an exercise ball or a machine at the gym. - Standing (1:43) - Towel (1:49) - Exercise ball (1:55.4) - Machine (2:02.1) 7- Adductions The inner thigh muscles become problematic when people sit with their legs crossed. They either get stiff or weak depending on whether you cross one leg over the other or with your foot on the opposite knee. I love Copenhagen Planks to restore the balance in your adductors. - Knee-bent (2:08.8) - Straight-leg (2:14) 8- Calf Raises The ankles are the cornerstone of your posture because they affect the alignment of every other joint above. Strong Calves are essential to their stability, yet many omit them from their workouts. Standing Calf Raises also strengthen the knees from behind. Doing the Donkey variation, you'll feel an intense stretch from the knee to the ankle. Seated Calf Raises work a different lower leg muscle essential to pump blood back up from your feet. - Standing (2:20.5) - Donkey (2:26.6) - Seated (2:33.3) Include these 8 types of motions in your routine as an insurance policy against serious mobility problems down the line. Keeping your legs strong ensures a stable posture and quality movements, two crucial factors for a high quality of life.

Alex Bernier

696,634 görüntüleme • 2 yıl önce

People with weak cores struggle to stabilize their bodies when they walk. Every step you take sends a little punch up your leg into your hip and lower back. Planks with one or more support points removed to expose this weakness. Use these 12 exercises to strengthen your core: 1 - Bird-Dog (0:06) 3 x 10/side Beginners start with this exercise because removing two support points with your knees on the floor is easier. The goal is to straighten the opposing arm and leg. A client wobbled when she removed her two support points today, which humbled her. 2 - Front Plank with Leg Lift, Elbows (0:15) 3 x 10/side The second plank involves lifting one leg at a time. Being on your elbows is easier than your straightened arms, so I'll first have people familiarize themselves with this position. Lift your leg as high as you can without swinging too much. Hold at the top for a few seconds to increase the burn. 3 - Front Plank with Arm/Leg Lift, Elbows (0:20) 3 x 10 The third plank resembles the Bird Dog, except your knees are off the floor. Straighten the opposite arm and leg at the same time, and hold. You might struggle to reach a full lengthening, so do your best and practice. Removing one hand off the floor also strengthens your shoulder blade muscles. 4 - Front Rotation Plank, Elbows (0:28) 3 x 10/side The fourth plank engages different abdominal muscles with the rotation. Your arms should point toward the ceiling, something beginners might initially struggle with. 5 - Push-Up Plank (0:34) 3 x 10 The fifth plank is excellent for building upper body strength at home. You are bound to break a sweat and work your chest and triceps. I've had many clients struggle to do more than one rep. 6 - Spider Plank, Elbows (1:01) 3 x 10/side The sixth plank improves your hip mobility as well. You want to open the leg and bring your knee to hip level while keeping in the air. 7 - Lateral Raise Plank (1:09) 3 x 10-20/side The seventh plank is done in a push-up position with your arms straight. There is now more weight on your arms, making it harder to stabilize when you remove a support point. My client tried this variation and had to regress to the Bird Dog because she couldn't support herself. Work your way up to 20 reps/side for extra posture gains. 8 - Toe Taps, Straight Arms (1:22) 3 x 10/side The eight plank has you lifting one leg toward one side and touching the floor with your toes. The contact is brief - You're tapping, not resting. 9 - Mountain Climbers with Twist (1:29) 3 x 10/side The ninth plank is a twist on the classic mountain climbers exercise. You lift one leg and bring it toward the opposite elbow, then repeat on the other side. Increase the speed to add a cardio component, but ensure you can first go through the full range of motion. 10 - Arm/Leg Lift Plank, Straight Arms (1:42) 3 x 10 The tenth plank is the final evolution of the Bird Dog in this series. Straighten your opposite arm and leg, and hold for a few seconds to increase the burn. You can also hold the lengthened position for an extended period, like 30 to 60 seconds. 11 - Plank Jacks (1:54) 3 x 30-60s The eleventh plank is a variation of the classic Jumping Jack. This dynamic exercise adds a cardio component to your core workout. Shuffle both feet toward the side, then jump back to the starting position, Ensure you keep your hips aligned with your head and shoulders. You want to avoid your lower back crashing below them and potentially hurting yourself. 12 - Knee to Elbow Plank, Straight Arms (2:01) 3 x 10/side This series's twelfth and final plank requires the most stability and mobility. Most people are unable to reach their knee to the elbow. Enjoy practicing this one; you will feel stronger after three full sets. // Planks with one or more support points removed are excellent for building a more stable posture when you move. They can be done anywhere with enough space. Progress through the twelve variations in this series and watch how your core strength improves. Enjoy!

Alex Bernier

351,097 görüntüleme • 2 yıl önce

This seven-day stretching routine is for tense people. You relax your mind by clearing the excess pressure stored in your body. The stretches target typical tension hot spots and create more space around your joints. Turn your stress around in less than 15 mins/day: Day 1 Prone Around the World (0:06) 3 x 10-20 reps - Start: Lying face down on the floor, arms straight by your sides, palms facing sideways. - Rotate your arms to have them ahead of you with your palms facing the floor. - Return to starting position. - This stretch is dynamic - Repeat 10-20x Standing Quad Stretch (0:12) Hold for 30-60s/leg - Start: Standing next to a wall. - Grab your ankle and pull it toward you, hold. Calf Wall Stretch (0:22) 3 x 30-60s - Start: Hands on a wall, one foot ahead of the other. - Align the front foot with the other and hold. - Ensure your legs are straight, knees locked. Day 2 Standing Chest Stretch (0:32) Hold for 30-60s/arm - Start: Place your hand flat against the wall at shoulder level. - Rotate your body in the opposite direction and hold. - Placing your hand higher than shoulder level increases the stretch. Lying Crossed-Leg Stretch (0:41) Hold for 30-60s/leg - Start: Lying on your back with one foot on the opposite knee. - Grab the uncrossed leg below the knee and pull it toward you. - Hold this position. Lying Leg-Up Hamstring Stretch (0:51) Hold for 30-60s/leg - Start: Lying on your back with one leg bent and the other flat. - Grab your leg underneath your knee with both hands. - Straighten your leg and pull it toward you, then hold. Day 3 Cobra Stretch (1:00) Hold for 30-60s - Start: Lying on your stomach, hands flat in front of you, arms bent like a push-up. - Use your hands to straighten your arms and push your torso off the floor, bringing your head as high as possible. - Look up and hold. Standing Wrist flexor Stretch (1:11) Hold for 30-60s - Start: Standing up, one arm in front of you with your palm facing the ceiling. - Use your other hand to pull your fingers toward you and hold, then switch sides. Sitting Toe Pointing Stretch (1:20) Hold for 30-60s - Start: Sit on the floor with your legs straight ahead. - Point your toes forward and hold, then point them toward you and hold. Day 4 Supine Around the World (1:36) Repeat 10-20x - Start: Lying on your back, arms straight by your sides, palms facing up. - Rotate your arms to have them behind you. - Return to starting position. - Repeat 10-20x All-Fours Quad Stretch (1:42) Hold for 30-60s/leg - Start: Hands and knees on the floor. - Grab one ankle and pull it towards you. Hold. - Use an elastic or a towel if you cannot reach your ankle. Lying Leg Tuck Hip Stretch (1:52) Hold for 30-60s/leg - Start: Hands and knees on the floor. - Straighten one leg toward the back, and cross the other in front of you. - Hold this position. Day 5 Kneeling Lat Dynamic Stretch (2:04) Repeat 10-20x - Start: Hands and knees on the floor. Palm up. - Slide one arm as far forward as possible. - Return to starting position. - This stretch is dynamic - Repeat 10-20x. Dynamic Overhead Chest Stretch (2:10) Repeat 10-20x - Start: Standing, arms by your sides. - Lift your arms above and behind your head, hands together. - Lower them back by your sides. - This stretch is dynamic - Repeat 10-20x. Deep Split Squat (2:17) Repeat 10-20x - Start: Standing in a split position, front foot flat, the other foot has heel off the floor, torso upright. - Drive your knee past your toes, keeping the back leg as straight as possible. You may have to bend your knee is too stiff. - This stretch is dynamic - Repeat 10-12x. Day 6 Overhead Triceps Stretch (2:26) Hold for 30-60s/arm - Start: Standing, put your hand behind your head. - Pull your elbow with your other as far down as possible. - Hold. Kneeling Back Rotation Stretch (2:35) Hold for 30-60s/side - Start: Knees and one hand on the floor. - Rotate your arm to point toward the ceiling or, as close as possible to that position, hold it at the top. Kneeling Calf-Ham Stretch (2:44) Hold for 30-60s/leg - Start: One knee on the floor, the other leg straight ahead of you with toes pointing toward the ceiling. - Lean forward to touch your toes or get as close to them as possible. - Do not force it. - Hold where your range of motion stops. Day 7 Deep Squat Twist (2:57) Repeat 10-20x/side - Start: Deep Squat position, elbows against your knees. - Rotate one arm toward the ceiling or as close as possible. - Rotate back to the starting position, then repeat on the opposite side. - Do not force the range of motion. Dynamic Kneeling Neck Stretch (3:05) Repeat 10-20x - Start: Hands and knees on the floor. - Lift your chin as high as possible. - Lower your head back to the starting position. - Do not force it any higher than you can reach. - This stretch is dynamic - Repeat 10-20x. Wide Leg Adductor Stretch (3:14) Hold for 30-60s - Start: Sit on the floor with your legs as wide as possible, hands right in front of you. - Walk your hands as far forward as possible. - Hold the position. - Do not force the range of motion. // The goal of this routine is to show you a simple way to calm your body and mind during times of stress, while improving your mobility and protecting yourself from future chronic pain. You don't have to aspire to bend like a pretzel to benefit from the powers of stretching. Start today, and you'll feel like a different person by the end of the week.

Alex Bernier

388,104 görüntüleme • 2 yıl önce

On May 8, 2025 I underwent spinal fusion surgery, a 6 hour procedure in which I was filleted from front to back. First, my abdomen was opened up so that the surgeon could scrape out the disc between L5 and S1, replacing it with a perforated cage containing bone grafting material that was screwed into my vertebra. Then I was flipped over and opened up on my back so that my surgeon could screw vertical rods into L5 and S1 to secure my spine position to ensure the fusion sets properly. The procedure was successful, correcting 15 years of lower back debilitation due to severe Spondylolisthesis. However, the recovery process demanded I endure far more than I bargained for, debilitating me in ways I thought might handicap me permanently. For the first 3 months I could barely move. For the first six months my activity was limited to walking only. Pain was constant. At nine months I was still in so much discomfort, still so limited in my range of motion, still too unstable to do anything to elevate my heart rate. My weight ballooned. My muscles atrophied. My mood plummeted. And I was becoming resigned to the idea that my athletic identity (let alone performing extreme feats of ultra-endurance) was a thing of the past, a memory well behind me. But very slowly after that I began to turn a corner. At ten months, I finally felt stable enough to resume a very modest non-spine compressing return to fitness exercise regimen. Zone 1 indoor cycling, gentle core work, extremely low weight / high rep resistance training. Proceeding on a ‘less is more’ mandate in late November (which demands discipline for someone like myself prone to taking everything to the extreme, I just showed up every single morning to do what I could, and stop well before doing more than I should. Today I am down 35 pounds from November (207 to 171) including a body fat reduction from 20% to 11%. More importantly, I am beginning to feel like myself again. Grateful and hopeful. I still have a long way to go—it takes 12-18 months for the fusion to fully set. My surgeon was not optimistic that I will be able to run again. Time will tell of course, but I’m confident that provided I continue to proceed patiently that I have a future in which running can become part of my new reality. Towards that end I have a goal—which is to celebrate my 60th birthday this Fall by participating in the NYC Marathon. But here’s the thing. I’m not trying to return to who I once was. I’ve leaned into the stillness this experience has demanded of me to become someone new and better. I am posting this story not for external validation but rather to say that change is always possible. And the way to do it is the same way I have navigated every one of my many life transformations, from alcoholism to sobriety, from sedentary to middle aged ultra endurance athlete, and from a corporate lawyer career to becoming an author and podcaster: getting sober and staying sober: by taking contrary action consistently and religiously—one day at a time. As Chris Paul said on my podcast, “keep stacking days.” And remember, every obstacle life presents you is simply an opportunity custom-designed for your growth and evolution.

richroll

442,456 görüntüleme • 5 ay önce

Moneytaur study blueprint 🗺️ The process I used to go from not knowing what an order block is to pulling cash from the crypto markets in under 6 months using 🎯 Master concepts. Proof of performance, past 120 days👇 Start date: 09/03/2025 Requirements: - A PC/laptop - Wifi - A basic understanding of trading. ( What candlesticks are, how to actually place trades , etc ) - A free mind - Time or the ability to free up time. Starting: - Structure and routine - Stick to that routine + Pre mortem plan. - Notion / Obsidian setup. The first thing you need to create is a clear routine moulded around how you intend to approach this very large and complex task. This will not be linear and you will naturally adapt it as you progress but especially in the beginning some resemblance of structure each day is vital. This is an individual process but it is important to understand from the beginning that this will require a majority of your free time assuming you work a full time Job or study as a student. For me in the beginning this looked like: - Wake up at 6:30. - Shower - Study/work for 1h 45m before leaving for work. - 09:00 -> 17:00 work - 17:30 Exercise / Train - Eat - 19:00 resume study/work - 22:30 Start to wind down and get ready to sleep. It changed several times over the months and especially now I am full time but this is irrelevant, the only thing that matters is sticking with what you choose. Whatever your own routine may look like, it is important to understand it will inevitably require sacrifice. --- The next thing once you have established a draft framework of your routine is ensuring you will actually stick to that routine. Something I implemented which I found particularly beneficial was the concept of a Pre-Mortem plan. This involves creating several scenarios of a future in which you have failed and working backwards from each of these to find where it went wrong. Here is a video which explains it fully: When I did this I came up with 3 scenarios as well as prevention and cure for each. In the 6 months that followed each scenario presented at some point but I was able to catch them early due to having done this. The last thing is to not over complicate this, don't hyper focus on systems and loose momentum optimizing each detail. Just ensure you do the fucking work. I was a little guilty of the above at times, trying to craft the perfect routine. In reality the person who just gets up, drinks too much coffee and works his ass off out performs the workflow perfectionist who visualizes and repeats affirmations, any day of the week. --- Next you need somewhere to store your notes, journal your trades and build your knowledge. For me this was Obsidian but I have also used Notion before and it is an equally viable option. Whichever one of these you choose be warned you will inevitably want to bang your head against a wall trying to use them for the first few days, but they will both click pretty quick and are 100% better options the word document or paper alternative. Here is my full obsidian setup tutorial: Here is a link to MisterPA 's notion Journal: Here is how I create "Meta-Notes" using obsidian: The process: - How I did it. - How I would do it if doing it again. Now I did things the "hard way" and manually worked my way back through each of MT's tweets starting in 2021, reading every one and logging those that I felt where relevant. You can see in my first post: the very first system I used to do this. I quickly adapted though after about a week and focused less on just logging each relevant tweet but trying to find and focusing on those which contained the most information. There where a lot of charts I looked at then skipped over because especially at the start of his timeline they contained little useful information and my time was better spent finding those where there was something to decode. Now this does not mean skip out on "work" just use your time efficiently. -- If however if I was to start from the beginning again with the goal of levelling up technical understanding as quickly as possible I would take a different approach. To start with I would familiarise myself with all relevant SMC concepts, I have linked the best free recourses for this below 👇 CryptoChase beginner friendly index: Barncore's "The Moneytaur Way" series: Gian's Trading bootcamp playlist: Following this I would then work through all of Taur's subscription posts working backwards, recreating his charts and taking notes on his logic. The subscription feed has the highest value density and least noise. Video example of my notes from his subscription posts 👇: --- Okay so now once you have a basic understanding of concepts and can re-recreate them on charts of your own it is time to put this in to practice. The next step is vigorous backtesting, you can use the trading view tool but I think trade Zella offers a more use friendly option if you pay for the subscription. Especially as it allows you to change timeframes without skipping ahead to candle close time of the timeframe you change too ( like Trading view does ) *my only note would be that their LTF/Micro TF data feed with be different to brokerage charts you will use on Trading view, to start with though you should not be going low enough that this is an issue. When you backtest in this context, treat it like real trading. That means journal and logging like you would if real cash was on the line. Take time, do not rush and focus on quality. Stick to BTC, ETH, Major FX pairs or indices as these assets are less reliant on confluence, backtesting a shitcoin is near useless as whether levels work or not will be highly dependent on Majors PA. Go on HTF, scroll back a couple years and try not too look at chart while doing so and then begin. Start with HTF analysis and work down to 2H or wherever you feel comfortable, chart it fully and then identify setups. Make rough notes / plans and then press play, execute the setups as they hit, log and journal trade management as well as observations and key notes. It is very important to not cheat when you do this, do not skip back and adjust your stoploss because it hit by 0.1%, do not skip back and adjust plan because you missed a block and your TP got frontrun. Instead these are the things you journal, embrace these mistakes because they are the cheapest mistakes you are going to make. Grind this, do it for hours, put some music on and enjoy. To start with focus on HTF's, as you get better and start netting $ on paper you can drop the timeframes and increase the difficulty. HTF = Normal, MTF = Medium, LTF = Hard. Even if you do not intend to day trade, learning how to read the lower TF's that force you to think faster, harder and prepare you for lower win rates / loss streaks can greatly improve your ability on higher TF's. While you are doing this as you start to have concepts click you now want to build up your real trading experience, take a sum of money that you care about but will be okay loosing and dedicate this to live trading. Start taking real trades and expect net losses in the beginning. This is where you will make you 2nd cheapest mistakes. This is also where you can begin to learn about your psychology. You may encounter some elements already in backtesting but the real market is where true colours really start to show. Mental issues are inevitable and part of the game, get used to them and start working to identify and fix them. Reading and applying books like Trading in the Zone and Mental Game of Trading are important and will help a lot but there is no easy fix, for some stuff you I believe you just have to get used to it and it goes away with experience. Losses suck at the beginning but after you loose 100 times you starting getting pretty numb to it, same goes for the winners. To accelerate the learning process, build connections and get advice there is also always the option of private groups, while I never personally chose this route and committed to learning everything through my own endeavours there is no denying that having nearly all the information you need structured and compiled in one place is valuable and can save time. Beyond this having access to real time thoughts and opinions of profitable traders can accelerate performance, however it carries the risk of being a double edged sword if not used properly, if relying on it like a crutch and using it as a substitute for real work you will not succeed. With that said if you take it for what it is, a learning opportunity then I believe it can be very beneficial. I am not a member of, nor affiliated with any paid group. There are now many options available within the community, all run by different people with different styles, tailored to different needs. If I was to make a recommendation though, as a non-member, it would be Albert & Co's 618'ers simply due to the diversity in styles of the traders running it and results I have seen from members I know personally. It is important that as you start to trade with real capital you reduce noise in your social feeds or eliminate it all together. You do not need 5 different opinions, you also do not need 2 people telling you the same thing in their own way so you feel re-assured. What you do need is to develop your independent thinking as a trader and be comfortable making different decisions to others, even traders ahead of yourself if it fits with your system or understanding of market. Taur here is perhaps an exception as this is who you are learning from but down the line a real test of your own ability and independence will be being able to stick with your own plan even when it differs from his. Don't get me wrong, counter trading him is retarded but you must learn to adapt his gift to your own style. This will make sense at some point. The next stage is taking your understanding of specific concepts to higher level as you simultaneously snowball experience. Look back through your journal and review where you lost money and made money, do not over extrapolate from a small sample but start to take notes and observe if trends in performance emerge. This is the beginning of the transition to self reliance, you now understand the strategy but must learn for yourself when and where it works. Here you can also learn more nuanced secondary concepts such as VSA, orderflow etc and add these to your game where appropriate. Do NOT get lost in the sauce though and remember mastery of basics is key. IMO a big focus should be understanding correlation thoroughly but especially on HTF's this is the most important thing and what triggers the majority of large swings where most of your cash will be made and losses recovered. Some people will disagree with me here but IMO you should also not be *focusing* on Odd TF's. These are secondary at best and most people overweight their significance leading to avoidable losses while wondering why price did not care about their 327minute Breaker Block which they think is the key to the market. Study Taurs feed and take note of how he mostly uses: 3M, 1M, 3W, 2W, 1W, 5D, 4D, 3D, 2D, 1D, 12H, 8H, 6H, 4H, 2H, 1H, 30m, 15m + micro time frames. The only thing left is time and repetition, you must show up each day and really do this, for months. Maybe you start to see result's, you catch your first key swing and where able to trade where others froze. Congratulations. Learn from these winners and repeat the actions. Find what assets work best for you, find your style, refine and grow. --- The last thing I will include is a short list of tools or links that can be helpful. - Trading view tutorial: - Dictionary: - Market news Calendar: --- Thank you too all those who have read this, I hope this has been helpful for the beginners who want to start but are just not sure how. 🫶 Don't just bookmark this and move on, start 🙃

Ace

45,581 görüntüleme • 10 ay önce

These quick workouts are for people who want to improve their postures. The exercises target the weakened foundations pulling your body out of alignment. The sessions are short yet effective. Use the workouts to raise yourself to the next level before the new year starts. Instructions: - Do the exercises as a circuit, or one at a time if you find the circuit format too challenging. - Repeat the circuit or each exercise 3 to 4 times. - The sessions are light enough that you can done daily. Follow the sequence from Day 1 to Day 7 in order. - Ideally done at the start of your day or at the end. Day 1: Kneeling T-Spine Stretch (0:06) [ 10 reps/side ] - Start: Kneeling, one hand on the floor. - Slide your straight arm under your torso. - Reach as far forward as possible. - Keep your hips squared throughout the motion. Kneeling T-Spine Rotation (0:12) [10 reps/side] - Start: Kneeling, one hand on the floor, the other behind your head. - Rotate inward to point your elbow toward the floor. - Rotate outward to point your elbow toward the ceiling. - You may not have the mobility to go all the way up. Stop when you reach your max, and do not force it. Supine Around The World (0:18) [10-20 reps/side] - Start: Lying on your back, arms by your sides, palms toward the ceiling. - Rotate your arms back to have your hands pointing behind you. Day 2 Side-Lying Quad Stretch (0:27) [30-60 seconds/leg] - Start: Lying on your side, legs stacked. - Grab your ankle and pull your foot toward you. - Use a towel or elastic band if you cannot reach your ankle. Hip Bridge, Feet on Bench (0:37) [10 reps with a 3s hold at the top of each rep] - Start: Lying on your back, feet on an elevated surface like a bench, couch, or chair. - Lift your hips off the floor to align your upper and lower bodies. - Adapt: If you cannot lift all the way, do the same exercise with your feet on the floor. - Adapt: If this variation is too easy, do one leg at a time. Dynamic Hip Extension Plank (0:49) [ 10-20 reps/leg] - Start: Push-up position. - Lift one leg as high as possible, keeping it straight. - Alternate legs. - Adapt: Rest on your forearms if you struggle to hold the push-up position. Day 3 Sky Reach (1:04) [10 reps/side] - Start: Deep Squat position - Rotate one arm to have your hand pointing toward the ceiling or as close as you can reach. - Do not force the range of motion if you block before that. - Alternate arms. - Adapt: Kneeling variation. Side-Lying External Rotation (1:21) [10 reps/arm] - Start: Lying on your side, one hand supports your head, and the other holds a dumbbell or any weighted object if you lack equipment. - Rotate the weight directly above your body while keeping your arm locked to your torso. Bent-Over Reverse Flys (1:28) [20 reps] Start: Bend forward, arms hanging down. Ensure your back is straight and your hips are held high. Lift your arms to shoulder level and keep them straight. Adapt: Add weights if bodyweight is too easy. Day 4 Deep Squat (1:36) [10 reps] - Start: Feet slightly wider than hips apart. Inhale first, then hold it in. - Lead the motion by sliding your knees forward and letting your hips naturally fold. - Go as low as your body allows, then push back up. - Exhale on the way up. - Adapt: Hold onto something stable to help you go lower. Hip Thrust (1:44) [10 reps with a 3s hold at the top of each rep] - Start: Both feet on the ground, shoulders on the edge of a bench or couch, hips down. - Lift your hips to align your lower and upper bodies, and hold. Side Bridge (1:57) [10 reps/side] - Start: Side Plank position, legs stacked. - Lift your hips off the floor and hold when you reach the top. - Ensure your head stays aligned with your shoulders and hips. Avoid bending it forward to make the motion easier. - Adapt: Bend the lower leg. Day 5 Wall Slides (2:23) [10 reps] - Start: Stand in front of a wall with your forearms and hands flat behind you. - Be as close as you can to the wall, but you can take a few steps forward if you lack the mobility to keep your arms flat. - Straighten your arms while keeping them flat against the wall. Y-Raises (2:29) [10 reps with a 3s hold at the top] - Start: Lying on your stomach, arms in a Y position, thumbs toward the ceiling. - Lift your thumbs toward the ceiling and hold. - Lower back to the floor. T-Raises (2:41) [10 reps with a 3-second hold at the top] - Start: Lying on your stomach, arms in a T position, thumbs toward the ceiling. - Lift your arms toward the ceiling and hold. - Lower back to the floor. Day 6 Seated Toe Pointing (2:56) [10 reps] - Start: Sitting on the floor with your legs ahead of you, feet together. - Point your toes forward. - Point them toward you. Seated Ankle Rotations (3:02) [10 reps] - Start: Sitting on the floor with your legs ahead of you, feet apart. - Rotate your feet like a windshield wiper, going as deep as possible on either side. Reverse Plank (3:09) [Hold for 30-60 seconds] - Start: Ball of the feet on a step, heels hanging. You may hold on to a ramp or wall for added support. - Lower your heels as low as possible and hold at the bottom. - Lift your heels as high as possible. Day 7 Unilateral Chest Stretch (3:21) [30-60 seconds/arm] - Start: Place your hand flat against the wall at shoulder level. - Rotate your body in the opposite direction and hold. - Placing your hand higher than shoulder level increases the stretch. Cat-Cow Stretch (3:31) [10 reps] - Start: Hands and knees on the floor. - Round your lower back like a cat (pulling it toward the ceiling) and hold. - Push it down as much as possible and hold. Wide Leg Adductor Stretch (3:38) [30-60 seconds] - Start: Sit on the floor with your legs as wide as possible, hands right in front of you. - Hold the position. // Start your New Year's resolutions with these quick posture workouts. You'll build up the foundations needed to withstand 2024 and crush your goals. Have an excellent weekend!

Alex Bernier

380,762 görüntüleme • 2 yıl önce

I've put together a straightforward protocol that seems to work quite well for people with Multiple Sclerosis (MS). A carnivore/lion diet works great for MS, but if you optimize a few nutrients and habits it can really improve your results and spur recovery. By just doing a carnivore/lion diet, there are now people who have not only put their symptoms into remission but have started to reverse their lesions on MRI. Some of these individuals will be in our upcoming case series on MS patients who are recovering using the carnivore diet. This full protocol can help even more. Dr. Chaffee's Protocol for Optimizing Multiple Sclerosis Recovery: This protocol outlines a comprehensive approach to supporting recovery from multiple sclerosis (MS), emphasizing dietary modifications, light optimization, and physical activity. 1) Dietary Intervention: The cornerstone of this protocol is a strict, high-fat, carnivore "lion" diet, predominantly consisting of beef and lamb, with 2g of fat for every 1g of protein, as detailed in my videos. All carbohydrates, sugars, and alcohol must be strictly excluded to induce and maintain ketosis, and to prevent further damage and inflammation to the nervous system. Ketones serve as the brain's preferred energy source and readily cross the blood-brain barrier, where they are converted into fatty acids, the essential building blocks for brain tissue. Prioritize grass-fed fats such as tallow, butter, or lamb fat, incorporating them into every meal for optimal results. Exclusively eating grass-fed meat is not required, these fats can be purchased separately. Grass-fed butter is readily available, as is grass finished tallow, and less often grass finished lamb. Bone marrow and even brain are excellent options as well. Wild-caught fatty fish is also acceptable; however, grass-finished lamb fat contains approximately 20 times the omega-3 fatty acids (DHA and EPA) compared to even oily wild-caught fish. DHA, EPA, and cholesterol are essential for myelin sheath regeneration on axons. 2) Nutritional Supplementation: For the first month, consume 50-100g (a few ounces) of liver daily. This can then be reduced to three times per week, with concurrent monitoring of B12 and homocysteine to maintain optimal levels. Maintain B12 levels between 800-1200 pmol/L or 1100-1600 pg/mL (American units). Homocysteine levels should remain below 7. If homocysteine is elevated, regardless of B12 levels, increase B12 intake. If liver consumption is not feasible, supplement with a methylated multi-B vitamin and/or sublingual methylcobalamin (methylated B12). Allow the sublingual dose (2000-2500 mcg daily for the first month) to dissolve under the tongue for at least five minutes before swallowing. Monitor B12 levels as described above and adjust accordingly. When testing B12 levels, discontinue B vitamin and B12 supplementation for approximately one week prior to the test to avoid artificially elevated results. Supplemental B vitamins can also interfere with other blood tests, particularly B7 (biotin). 3) Light Optimization and Circadian Rhythm: Optimize vitamin D levels and circadian rhythm by exposing yourself to direct sunlight for 30 minutes each morning, looking towards the sun (but not directly at it). Refrain from wearing sunscreen, sunglasses, or corrective lenses during this time. Direct, unfiltered sunlight exposure on as much skin as possible, including the eyes, is crucial, and multiple exposures throughout the day are beneficial. Minimize exposure to screens and artificial blue light, especially in the evenings. Wear blue-light-blocking glasses when using electronic devices or under artificial light after sunset. Remember that MS prevalence decreases closer to the equator; emulate these conditions as much as possible. Maximize vitamin D absorption by delaying showering for at least six to eight hours after sun exposure. Vitamin D is produced in the skin's sebum and can be washed away, particularly with soap. Absorption can take up to 48 hours, so allowing at least six to eight hours is essential. Vitamin D3 can also be obtained from wild-caught fatty fish and grass-fed animal fats. Monitor vitamin D levels six weeks from commencing the protocol, aiming for the high end of the normal range or preferably above. While supplemental vitamin D3 with K2 is an option, natural sunlight exposure and proper diet is preferred. Take repeat blood tests every 6-8 weeks in order optimize these levels and maintain them there. Once stabilized with your current diet +/- supplementation, you can can extend this period to once every 6 months. 4) Physical Activity: Maintain an active lifestyle. Nerve stimulation promotes growth and repair. Engage in as much activity as possible, gradually increasing intensity each week. As tolerated, incorporate resistance training and, if possible, sprinting. If walking is all you can do though, then walk. If not, then work your way up to walking. Important Considerations: Underlying Principles: This protocol addresses the root causes of MS and provides the resources and stimuli for tissue repair. The dietary and light hygiene modifications aim to halt further damage. The specified nutrients and light exposure provide the building blocks for repair, while exercise and light stimulate regrowth. The Crucial Role of Light: One example of the beneficial nature of light is UVA exposure. UVA light directed into the eyes (without glasses or other filters), stimulates the production of brain-derived neurotrophic factor (BDNF), which promotes brain growth, healing, and myelin repair. Proper light hygiene offers numerous benefits beyond BDNF stimulation, but it would be well worth it even if this were the only one. By adhering to this comprehensive protocol, individuals with MS can potentially achieve significantly improved outcomes compared to standard care. For the best results, ensure you are receiving proper medical supervision, particularly with regard to supplementation, blood work, and medications. Do not stop any medications until or unless it is appropriate to do so under medical supervision. *Always work closely with your healthcare provider when implementing any new interventions or protocols. #ms #multiplesclerosis #carnivore

Anthony Chaffee, MD

79,081 görüntüleme • 1 yıl önce

VEO 2 by Google DeepMind : MY CHEAT SHEET Alright, so after 500h-ish spent on VEO and giving birth to both "Kitsune" and "Banished", tons of people asked for a making-of. Instead, I decided to give you what I actually know of VEO 2 to this day. Please share! it's made to be spread around! 1/ If you're not using a LLM (Gemini, ChatGPT, whatever), you're doing it wrong. VEO 2 currently has a sweet spot when it comes to prompt length: too short is poor, too long drops information, action, description etc. I did a lot of back and forth to find my sweet spot, but once I got in a place I thought felt right, I used a LLM to help me keep my structure, length, and help me draft actions. I would then spent an extensive amount of time tweaking, iterating, removing words, changing order, adding others, but the draft would come from a LLM and a conversation I built and trained to understand what my structure looked like, what was a success, or a failure. I would also share the prompts working well for further reference, and sharing the failures also for further reference. This would ensure my LLM conversation became a true companion. 2/ Structure, structure, structure Structure is important. Each recipe is different but same as any GenAI text-to something, it looks like the "higher on the prompt has more weight" rule applies. So, in my case I would start by describing the aesthetics I am looking for, time of day, colors, mood, then move to camera, subject, action, and all the rest. Once again, you might have a different experience but what is important is to stick to whatever structure you have as you move forward. Keeping it organized also makes it easier to edit later. 3/ Only describe what you see in the frame If you have a character you want to keep consistent, but you want a close-up on the face for example, your reflex will be to describe the character from head to toe and then mention you want a close-up...It's not that simple. If I tell VEO I want a face close-up but then proceed to describe the character's feet, the close-up mention will be dropped by VEO... Once again, the LLM can help you in this by giving it the instruction to only describe what is in the frame. 4/ Patience Well, it can get costly to be patient, but even if you repeat the same structure, sometimes changing one word can still throw the entire thing out and totally change the aesthetics of your scene. It is by nature extremely consistent if you conserve most words, but sometimes it happens. In those situations, trace your steps back and try to figure out which words are triggering a larger change. 5/ Documenting When I started "Kitsune" (and did the same for all others), the first thing I did was start a Figjam file so I could save the successful prompts and come back to them for future reference. Why Figjam? So I could also upload 1 to 4 generations from this prompt, and browse through them in the future. 6/ VEO is the Midjourney of video Currently, no text-to-video tool (Minimax being the closest behind) gave me a feeling I could provide strong art directions and actually get them. I have been a designer for nearly 20 years, and art direction to me has been one of the strongest foundations of most of my work. Dark, light, happy, sad, colorful or not, it doesn't matter as long as you have a point of view and please...have a point of view. Recently watched a great video about the slow death of art direction in film (link in comments) and oh boy, did VEO 2 deliver on giving me the feeling I was listened. Try starting your prompts with different kinds of medium (watercolor for example), the mood you are trying to achieve, the kind of lighting you want, the dust in the rays of light, etc... which gets me to the next one 7/ You can direct your colors in VEO It's as simple as mentioning the hues you want to have in the final result, in which quantity, and where. When I direct shots, I am constantly describing colors for two reasons: 1. Well, having a point of view and 2. reaching better consistency through text-to-video. If I have a strong and consistent mood but my character is slightly different because of text-to-video, the impact won't be dramatic because a strong art direction helps a lot with consistency. 8/ Describe your life away Some people asked me how I achieved a good consistency between shots knowing it's only text-to-video and the answer is simple: I describe my characters, their unique traits, their clothing, their haircut, etc..anything which could help someone visually impaired have a very precise mental representation of the subject. 9/ But don't describe too much either... It would be magical if you could stuff 3000 words in the window and have exactly what you asked for, right? Well, it turns out VEO is amazing with its prompt adherence, but there is always a moment where it starts dropping animations or visual elements when your prompt stretches for a tad too long. This actually happens way before the character limit allowed by VEO is reached, so don't overdo it, it's no use and will play against the results. For info, 200-250 words seems like a sweet spot! 10/ Natural movements but... VEO is great with natural movements and this is also one of the reasons why I used it so extensively: people walking don't walk in slow-motion. That being said, don't try to be too ambitious on some of the expected movements: multiple camera movements won't work, full 360 revolutions around a subject won't work, anime-style crazy camera movements won't work, etc... what it can do is already great, but there are still some limitations...

Henry Daubrez 🌸💀

31,182 görüntüleme • 1 yıl önce

Why Exchanges Banned This Bot: The 142,000% Return Liquidation Strategy Revealed i finally posted the strategy that got me banned and now the exchanges are probably sweating because i am handing you the keys to the liquidation engine. most people think trading is about charts but the real alpha is hidden in the moments when other traders lose everything. if you can understand why market makers hunt these positions you will never look at a candlestick the same way again. it took years of losing money to liquidations and over trading to realize that hand trading is a losing game for almost everyone on the planet. code is the great equalizer because it removes the emotion that usually causes you to hold a losing position until your account hits zero. i spent hundreds of thousands on developers in the past thinking i could not code myself until i realized i just needed to iterate to success. trading by hand is just driving a horse while everyone else is in a ferrari and the fees alone will chop you up before you even realize you were wrong. i watched a guy with a six million dollar short position sitting just two percent away from total liquidation while i was building this. seeing those numbers on the screen gives me ideas that i can automate into a bot so i dont have to spend my life staring at a monitor. the process i follow is called the rbi system which stands for research backtest and implement. most traders skip the first two steps and go straight to implementation which is why they get smoked on their very first bot. research starts with a backlog of ideas from books or papers or even just watching how the market reacts to big moves. once you have that idea you have to see if it worked in the past using a backtest because if it did not work then it certainly won't work in the future. i have been collecting liquidation data for eighteen months because that data is the lifeblood of a winning system. there is a hidden loop in the market where market makers try to liquidate as many people as possible to find liquidity. i wanted to build a strategy that either trades with that momentum or bets on the bounce right after the liquidation happens. the first strategy i tested was a pure liquidation momentum play that looks for a threshold of nine hundred seventy five thousand dollars in liquidations. when longs get liquidated it shorts the market to continue the down move and it tries to take a one percent profit. this strategy showed a return of over four hundred percent in the backtest while the buy and hold was only thirty three percent. it sounds amazing but you have to be careful with optimized results because you can search with math until you find anything. i decided to flip the logic on its head and create an inverse liquidation strategy that acts as a contrarian. instead of following the move it waits for the longs to get liquidated and then buys the dip after a small price spread. this is where i stumbled onto something that felt like a mistake but turned out to be pure alpha. i accidentally typed in a threshold of three hundred thousand dollars instead of three million and the results were unbelievable. the backtest return jumped to over one hundred forty thousand percent because the bot was catching every single micro bounce in the market. even when i doubled the commission fees to account for the high trade volume the strategy still stayed incredibly profitable. most people would have missed this because they are too busy trying to be right instead of just looking at what the data says. i use tools like claude and cursor to build these bots in minutes when it used to take me an entire week to write the code. if you are not using ai to automate your ideas you are essentially choosing to work ten times harder for less money. i built three separate bots during this session including a momentum bot and two different versions of the inverse spread bot. running these together creates a sort of statistical arbitrage where you can hedge your positions across different market conditions. one bot wins when the market cascades and the other wins when it fakes out and reverses. you have to start with tiny ten dollar sizes because a backtest is never a hundred percent guarantee of what will happen today. i always run my p and l close logic first to make sure the bot exits the position if the stop loss or take profit is hit. it is vital to check your position every fifteen seconds and make sure you are not double ordering or getting stuck in a trade. the goal is to have fully automated systems trading for you so you can actually live your life while the bots do the work. i push all of this code to my private github because i believe that wall street will never show you how this actually works. you have to be a doer and not a dabbler if you want to actually make it in this industry. the reason i show everything live on youtube is to prove that anyone can learn to do this if they are willing to iterate. you dont need to be a math genius you just need to follow the rbi system and stay disciplined with your risk. every liquidation you see on the chart is a signal and if you know how to read them you are no longer the one being hunted. i am currently running the third version of the bot to see how it handles the live market volatility. it is a beautiful thing to see a system enter and exit a trade perfectly without you having to click a single button. the fees are the silent killer of hand traders but a bot can be programmed to use limit orders and stay efficient. if you learn to code you can build anything for the rest of your life regardless of where you are in the world. stop trying to guess which way the candle will go and start building systems that can handle both directions. i am going to keep testing these three strategies against each other to find the ultimate ensemble for this current market. once you find a winning edge you just have to scale it up slowly and keep refining the parameters. the exchanges might not like that i am sharing this but code is the great equalizer and it is time for you to use it. i will be back tomorrow to show the results and keep building more systems until everything is fully automated

Moon Dev

11,948 görüntüleme • 5 ay önce