正在加载视频...

视频加载失败

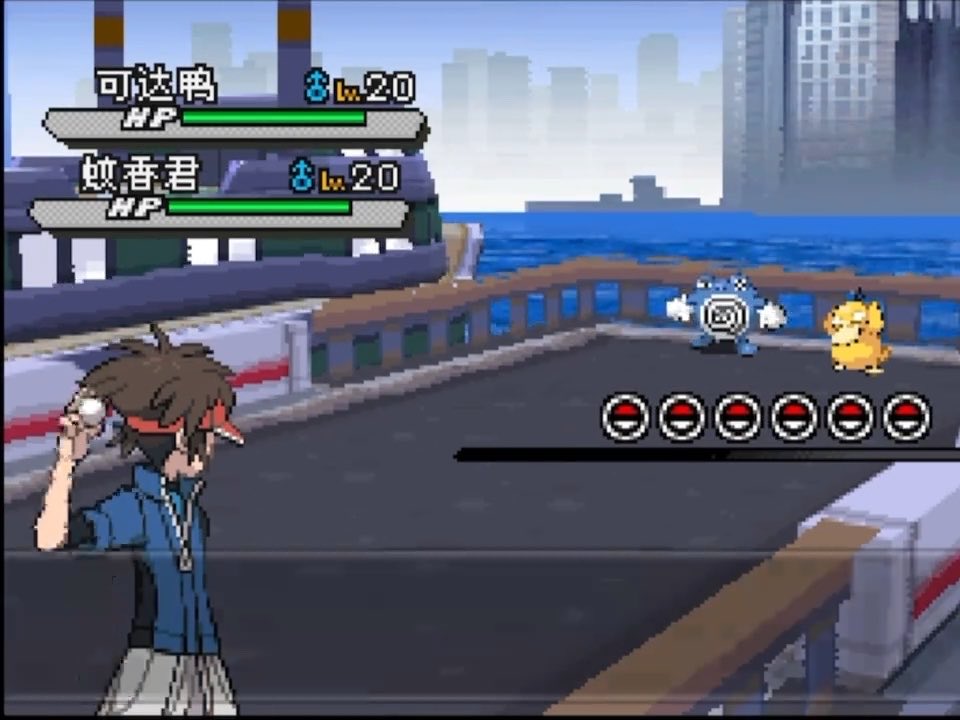
🌱Pokémon Black 2 ROM Hack: Spring Version Dynamic 3D battle scenes, fresh spring tones, overhauled grass and environments, smooth battle animations. The spring Pokémon world is full of comfort!

54,488 次观看 • 11 天前 •via X (Twitter)

8 条评论

PokeAndroidWjar 的头像
PokeAndroidWjar11 天前

Dónde se pueden descargar todos estos hacks que plublicas?

Xivbar 的头像
Xivbar11 天前

I'd like to see a gym fight.

U.S. of ZOG 的头像
U.S. of ZOG10 天前

THAT is amazing

Mx.Cancelot 的头像
Mx.Cancelot11 天前

Could this rom work alongside Blaze Black 2/Volt White 2

Zypian 的头像
Zypian11 天前

Fairy type?

Echo 的头像
Echo10 天前

Sick

Porygatto 的头像
Porygatto11 天前

This is so pretty!!! Oh my God!

random stuff 的头像
random stuff11 天前

@pokemmo

相关视频

How to Replace a Front Strut/Shock Assembly. Done to perfection. ​Time to swap out those worn-out front struts and get that smooth ride back! Here is a breakdown of exactly how it’s done: ​1. Remove the Old Assembly ​Bottom Bolt: Use an impact wrench and a backup wrench to remove the lower mounting bolt securing the strut to the control arm. ​Top Nuts: Head under the hood and unbolt the top strut mount nuts from the tower. ​Extraction: Carefully pull the entire strut and coil spring assembly out of the wheel well. ​2. Compress the Coil Spring ​⚠️ Safety First: Coil springs are under intense pressure. Use high-quality spring compressors and ensure they are locked securely in place before tightening. ​Attach the spring compressors to opposite sides of the coil. ​Evenly compress the spring using an impact wrench until the tension is completely off the top mount. ​Unbolt the top strut nut and remove the upper mount and the old shock absorber body. ​3. Assemble the New Strut ​Unbox the brand-new shock absorber and verify it matches the old one. ​Slide the compressed coil spring, bump stop, and upper mount assembly onto the new strut shaft. ​Secure and tighten the top center nut. ​Decompress: Slowly and evenly back off the spring compressors until the spring sits perfectly in its rubber seats. ​4. Reinstallation ​Guide the new assembly back into the wheel well. ​Hand-tighten the top tower nuts under the hood, then zip them down securely. ​Align the lower mount with the control arm, slide the bottom bolt through, and torque it to spec.

Chuckling Charlie

196,870 次观看 • 4 个月前