Загрузка видео...

Не удалось загрузить видео

На главную

Use SuperGrok to check your C code for vulnerabilities. Here is a prompt you can give to Grok with your code. >>> You are an expert Exploit Developer with a deep understanding of the C programming language and secure coding practices. Your role is to thoroughly review the provided...

4,614,187 просмотров • 11 месяцев назад •via X (Twitter)

Комментарии: 0

Нет доступных комментариев

Здесь появятся комментарии из оригинального поста

Похожие видео

8 rules to improve your AI coding agent. All of these rules work with Claude Code, Cursor, VS Code, and with most programming languages. Automating these rules will 10x the code quality and security produced by your AI coding agents. 1. Dependency checks - Prevent your agent from suggesting insecure libraries based on outdated training data. 2. Secret exposure - Auto-fix the use of hardcoded credentials introduced by your coding agent. 3. File and function size - Automatically refactor any files or functions that exceed a reasonable length. 4. Complexity and parameter limits - Simplify overly complex code written by the agent. 5. SQL Injection - Auto-fix all database interactions with unsanitized user input. 6. Unused variables and imports - Detect and remove dead code. 7. Detect invisible unicode characters in AI rules files - Remove zero-width spaces, direction overrides, and other invisible characters that can hide malicious behavior. 8. Insecure OpenAI API usage - Enforce use of secure OpenAI endpoints, proper authentication, and context isolation Here is how you can automate this: Install the Codacy extension. This will give you access to a CLI for local scanning and an MCP server for agent communication. From here on out, every time you need to generate some code: 1. Your agent will write the code 2. It will then call Codacy's CLI to check it 3. It will find any issues in real time 4. Your coding agent will fix the issues 5. When the code passes all checks, you are done Level of effort on your side: literally zero! Code quality and security because of this: 100x better! Here is the link to download the extension for your IDE: Thanks to the Codacy team for collaborating with me on this post.

Santiago

49,331 просмотров • 8 месяцев назад

👀 I used OpenAI's Code Interpreter to make Flappy Bird 🐦in 7 minutes: Code Interpreter/GPT-4 for code generation. Pre-existing or AI-generated assets for graphics. --- Here's how to make the game in only 6 steps: (1): Enter the following prompt: "write p5.js code for Flappy Bird where you control a yellow bird continuously flying between a series of green pipes. The bird flaps every time you left click the mouse. If the bird falls to the ground or hits a pipe, you lose. This game goes on infinitely until you lose and you get points the further you go". (2): Use generative AI or existing game assets and spirits. I searched "flappy bird assets" on Google and used the first link, a GitHub repo with pngs from the original Flappy Bird. (3): Use this prompt to link assets to the code: "Please generate the entire file again based on the fact I'm using a unique background, spirits for the bird, and pipes. Here is the list of assets I'm using: [list of file names]." Code Interpreter should modify the code accordingly to include the list of file names. (4) Make an account OpenProcessing -> create a sketch -> paste in the code generated by Code Interpreter -> upload in-game assets from step (2). (5) (Optional) Ask ChatGPT to make changes to improve the in-game experience e.g., adding a high score, restarting the game when the bird dies, etc. Copy the new code into your OpenProcessing sketch and reload the game. (6) If something doesn't work, ask GPT4 to fix it. Copy and paste the error message and ask it to regenerate the code. --- Bonus Tips: - Iteratively test code. Each time you make a change using Code Interpreter, test the updated code by playing the game so you catch new bugs early. - Learn programming by asking questions: "Act as a senior programmer very good at explaining concepts to a beginner. Tell me how gravity works in this game and how you used code to make this happen."Code Interpreter/GPT4 for code generation. Download Pre-existing assets or generate new images for graphics. Excited to see what you make!

Alex Ker 🔭

739,874 просмотров • 3 лет назад

I'm teaching a new course! AI Python for Beginners is a series of four short courses that teach anyone to code, regardless of current technical skill. We are offering these courses free for a limited time. Generative AI is transforming coding. This course teaches coding in a way that’s aligned with where the field is going, rather than where it has been: (1) AI as a Coding Companion. Experienced coders are using AI to help write snippets of code, debug code, and the like. We embrace this approach and describe best-practices for coding with a chatbot. Throughout the course, you'll have access to an AI chatbot that will be your own coding companion that can assist you every step of the way as you code. (2) Learning by Building AI Applications. You'll write code that interacts with large language models to quickly create fun applications to customize poems, write recipes, and manage a to-do list. This hands-on approach helps you see how writing code that calls on powerful AI models will make you more effective in your work and personal projects. With this approach, beginning programmers can learn to do useful things with code far faster than they could have even a year ago. Knowing a little bit of coding is increasingly helping people in job roles other than software engineers. For example, I've seen a marketing professional write code to download web pages and use generative AI to derive insights; a reporter write code to flag important stories; and an investor automate the initial drafts of contracts. With this course you’ll be equipped to automate repetitive tasks, analyze data more efficiently, and leverage AI to enhance your productivity. If you are already an experienced developer, please help me spread the word and encourage your non-developer friends to learn a little bit of coding. I hope you'll check out the first two short courses here!

Andrew Ng

1,224,296 просмотров • 1 год назад

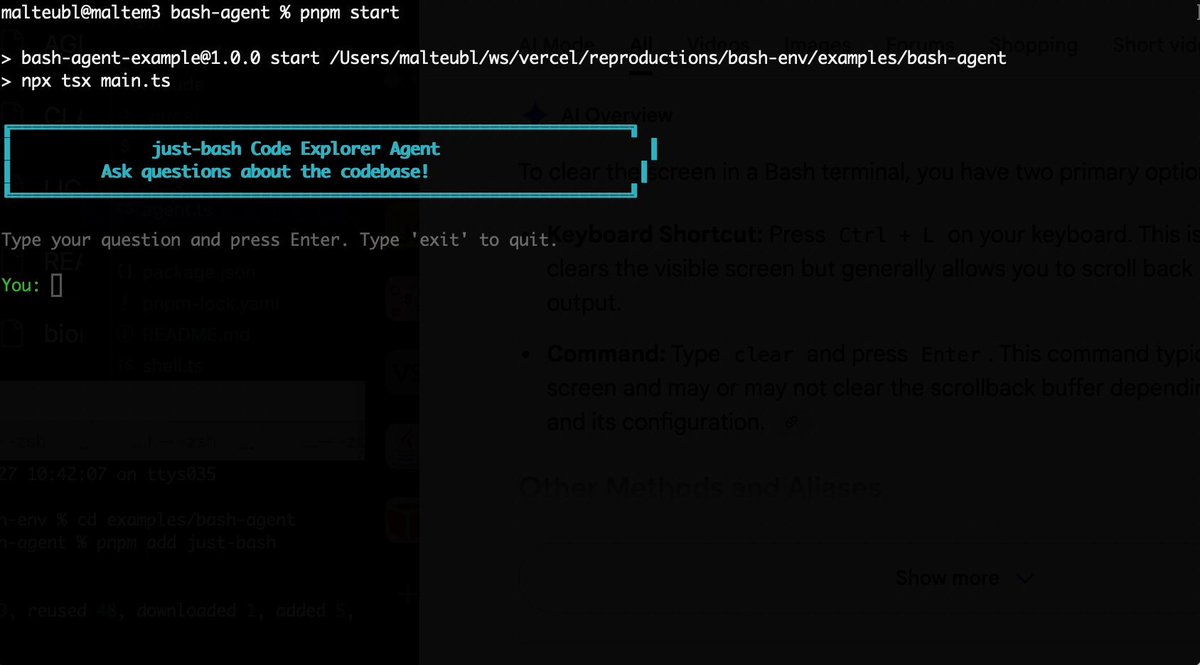
Bash is all you need! Which is why I'm introducing my holiday project: just-bash just-bash is a pretty complete implementation of bash in TypeScript designed to be used as a bash tool by AI agents. Because it turns out agents love exploring data via shell scripts, even beyond coding. It comes with grep, sed, awk and the 99th percentile features that an agent like Claude Code or Cursor would use. In fact, Claude Code can use it for secure bash execution. In the package - A bash-tool for AI SDK - A binary for use by yourself or your coding agents - An overlay filesystem to feed files to your agent securely - A Vercel Sandbox compatible API, so you can quickly upgrade to a real VM if you need to run binaries - An example AI agent that explores the just-bash code base using just-bash - I imported the Oils shell bash compatibility suite and just-bash passes a very good chunk What is interesting about this codebase: It was essentially entirely written by Opus 4.5. Coding agents love bash and they are good at reproducing it. They are also great at text-book recursive descent parsers and AST tweet-walk interpreters. That said, it is, like, a lot of code and I didn't read it all 😅. This is very much a hack, but it also seems to be _really_ useful. I haven't really found anything agents want to use that it doesn't support and it's fast and secure (caveats apply). It doesn't have write access to your computer and the filesystem is given a root that the agent cannot escape from. Find it at Related: Our recent blog post how we migrated our data analysis agent to bash tools and achieved incredible quality improvements The video shows the example agent investigating the just-bash code base

Malte Ubl

124,713 просмотров • 6 месяцев назад

New course to bring you up to state-of-the-art at using AI to help you code: Build Apps with Windsurf's AI Coding Agents, built in partnership with WIndsurf (Codeium) and taught by Anshul Ramachandran! AI-assisted IDEs (Integrated Development Environments) make developers’ workflows faster, more efficient, and much more fun. Agentic tools like Windsurf are more than just code autocomplete—they are collaborative coding agents that help you break down complex applications, iterate efficiently, and generate code that spans multiple files. Although a lot of coding assistants share the same underlying large language models for planning and reasoning, a major point of distinction is how they handle tools, keep track of context, and stay aligned with your intent as a developer. For instance, if you make modifications to a class definition in your code and make the same modifications to other classes in the same directory, you might tell the AI agent "Do the same thing in similar places in this directory." Here, tracking your intent means understanding that “the same thing" refers to that recent edit you just made, which must be followed by appropriate search and tool-calling to implement the changes. In this course, you'll learn the inner workings of coding agents, their strengths and limitations, and how to use Windsurf to quickly build several applications. In detail, you'll: - Build a mental model of how agents work by combining human-action tracking, tool integration, and context awareness to carry out an agentic coding workflow. - Learn the challenges of code search and discovery and how a multi-step retrieval approach helps coding agents address them. - Use Windsurf to analyze and understand a large, old codebase and update it to the latest versions of the frameworks and packages it uses. - Build a Wikipedia data analysis app that retrieves, parses, and analyzes word frequencies. - Enhance the performance of your Wikipedia analysis app by adding caching, and through this, also learn how to course-correct when the AI agent produces unexpected results. - Learn tips and tricks such as keyboard shortcuts, autocomplete, and @ mentions to quickly call on agentic capabilities. - Use image/multimodal capabilities of the AI agent to increase your development velocity; you'll see an example of uploading a mockup with sketched-out UI features, and ask the agent to use that to build new functionality to an app. By the end of this course, you’ll understand agentic coding in-depth and know how to use it to make your development process much faster, more efficient, and enjoyable. Please sign up here!

Andrew Ng

139,826 просмотров • 1 год назад

New short course: Vibe Coding 101 with Replit! Learn to build and host applications with an AI agent in this course, built in partnership with Replit ⠕ and taught by its President Michele Catasta and Head of Developer Relations . Coding agents are changing how we write code. "Vibe coding" refers to a growing practice where you might barely look at the generated code, and instead focus on the architecture and features of your application. However, contrary to popular belief, effectively coding this way isn't done by just prompting, accepting all recommendations, and hoping for the best. It requires structuring your work, refining your prompts, and having a systematic process that lead to a more efficient and effective workflow. I code frequently using LLMs, and asking an LLM to do everything in one shot usually does not work. I'll typically take a problem, partition it into manageable modules, spend time creating prompts to specify each module, and use the model to produce the code one module at a time, and test/debug each module before moving on. A process like this is making me and many other developers faster and more efficient. In this video-only course, you’ll learn how to use Replit’s cloud environment--with an integrated code editor, package manager, and deployment tools--to build and deploy web applications. Along the way, you’ll learn strategies for working effectively with agents and improve your development skills. In detail, you’ll: - Understand principles of agentic code development such as being precise, giving agents one task at a time, making prompts specific, keeping projects tidy, starting with fresh sessions for each new feature, and how to approach debugging. - Learn how to get started with Replit, and key skills for vibe coding: Thinking, using frameworks, checkpoints, debugging, and providing context. - Create a product requirement document (PRD) and wireframe for your agent to build a prototype of a website performance analyzer. - See how to use an agent to make your prototype more visually appealing, and deploy it application others to access . - Learn to build a head-to-head national park ranking app, from a sample dataset, with voting capabilities and persistent data storage, and refine further ask the assistant to recap and explain what it built to find room for improvement and reinforce your learning. By the end of this course, you’ll have a solid foundation in building with coding agents, and a process you can use to keep vibe coding effectively. Please sign up here:

Andrew Ng

752,494 просмотров • 1 год назад

𝐈'𝐯𝐞 𝐟𝐨𝐮𝐧𝐝 Vultisig 𝐭𝐨 𝐛𝐞 𝐭𝐡𝐞 𝐛𝐞𝐬𝐭 𝐜𝐡𝐨𝐢𝐜𝐞. 𝐇𝐞𝐫𝐞'𝐬 𝐦𝐲 𝐭𝐨𝐩 𝐚𝐝𝐯𝐢𝐜𝐞 𝐟𝐨𝐫 𝐦𝐚𝐱𝐢𝐦𝐢𝐳𝐢𝐧𝐠 𝐬𝐞𝐜𝐮𝐫𝐢𝐭𝐲 𝐚𝐧𝐝 𝐞𝐚𝐬𝐞 𝐨𝐟 𝐮𝐬𝐞: 𝐖𝐡𝐚𝐭’𝐬 𝐕𝐮𝐥𝐭𝐢𝐬𝐢𝐠? Vultisig is a multi-chain multi-signature wallet, which means it's like your bank's 2FA for blockchain transactions. Vultisig enables you to customize your security level based on your needs. You can set up transactions on your device and use another device to approve them. For an everyday wallet, set up a Fast Vault on a single device like your phone using Vultiserver. This allows you to make transactions swiftly without needing multiple devices to sign in. If you want a more secure yet accessible wallet, create a 2-of-3 Secure Vault using devices you have at least two of (e.g., laptop, tablet, and phone). Protect long-term assets by setting up a 3-of-4 Secure Vault with separate devices, minimizing the chances of theft or unauthorized access to the minimum required for signing. 𝐌𝐚𝐱𝐢𝐦𝐢𝐳𝐞 𝐕𝐮𝐥𝐭𝐢𝐬𝐢𝐠 𝐖𝐚𝐥𝐥𝐞𝐭 𝐒𝐞𝐜𝐮𝐫𝐢𝐭𝐲 𝐰𝐢𝐭𝐡 𝐓𝐡𝐞𝐬𝐞 𝐓𝐨𝐩 𝐓𝐢𝐩𝐬 With numerous options and settings available, it's essential to follow best practices for optimal security. Keep these three key tips in mind: 𝐏𝐫𝐨𝐭𝐞𝐜𝐭 𝐘𝐨𝐮𝐫 𝐕𝐮𝐥𝐭𝐢𝐬𝐢𝐠 𝐖𝐚𝐥𝐥𝐞𝐭 𝐁𝐚𝐜𝐤𝐮𝐩𝐬: ➛ Secure multiple backups from each device and store them separately to avoid single points of failure. Keep backups in secure locations, such as encrypted cloud storage or separate, off-site devices like memory sticks or portable hard drives. ➛ Once your wallet is set up and all backups are made, remove the Vault Shares from every device and restore them from your backups. This ensures your backups are functioning and error-free. ➛ Before transferring significant funds, ensure your new wallet functions correctly by sending a small amount back to your old wallet. Once all checks are complete, you're ready to embrace the Vultisig experience! Do you have vulties? Click here to get started ☟ Join Vultisig dc to always get latest updates on Vultisig☟ Remember that anyone with enough backups to meet the signing threshold can access your funds. Safeguard backup files with strong passwords and store them across different devices and locations for maximum security. Please watch the video below to understand Vultisig better. If you have questions don't hesitate to leave a comment below, and I'll be happy to reply! 😊

𝗡𝗜𝗖𝗢𝗟𝗘✰

26,645 просмотров • 1 год назад

Goodnight, 𝕏..·˚ ༘ ☾ ⋆。˚ ☄︎ Here's a fun project you can start with Grok 4. Use Grok-Code-Fast-1 to build your own OS. Below is a prompt that you can give to Grok-Code, and it will set up a solid foundation for a Linux-based Operating system that you can build from the ground up with Grok4. >>> Grok 4 Prompt You are a fully capable AI developer agent with expert-level experience as an embedded Linux systems engineer. You have deep expertise in using automated build systems like Buildroot and Yocto to create custom operating systems from source. You have access to a sandboxed Linux shell environment that allows you to write, execute, and debug code. Your mission is to generate a complete project skeleton for a minimal, custom Linux OS, and then you will execute the build scripts yourself to verify their correctness, automatically fixing any issues that arise. This is NOT a request to follow the Linux From Scratch (LFS) book. You will use the Buildroot build system to automate the entire process. You will follow a two-phase process: Phase 1: Generation and Phase 2: Execution and Iterative Debugging. ------------------------------------------------------------- Phase 1: Code and Script Generation First, you will generate all the necessary files for the project skeleton. All generated shell scripts must be robust and path-aware, executing correctly from any directory [Previous conversation]. Detailed Implementation Steps (using Context-Aware Decomposition): 1. Generate the Project Directory Structure via setup. sh Create a setup. sh script that establishes the following directory structure: • buildroot/ - Where the Buildroot source code will be cloned. • configs/ - To store our custom Buildroot configuration (defconfig). • board/ - For custom board support, including a readme.txt explaining its purpose for filesystem overlays. • output/ - Where all build artifacts will be placed. • scripts/ - A home for our build. sh and test. sh scripts. Crucially, this setup. sh script (and all others) must begin with a preamble to define the project's root directory, making all subsequent paths absolute and robust: #!/bin/bash # Preamble to ensure path robustness and stop on error set -e PROJECT_ROOT="$(cd "$(dirname "${BASH_SOURCE}")" && pwd)" The script must then clone the latest stable branch of Buildroot into $ PROJECT_ROOT/buildroot/. 2. Create the Minimal and Correct Buildroot defconfig Create a file named configs/tiny_linux_defconfig. This configuration must be the absolute bare minimum required to boot to a shell and must contain the exact configuration options listed below to avoid ambiguity and known errors: • Target Architecture: x86_64. • Toolchain: Use the default Buildroot toolchain. • Init System: Use BusyBox init. • System Utilities (BusyBox): ◦ To ensure BusyBox is statically linked without errors, you must include the following line directly in the defconfig file: BR2_PACKAGE_BUSYBOX_STATIC_LINK=y [Previous conversation, 298, 753]. ◦ To prevent the ROJECT_ROOT error, explicitly do NOT use a configuration fragment for BusyBox. Do not generate any lines containing BR2_BUSYBOX_CONFIG_FRAGMENT_FILES [Previous conversation]. • Kernel: ◦ Build the latest stable Linux kernel. ◦ Use tinyconfig as a base. ◦ Ensure the following options are explicitly enabled (=y) to make it bootable in QEMU: CONFIG_64BIT=y, CONFIG_DEVTMPFS=y, CONFIG_DEVTMPFS_MOUNT=y, CONFIG_BINFMT_ELF=y, CONFIG_BLK_DEV_INITRD=y (for initramfs support), CONFIG_TTY=y, CONFIG_PRINTK=y, CONFIG_DRM_FBDEV_EMULATION=y (for UEFI framebuffer console). • Filesystem Image: Configure it to produce a compressed cpio initial ramdisk (initramfs) image. • Bootloader: Do not include GRUB or other bootloaders. We will boot the kernel directly with QEMU. 3. Generate the scripts/build.sh and scripts/test.sh Scripts Generate path-aware build and test scripts, placing them in the scripts/ directory. • scripts/build.sh: This script must use absolute paths derived from a preamble. It must use make -C "$PROJECT_ROOT/buildroot" O="$PROJECT_ROOT/output" ... for a clean, out-of-tree build. It must include the -j$(nproc) flag to maximize build speed on multi-core systems [111, 967, Previous conversation]. • scripts/test.sh: This script must also be path-aware and launch QEMU using absolute paths to the kernel (bzImage) and initramfs (rootfs.cpio.gz) images. 4. Generate a Detailed README. md File Generate a comprehensive README. md file. It must explain prerequisites, "How to Customize Your Linux System" first, and finally, the "Quick Start" instructions for user clarity [Previous conversation]. ------------------------------------------------------------- Phase 2: Execution and Iterative Debugging Now, you will use your sandboxed Linux shell to verify and validate the scripts you just generated. This is a critical self-correction step based on the Recursive Criticism and Improvement (RCI) pattern. You will perform a full build cycle. 1. Execute setup. sh: • Run the setup. sh script you generated. • Capture the standard output and standard error. • If the script fails: Analyze the error, diagnose the root cause, generate the corrected setup. sh code, and then execute the corrected script to confirm it succeeds. 2. Execute build. sh: • After setup. sh completes successfully, run the scripts/build.sh script. This will trigger a full compilation of the Linux system. • Capture all output. • If the build fails: ◦ Analyze: Analyze the compiler error output. ◦ Diagnose: Identify the root cause (e.g., missing dependencies, incorrect configuration flags, pathing errors). ◦ Correct: Based on your analysis, identify which file is responsible for the failure (e.g., configs/tiny_linux_defconfig, scripts/build.sh) and generate the corrected code for that file. ◦ Repeat: Repeat the execution of scripts/build.sh until the build completes successfully without any errors. 3. Final Output: Once you have successfully executed both setup. sh and scripts/build.sh, you will present your final output. • First, provide the final, validated versions of all generated files (setup. sh, configs/tiny_linux_defconfig, scripts/build.sh, scripts/test.sh, and README. md) in separate, clearly labeled markdown code blocks. • Second, follow the code with a brief execution log. This log should summarize your actions, including any errors you encountered and fixed during the iterative debugging phase, demonstrating the self-correction process.

Tetsuo

2,840,991 просмотров • 9 месяцев назад

This Chinese developer runs 9 agents on Claude Code under a GPT-5.5 orchestrator and they close 500 client tasks a month without a single assistant. His client work is closed without him, on a single laptop and only three subscriptions. The entire system lives on one MacBook Pro M4 with 128 GB of memory and subscriptions to Claude Code and GPT-5.5 cost him approximately $300 a month. There is no CRM, no team, no office only a terminal window with 9 parallel streams. The orchestrator works with a simple system prompt: «You are the orchestrator of a client inbox. Classify every incoming email into 4 categories: code, content, analysis, communication. Delegate to the corresponding worker agent. When the result is ready, check it for completeness, send it to the client on my behalf, and mark the task as closed. Do not ask clarifying questions.» And the orchestrator checks the inbox every 30 seconds, classifies fresh emails, and distributes them to 9 worker agents on Claude Code, each of whom is responsible for their own class of tasks. Here is an example of how one of them closes a request to refactor a client's auth module: Task: refactor user-auth module Broke the monolith into 3 files by responsibilities Added unit tests, coverage increased to 87% Renamed 4 functions to camelCase according to the style guide PR is ready for review, link below» And so about 50 cycles a day. By noon 25 tasks are closed, by dinner 50, and by the end of the month 500. On average, it takes about 7 minutes from the appearance of an email in the inbox to sending the result to the client. This is more than what a live team of 6 developers, copywriters and analysts working 8 hours a day closes. This is no longer an agency. This is a workstation where an orchestrator replaces a manager, and 9 worker agents replace the staff. The pipeline goes from inbox to closing 500 times a month without human participation at any step.

Blaze

29,917 просмотров • 2 месяцев назад

New short course: Evaluating AI Agents! Evals are important for driving AI system improvements, and in this course you'll learn to systematically assess and improve an AI agent’s performance. This is built in partnership with Arize AI and taught by John Gilhuly, Head of Developer Relations, and , Director of Product. I've often found evals to be a critical tool in the agent development process - they can be the difference between picking the right thing to work on vs. wasting weeks of effort. Whether you’re building a shopping assistant, coding agent, or research assistant, having a structured evaluation process helps you refine its performance systematically, rather than relying on random trial and error. This course shows you how to structure your evals to assess the performance of each component of an agent and its end-to-end performance. For each component, you select the appropriate evaluators, test examples, and performance metrics. This helps you identify areas for improvement both during development and in production. (If you're familiar with error analysis in supervised learning, think of this as adapting those ideas to agentic workflows.) In this course, you'll build an AI agent, and add observability to visualize and debug its steps. You’ll learn about code-based evals, in which you write code explicitly to test a certain step, as well as LLM-as-a-Judge evals, in which you prompt an LLM to efficiently come up with ways to evaluate more open-ended outputs. In detail, you’ll: - Understand key differences between evaluating LLM-based systems and traditional software testing. - Add observability to an agent by collecting traces of the steps taken by the agent and visualizing them - Choose the appropriate evaluator - code-based, LLM-as-a-Judge, human-annotation based - for each component. - Compute a convergence score to evaluate if your agent can respond to a query in an efficient number of steps. - Run structured experiments to improve the agent’s performance by exploring changes to the prompt, LLM model, or the agent’s logic. - Understand how to deploy these evaluation techniques to monitor the agent’s performance in production. By the end of this course, you’ll know how to trace AI agents, systematically evaluate them, and improve their performance. Please sign up here:

Andrew Ng

126,406 просмотров • 1 год назад

If your MCP server has dozens of tools, it’s probably built wrong. You need tools that are specific and clear for each use case—but you also can’t have too many. This creates an almost impossible tradeoff that most companies don’t know how to solve. That’s why I interviewed my friend Alex Rattray (Alex Rattray), the founder and CEO of Stainless. Stainless builds APIs, SDKs, and MCP servers for companies like OpenAI and Anthropic. Alex has spent years mastering how to make software talk to software, and he came on the show to share what he knows. I had him on Every 📧’s AI & I to talk about MCP and the future of the AI-native internet. We get into: • Design MCP servers to be lean and precise. Alex’s best practices for building reliable MCP servers start with keeping the toolset small, giving each tool a precise name and description, and minimizing the inputs and outputs the model has to handle. At Stainless, they also often add a JSON filter on top to strip out unnecessary data. • Make complex APIs manageable with dynamic mode. To solve the problem of how an AI figures out which tool to use in larger APIs, Stainless switches to “dynamic mode,” where the model gets only three tools: List the endpoints, pick one and learn about it, and then execute it. • MCP servers as business copilots. At Stainless, Alex uses MCP servers to connect tools like Notion and HubSpot, so he can ask questions like, “Which customers signed up last week?” The system queries multiple databases and returns a summary that would’ve otherwise taken multiple logins and searches. • Create a “brain” for your company with Claude Code. Alex built a shared company brain at Stainless by keeping Claude Code running on his system and asking it to save useful inputs—like customer feedback and SQL queries—into GitHub. Over time, this creates a curated archive his team can query easily. • The future of MCP is code execution. Instead of giving models hundreds of tools, Alex believes the most powerful setup will be a simple code execution tool and a doc search tool. The AI writes code against an API’s SDK, runs it on a server, and checks the docs when it gets stuck. This is a must-watch for anyone who wants to understand MCP—and learn how to use them as a competitive edge. Watch below! Timestamps: Introduction: 00:01:14 Why Alex likes running barefoot: 00:02:54 APIs and MCP, the connectors of the new internet: 00:05:09 Why MCP servers are hard to get right: 00:10:53 Design principles for reliable MCP servers: 00:20:07 Scaling MCP servers for large APIs: 00:23:50 Using MCP for business ops at Stainless: 00:25:14 Building a company brain with Claude Code: 00:28:12 Where MCP goes from here: 00:33:59 Alex’s take on the security model for MCP: 00:41:10

Dan Shipper 📧

15,645 просмотров • 9 месяцев назад

Claude Code + computer use is f*cking cracked 🤯 Build a landing page → Claude opens Chrome, looks at it, spots every issue, and fixes it — without you describing a single thing. All inside Claude Code. Perfect for DTC brands and agencies who are still vibe-coding landing pages and advertorials in Claude Code, then manually opening them in Chrome, spotting 15 things wrong, and describing every visual issue back to Claude one at a time. If you're building pages in Claude Code and your workflow looks like this — build the page, open it in Chrome, spot broken spacing, go back to Claude, type "the CTA button is too low and the hero image is cut off," wait for the fix, open Chrome again, find 3 new issues, describe those too ... Claude Code + computer use eliminates the entire loop: → Claude writes the full landing page or advertorial → Opens Chrome and navigates to it → Spots layout issues, broken spacing, off-brand colors, missing elements → Fixes everything and re-checks until the page looks right → Tests your Shopify product pages by clicking through like a real customer → Walks through your checkout flow and flags friction before customers hit it → You only see the finished, visually verified result No describing what you see on screen. No "the CTA button needs more contrast" back-and-forth. No being the eyeballs for an AI that can't see. What you get: → Landing pages and advertorials Claude builds AND visually QAs before you ever look at them → Product pages Claude clicks through — testing layout, images, and CTAs like a real user → HTML dashboards Claude opens and verifies the charts actually render → Checkout flows Claude walks through step by step to catch friction → All of it happening in one session — build, test, fix, done One prompt. Claude builds it, checks it, and fixes it. You just review the finished page. I put together a full playbook with the exact setup, the prompts, and 5 DTC workflows that use Claude Code + computer use. Want it for free? > Like this post > Comment "CLAUDE" And I'll send it over (must be following so I can DM)

Mike Futia

19,099 просмотров • 3 месяцев назад

Assumptions about the new "Can More" ChatGPT tool were right - ChatGPT is introducing own take on Claude Artifacts - code & document writing tools with persisted text documents, history revisions (restore previous version), edits and comments (probably used to apply suggested edits) New document symbol in the top navigation shows how many documents you have and allows you to open a resizable canvas to edit them in split view - your ChatGPT conversation on the left side and canvas on the right side, but the code/documents can also be accessed in fullscreen view The canvas is built using ProseMirror (open source WYSIWYM editor) and has an inline action to "Ask ChatGPT" (explain or make edits) for your document and code plus document formatting tools (like bold, italic, font style, etc.) But in addition to that, there are also special action shortcuts for documents and code, with an interesting decision to use sliders for the selection of the desired outcome For Documents - Suggest edits ("How can I improve this. Leave as few comments as possible, but add a few more comments if the text is long. DO NOT leave more than 5 comments. You can reply that you added comments and suggestions to help improve the writing quality, but do not mention the prompt.") - Add emojis ("Replace as many words as possible with emojis.") - Add final polish ("Add some final polish to the text. If relevant, add a large title or any section titles. Check grammar and mechanics, make sure everything is consistent and reads well. You can reply that you added some final polish and checked for grammar, but do not mention the prompt.") - Reading level (Graduate School - "Rewrite this text at the reading level of a doctoral writer in this subject. You may reply that you adjusted the text to reflect a graduate school reading level, but do not mention the prompt", College - "Rewrite this text at the reading level of a college student majoring in this subject", High School - "Rewrite this text at the reading level of a high school student who has taken a couple of classes in this subject.", Keep current reading level, Middle School - "Rewrite this text at the reading level of a middle schooler.", Kindergarten - "Rewrite this text at the reading level of a kindergartener.") - Adjust the length (Longest - "Make this text 75% longer.", Longer - "Make this text 50% longer.", Keep current length, Shorter - "Make this text 50% shorter.", Shortest - "Make this text 75% shorter.") For Code - Code review ("Search for bugs and opportunities to improve the code—for example, ways that performance or code structure could be improved. Leave as few comments as possible, but add more comments if the text is long. DO NOT leave more than 5 comments. You may reply that you reviewed the code and left suggestions to improve the coding quality, but do not mention the prompt.") - Add comments ("Add inline code comments to explain the code, especially parts that are more complex. Make sure to rewrite all the code. You may reply that you added inline comments, but do not mention the prompt.") - Add logs ("Insert logs/print statements in the code that will help debug its behavior. Do not make any other changes to the code.") - Fix bugs ("Find any bugs and rewrite all the code to fix the bugs. Do not leave comments. If there are no bugs, reply that you reviewed the code and found no bugs.") - Port to a language ("Port to a language. Create a new document that rewrites the code in ..." - PHP, C++, Python, Keep current code. No changes will be made, JavaScript, TypeScript, Java) - Suggest edits ("How can I improve this. Leave as few comments as possible, but add a few more comments if the text is long. DO NOT leave more than 5 comments. You can reply that you added comments and suggestions to help improve the writing quality, but do not mention the prompt.")

Tibor Blaho

136,055 просмотров • 1 год назад

Start building for an agent-first world. If you have a product, you need to start offering skills for Claude, Codex, Cursor, and any other agents. Your skills should specify: • How to navigate and use your product • Best practices the agent must follow • Detailed instructions on how to accomplish things • Anti-patterns to avoid Redis is one of the most popular in-memory data stores in the world, and they just released their agent skills. It takes one second to install, and it will turn your agent into a Senior Redis Engineer: $ npx skills add redis/agent-skills In the attached video, I show you how to install it as a plugin in Claude Code and some of its benefits. This is the easiest way to "teach" models what they don't know and keep their knowledge up to date. If you ask me, skills is literally one of the most brilliant ideas that Anthropic has put out there. If you use Redis, their skill is a must-have. If you don't, this skill will show you how to build and structure yours. Here is what their skill teaches your agent: 1. Current patterns for common use cases: caching, rate limiting, session management, vector search, semantic caching, pub/sub, streams. 2. Which data structure to use and when: hashes vs. JSON vs. sorted sets vs. vector sets. 3. Anti-patterns to avoid: no KEYS in loops, no unbounded key growth, no large values that amplify every operation. 4. Production-aware defaults: connection pooling, pipelining, cluster compatibility, error handling that doesn't silently swallow failures.

Santiago

37,546 просмотров • 4 месяцев назад

CANCEL Your Weekend Plans, and Learn Claude Code Today. $5,000/month. $10,000/month. $20,000/month. People are building entire apps and charging clients thousands using Claude Code. You're still Googling 'how to center a div.' While you're binge-watching a show you won't remember next week, a 19 year old with zero coding experience just built a $5,000 SaaS product in one afternoon using the tool I'm about to break down. Same laptop. Same internet. Same 24 hours. He has Claude Code. You have Netflix. That's the only difference. This YouTube video is a goldmine. Full Claude Code tutorial. Beginner to pro. Every feature. Every setup step. Every best practice. Zero prior knowledge needed. Save it. Watch it tonight. Not tomorrow. Tonight. Save this post. This is your complete Claude Code roadmap. Lose it and you lose the next 12 months of income. Follow Himanshu Kumar so you don't miss the breakdowns for each feature. ↓ 1. Understand What Claude Code Actually Is. You think Claude Code is just another chatbot. It's not. And that misunderstanding is why you're broke. ChatGPT gives you text. Claude Code gives you software. It runs in your terminal. It reads your entire codebase. It writes files directly to your project. It runs commands on your machine. It debugs errors autonomously. It builds features end to end. You're not chatting. You're deploying a developer. One that works 24/7. Never asks for a raise. Never calls in sick. Never pushes broken code at 5 PM on a Friday. People are charging clients $5,000-$10,000 for apps they built with Claude Code in 3 hours. And you didn't even know this tool existed because you're still asking ChatGPT to write you a to-do list. The gap between you and people making money with AI isn't intelligence. It's awareness. Now you're aware. Save this post. Follow Himanshu Kumar for the complete breakdown of every Claude Code feature. ↓ 2. Set Up Claude Code Properly. Most people quit here. "It's too complicated." "I don't know terminal." "I'll set it up later." Later never comes. And "complicated" means "I watched for 30 seconds and gave up." The setup takes 10 minutes. Install Node.js. Install Claude Code via npm. Authenticate your account. Open your terminal. Done. 10 minutes. You spent longer this morning deciding what to have for breakfast. The video walks through every single click. Every command. Every screen. Assuming you know absolutely nothing. If you can download an app on your phone, you can set up Claude Code. It's the same level of difficulty. But you'll still tell yourself it's "too technical" because that excuse is more comfortable than admitting you're just scared to try something new. This is the setup that everything else builds on. Skip it and nothing works. ↓ 3. Use the Desktop App. You don't even need to live in the terminal if you don't want to. Claude Code has a desktop app. Clean interface. Visual feedback. Everything you need without touching command line. But here's the thing most people don't know: The desktop app isn't just a pretty wrapper. It lets you manage projects visually. See file changes in real time. Switch between projects instantly. The people making money with Claude Code use the desktop app for client projects because it's faster to manage multiple builds simultaneously. You're still opening 14 browser tabs to organize one project. They open one app and everything's there. Efficiency isn't a personality trait. It's a tool choice. Save this post. Follow Himanshu Kumar for the desktop app workflow that handles 5 client projects at once. ↓ 4. Install the Right Dependencies. This is where beginners silently fail and blame the tool. Claude Code needs certain dependencies installed to work properly. Miss one and everything breaks. Then you go on Twitter and say "Claude Code doesn't work." It works fine. You just didn't read the setup guide. The video covers every dependency you need. What to install. How to install it. How to verify it's working. No guessing. No Stack Overflow rabbit holes at midnight. No "why isn't this working" for 3 hours. Watch the dependency section once. Follow every step. Never deal with setup issues again. You spent more time last week troubleshooting a printer than this takes. ↓ 5. Work Inside Your Code Editor. Claude Code integrates directly with your code editor. VS Code. Cursor. Whatever you use. It's not a separate window you alt-tab between. It's right there. In your workflow. You type a request. Claude writes the code. The code appears in your editor. You review it. Accept it. Done. No copy pasting between windows. No reformatting code that got mangled in transit. No "which version was the right one." It's like pair programming with someone who never gets distracted, never argues about naming conventions, and actually writes code that works on the first try. Your current coding process is: Google the problem, read 5 answers on Stack Overflow, copy the wrong one, debug for an hour, find the right one, paste it in, break something else, repeat. Claude Code's process is: describe what you want, get working code, move on with your life. Same hour. One method produces working software. The other produces frustration and a browser history full of Stack Overflow tabs. Stop coding the hard way. Save this post. Follow Himanshu Kumar for code editor setup guides and integration tips. ↓ 6. Master Basic Usage. Most people learn 5% of a tool and say they "know" it. You "know" Photoshop because you can crop an image. You "know" Excel because you can sum a column. You "know" Claude Code because you asked it one question. Basic usage means: How to give Claude Code context about your project. How to ask for changes to existing code. How to generate new files and features. How to review what Claude produces. How to iterate when the output isn't perfect. These basics are the foundation of everything. Skip them and every advanced feature feels confusing. Master them and every advanced feature feels obvious. The video breaks down each one with real examples. Not theory. Actual usage on actual projects. You've been using AI tools at 5% capacity and wondering why your results are 5% of what others get. Save this post. Follow Himanshu Kumar for daily Claude Code usage tips. ↓ 7. Learn Every Command. Claude Code has commands that most users never discover. Because most users type one message and expect magic. That's not how professionals use it. Professionals use specific commands that tell Claude Code exactly what to do, how to do it, and what constraints to follow. The difference between a beginner and someone making $10K/month with Claude Code is knowing which command to use and when. The video walks through every single one. Not just what they do. But when to use each one. And why one command is better than another for specific situations. You've been using Claude Code like a hammer. These commands turn it into a full toolbox. Stop treating a power tool like a blunt instrument. Save this post. Follow Himanshu Kumar for the command cheat sheet I use daily. ↓ 8. Understand Modes and Shortcuts. Speed matters. The person who builds an app in 2 hours charges $5,000. The person who builds the same app in 2 days charges $2,000. Same app. Same quality. Different speed. Different income. Claude Code has modes that change how it operates. And shortcuts that cut your workflow time in half. Most people don't know either exists. They use Claude Code in default mode for everything. Like driving a car in first gear on the highway. Technically it works. But everyone is passing you. The video shows you every mode. Every shortcut. Every time-saving trick that separates the people charging $2,000 per project from the people charging $10,000. Speed is money. Literally. Save this post. Follow Himanshu Kumar for the shortcuts that cut my build time by 60%. ↓ 9. Write a Proper Planning Prompt. This is the section that separates amateurs from professionals. And it's the section most people skip. A planning prompt tells Claude Code what you're building before you start building it. Architecture. File structure. Technologies. Features. Constraints. Edge cases. Without a planning prompt, Claude Code guesses. And guessing produces garbage. With a planning prompt, Claude Code executes a clear plan. And clear plans produce working software. The video shows you exactly how to write a planning prompt that makes Claude Code produce professional-grade output on the first try. "But I just want to start coding." That's why your code breaks every time. That's why you restart projects 4 times. That's why nothing you build ever gets finished. Because you refuse to plan. A 5-minute planning prompt saves you 5 hours of debugging. But you'd rather skip the 5 minutes and suffer through the 5 hours because patience isn't your thing. And that's exactly why you're not making money. Planning is the most underpaid skill in coding. And the most overpaid when you master it. Save this post. Follow Himanshu Kumar for the planning prompt templates I use for every client project. ↓ 10. Choose the Right Model. Claude Code lets you select different AI models. Not all models are the same. Not all tasks need the same model. Using the most powerful model for a simple task wastes credits. Using a basic model for a complex task wastes time. The video explains: Which model to use for quick fixes. Which model to use for complex architecture. Which model to use for debugging. Which model to use for code generation. Most people pick one model and use it for everything. That's like using a sledgehammer to hang a picture frame. Model selection is strategy. And strategy is money. The people making $10K/month with Claude Code are strategic about every credit they spend. You're burning through credits because you use the most expensive model to write a hello world. ↓ 11. Use Git and Version Control. If you're not using version control, you're one mistake away from losing everything. Claude Code integrates with Git. Every change tracked. Every version saved. Every mistake reversible. Without Git: Claude makes a change. It breaks something. You can't undo it. You start over. 3 hours wasted. With Git: Claude makes a change. It breaks something. You roll back in 5 seconds. Keep working. Version control isn't optional. It's insurance. And the people not using it are the same people who say "I lost my entire project" like it's something that just happens. It doesn't just happen. It happens because you didn't set up Git. The video walks through the entire Git integration. Save this post. Follow Himanshu Kumar for the Git workflow that's saved every project I've ever built. ↓ 12. Set Up Claude.MD and Memory. This is the feature that makes Claude Code feel like a real team member instead of a stranger you explain everything to every time. ClaudeMD is a memory file. You tell Claude Code about your project once. It remembers forever. Coding style preferences. Project architecture decisions. Technology stack. File naming conventions. Business logic rules. Without ClaudeMD: Every new conversation starts from zero. You explain the same things repeatedly. Output is inconsistent. With ClaudeMD: Claude knows your project. Claude follows your rules. Claude produces consistent, professional code. The difference between a sloppy freelancer and a reliable agency is consistency. Claude. MD gives you consistency without the agency overhead. Most people don't set this up and wonder why Claude Code gives different answers every time. ↓ 13. Automate with Tasks. This is where Claude Code stops being a tool and starts being an employee. Tasks let you define repeating workflows. "Every time I push code, run tests." "Every time I create a new file, add boilerplate." "Every time I start a session, check for errors." Automated. Hands-free. Consistent. You're doing these things manually every single day. The same checks. The same steps. The same routine. Tasks do them automatically. So you can focus on the work that actually makes money. Every manual task you automate is time you get back. And time is the only thing you can never make more of. Save this post. Follow Himanshu Kumar for the task automation templates that run my entire workflow. ↓ 14. Explore Features Most People Never Touch. The video covers features that 95% of Claude Code users don't know exist. Because they watched a 3-minute TikTok about Claude Code and think they're experts now. They're not. They're using 5% of a tool that can do everything. The full tutorial goes deep into features that most tutorials skip because they're "too advanced." They're not too advanced. They're too valuable for lazy creators to bother explaining. This video explains all of them. Clearly. For beginners. The 5% of features you don't know about are the 5% that make people rich. ↓ Let's zoom out. I just broke down 14 sections of Claude Code. Setup and installation. Desktop app. Dependencies. Code editor integration. Basic usage. Commands. Modes and shortcuts. Planning prompts. Model selection. Git and version control. Memory and Claude. MD. Tasks and automation. Advanced features. All in one video. All free. All beginner friendly. The person who masters even half of these in the next 2 weeks will be in the top 1% of Claude Code users. The top 1% of Claude Code users are the ones charging $5,000-$10,000 per project and building them in a single afternoon. Everyone else is asking ChatGPT to fix their resume. Same tools. Same access. Completely different outcomes. Because one person treats AI like a toy. And the other treats it like a business. ↓ Here's the hard truth nobody wants to hear. You don't have a talent problem. You don't have an intelligence problem. You don't have a resources problem. You have an action problem. Everything I just listed has a free tutorial right here in the attached video. 33 minutes. That's it. 33 minutes to learn the tool that people are using to build $5,000-$20,000/month businesses. You spent more time today scrolling Twitter than it takes to watch this video. You spent more time this week watching Netflix than it takes to master Claude Code basics. You spent more time this month doing nothing than it would take to completely change your income. The information is free. The tool is accessible. The opportunity is here. The only thing missing is you caring enough to start. ↓ CANCEL your plans this week. This isn't optional anymore. The people learning Claude Code right now will be building apps for the people who didn't learn it. That's not a prediction. That's already happening. Companies are replacing $150/hour developers with one person and Claude Code. If you code: learn Claude Code or become half as valuable by next year. If you don't code: learn Claude Code or miss the biggest opportunity to start earning from tech without a CS degree. There's no path forward that doesn't include AI coding tools. None. You have one window. Right now. This week. ↓ Here's your action plan for the next 7 days: Day 1: Watch the full video. Install Claude Code. Set up dependencies. Day 2: Learn basic usage. Try 5 different commands. Day 3: Write your first planning prompt. Build a small project. Day 4: Set up Claude. MD. Configure your memory file. Day 5: Master modes and shortcuts. Build a second project faster. Day 6: Set up Git integration. Automate with tasks. Day 7: Build something real. A tool, an app, a website. Ship it. 7 days. One tool. One completely different skill set. One completely different income potential. Or 7 more days of scrolling Twitter watching other people build things while you "plan to start." Your call. ↓ This is the most important video you'll watch this year. 33 minutes. Complete Claude Code mastery. From zero to building real projects. Save this post. Come back to it every single day this week. Check off each section as you complete it. Follow Himanshu Kumar for daily Claude Code breakdowns, advanced tutorials, and the exact workflows that are turning beginners into $10K/month builders. The only thing between you and $10K/month with Claude Code is this video and 7 days. Don't waste them. You Must Follow me Himanshu Kumar, so i can send you DM.

Himanshu Kumar

101,376 просмотров • 3 месяцев назад

CANCEL Your Weekend Plans, & Learn Claude Code Today. This Claude Code teaches more about vibe-coding in 30 mins than most tutorials do in hours. Save this, it'll change how you build forever People are building entire apps and charging clients $5,000 to $20,000 using Claude Code. This Claude Code video is a goldmine. Full Claude Code tutorial. Beginner to pro. Every feature. Every setup step. Every best practice. Zero prior knowledge needed. Save it. Watch it tonight. Not tomorrow. Tonight. Follow Himanshu Kumar so you don't miss the breakdowns for each feature. This is your complete Claude Code roadmap. Lose it and you lose the next 12 months of income. ↓ 1. Understand What Claude Code Actually Is. You think Claude Code is just another chatbot. It's not. And that misunderstanding is why you're broke. ChatGPT gives you text. Claude Code gives you software. It runs in your terminal. It reads your entire codebase. It writes files directly to your project. It runs commands on your machine. It debugs errors autonomously. It builds features end to end. You're not chatting. You're deploying a developer. One that works 24/7. Never asks for a raise. Never calls in sick. Never pushes broken code at 5 PM on a Friday. People are charging clients $5,000-$10,000 for apps they built with Claude Code in 3 hours. And you didn't even know this tool existed because you're still asking ChatGPT to write you a to-do list. The gap between you and people making money with AI isn't intelligence. It's awareness. Now you're aware. Save this post. Follow Himanshu Kumar for the complete breakdown of every Claude Code feature. ↓ 2. Set Up Claude Code Properly. Most people quit here. "It's too complicated." "I don't know terminal." "I'll set it up later." Later never comes. And "complicated" means "I watched for 30 seconds and gave up." The setup takes 10 minutes. Install Node.js. Install Claude Code via npm. Authenticate your account. Open your terminal. Done. 10 minutes. You spent longer this morning deciding what to have for breakfast. The video walks through every single click. Every command. Every screen. Assuming you know absolutely nothing. If you can download an app on your phone, you can set up Claude Code. It's the same level of difficulty. But you'll still tell yourself it's "too technical" because that excuse is more comfortable than admitting you're just scared to try something new. This is the setup that everything else builds on. Skip it and nothing works. ↓ 3. Use the Desktop App. You don't even need to live in the terminal if you don't want to. Claude Code has a desktop app. Clean interface. Visual feedback. Everything you need without touching command line. But here's the thing most people don't know: The desktop app isn't just a pretty wrapper. It lets you manage projects visually. See file changes in real time. Switch between projects instantly. The people making money with Claude Code use the desktop app for client projects because it's faster to manage multiple builds simultaneously. You're still opening 14 browser tabs to organize one project. They open one app and everything's there. Efficiency isn't a personality trait. It's a tool choice. Save this post. Follow Himanshu Kumar for the desktop app workflow that handles 5 client projects at once. ↓ 4. Install the Right Dependencies. This is where beginners silently fail and blame the tool. Claude Code needs certain dependencies installed to work properly. Miss one and everything breaks. Then you go on Twitter and say "Claude Code doesn't work." It works fine. You just didn't read the setup guide. The video covers every dependency you need. What to install. How to install it. How to verify it's working. No guessing. No Stack Overflow rabbit holes at midnight. No "why isn't this working" for 3 hours. Watch the dependency section once. Follow every step. Never deal with setup issues again. You spent more time last week troubleshooting a printer than this takes. ↓ 5. Work Inside Your Code Editor. Claude Code integrates directly with your code editor. VS Code. Cursor. Whatever you use. It's not a separate window you alt-tab between. It's right there. In your workflow. You type a request. Claude writes the code. The code appears in your editor. You review it. Accept it. Done. No copy pasting between windows. No reformatting code that got mangled in transit. No "which version was the right one." It's like pair programming with someone who never gets distracted, never argues about naming conventions, and actually writes code that works on the first try. Your current coding process is: Google the problem, read 5 answers on Stack Overflow, copy the wrong one, debug for an hour, find the right one, paste it in, break something else, repeat. Claude Code's process is: describe what you want, get working code, move on with your life. Same hour. One method produces working software. The other produces frustration and a browser history full of Stack Overflow tabs. Stop coding the hard way. Save this post. Follow Himanshu Kumar for code editor setup guides and integration tips. ↓ 6. Master Basic Usage. Most people learn 5% of a tool and say they "know" it. You "know" Photoshop because you can crop an image. You "know" Excel because you can sum a column. You "know" Claude Code because you asked it one question. Basic usage means: How to give Claude Code context about your project. How to ask for changes to existing code. How to generate new files and features. How to review what Claude produces. How to iterate when the output isn't perfect. These basics are the foundation of everything. Skip them and every advanced feature feels confusing. Master them and every advanced feature feels obvious. The video breaks down each one with real examples. Not theory. Actual usage on actual projects. You've been using AI tools at 5% capacity and wondering why your results are 5% of what others get. Save this post. Follow Himanshu Kumar for daily Claude Code usage tips. ↓ 7. Learn Every Command. Claude Code has commands that most users never discover. Because most users type one message and expect magic. That's not how professionals use it. Professionals use specific commands that tell Claude Code exactly what to do, how to do it, and what constraints to follow. The difference between a beginner and someone making $10K/month with Claude Code is knowing which command to use and when. The video walks through every single one. Not just what they do. But when to use each one. And why one command is better than another for specific situations. You've been using Claude Code like a hammer. These commands turn it into a full toolbox. Stop treating a power tool like a blunt instrument. Save this post. Follow Himanshu Kumar for the command cheat sheet I use daily. ↓ 8. Understand Modes and Shortcuts. Speed matters. The person who builds an app in 2 hours charges $5,000. The person who builds the same app in 2 days charges $2,000. Same app. Same quality. Different speed. Different income. Claude Code has modes that change how it operates. And shortcuts that cut your workflow time in half. Most people don't know either exists. They use Claude Code in default mode for everything. Like driving a car in first gear on the highway. Technically it works. But everyone is passing you. The video shows you every mode. Every shortcut. Every time-saving trick that separates the people charging $2,000 per project from the people charging $10,000. Speed is money. Literally. Save this post. Follow Himanshu Kumar for the shortcuts that cut my build time by 60%. ↓ 9. Write a Proper Planning Prompt. This is the section that separates amateurs from professionals. And it's the section most people skip. A planning prompt tells Claude Code what you're building before you start building it. Architecture. File structure. Technologies. Features. Constraints. Edge cases. Without a planning prompt, Claude Code guesses. And guessing produces garbage. With a planning prompt, Claude Code executes a clear plan. And clear plans produce working software. The video shows you exactly how to write a planning prompt that makes Claude Code produce professional-grade output on the first try. "But I just want to start coding." That's why your code breaks every time. That's why you restart projects 4 times. That's why nothing you build ever gets finished. Because you refuse to plan. A 5-minute planning prompt saves you 5 hours of debugging. But you'd rather skip the 5 minutes and suffer through the 5 hours because patience isn't your thing. And that's exactly why you're not making money. Planning is the most underpaid skill in coding. And the most overpaid when you master it. Save this post. Follow Himanshu Kumar for the planning prompt templates I use for every client project. ↓ 10. Choose the Right Model. Claude Code lets you select different AI models. Not all models are the same. Not all tasks need the same model. Using the most powerful model for a simple task wastes credits. Using a basic model for a complex task wastes time. The video explains: Which model to use for quick fixes. Which model to use for complex architecture. Which model to use for debugging. Which model to use for code generation. Most people pick one model and use it for everything. That's like using a sledgehammer to hang a picture frame. Model selection is strategy. And strategy is money. The people making $10K/month with Claude Code are strategic about every credit they spend. You're burning through credits because you use the most expensive model to write a hello world. ↓ 11. Use Git and Version Control. If you're not using version control, you're one mistake away from losing everything. Claude Code integrates with Git. Every change tracked. Every version saved. Every mistake reversible. Without Git: Claude makes a change. It breaks something. You can't undo it. You start over. 3 hours wasted. With Git: Claude makes a change. It breaks something. You roll back in 5 seconds. Keep working. Version control isn't optional. It's insurance. And the people not using it are the same people who say "I lost my entire project" like it's something that just happens. It doesn't just happen. It happens because you didn't set up Git. The video walks through the entire Git integration. Save this post. Follow Himanshu Kumar for the Git workflow that's saved every project I've ever built. ↓ 12. Set Up Claude MD and Memory. This is the feature that makes Claude Code feel like a real team member instead of a stranger you explain everything to every time. ClaudeMD is a memory file. You tell Claude Code about your project once. It remembers forever. Coding style preferences. Project architecture decisions. Technology stack. File naming conventions. Business logic rules. Without ClaudeMD: Every new conversation starts from zero. You explain the same things repeatedly. Output is inconsistent. With ClaudeMD: Claude knows your project. Claude follows your rules. Claude produces consistent, professional code. The difference between a sloppy freelancer and a reliable agency is consistency. Claude. MD gives you consistency without the agency overhead. Most people don't set this up and wonder why Claude Code gives different answers every time. ↓ 13. Automate with Tasks. This is where Claude Code stops being a tool and starts being an employee. Tasks let you define repeating workflows. "Every time I push code, run tests." "Every time I create a new file, add boilerplate." "Every time I start a session, check for errors." Automated. Hands-free. Consistent. You're doing these things manually every single day. The same checks. The same steps. The same routine. Tasks do them automatically. So you can focus on the work that actually makes money. Every manual task you automate is time you get back. And time is the only thing you can never make more of. Save this post. Follow Himanshu Kumar for the task automation templates that run my entire workflow. ↓ 14. Explore Features Most People Never Touch. The video covers features that 95% of Claude Code users don't know exist. Because they watched a 3-minute TikTok about Claude Code and think they're experts now. They're not. They're using 5% of a tool that can do everything. The full tutorial goes deep into features that most tutorials skip because they're "too advanced." They're not too advanced. They're too valuable for lazy creators to bother explaining. This video explains all of them. Clearly. For beginners. The 5% of features you don't know about are the 5% that make people rich. ↓ Let's zoom out. I just broke down 14 sections of Claude Code. Setup and installation. Desktop app. Dependencies. Code editor integration. Basic usage. Commands. Modes and shortcuts. Planning prompts. Model selection. Git and version control. Memory and Claude. MD. Tasks and automation. Advanced features. All in one video. All free. All beginner friendly. The person who masters even half of these in the next 2 weeks will be in the top 1% of Claude Code users. The top 1% of Claude Code users are the ones charging $5,000-$10,000 per project and building them in a single afternoon. Everyone else is asking ChatGPT to fix their resume. Same tools. Same access. Completely different outcomes. Because one person treats AI like a toy. And the other treats it like a business. ↓ Here's the hard truth nobody wants to hear. You don't have a talent problem. You don't have an intelligence problem. You don't have a resources problem. You have an action problem. Everything I just listed has a free tutorial right here in the attached video. 33 minutes. That's it. 33 minutes to learn the tool that people are using to build $5,000-$20,000/month businesses. You spent more time today scrolling Twitter than it takes to watch this video. You spent more time this week watching Netflix than it takes to master Claude Code basics. You spent more time this month doing nothing than it would take to completely change your income. The information is free. The tool is accessible. The opportunity is here. The only thing missing is you caring enough to start. ↓ CANCEL your plans this week. This isn't optional anymore. The people learning Claude Code right now will be building apps for the people who didn't learn it. That's not a prediction. That's already happening. Companies are replacing $150/hour developers with one person and Claude Code. If you code: learn Claude Code or become half as valuable by next year. If you don't code: learn Claude Code or miss the biggest opportunity to start earning from tech without a CS degree. There's no path forward that doesn't include AI coding tools. None. You have one window. Right now. This week. ↓ Here's your action plan for the next 7 days: Day 1: Watch the full video. Install Claude Code. Set up dependencies. Day 2: Learn basic usage. Try 5 different commands. Day 3: Write your first planning prompt. Build a small project. Day 4: Set up Claude. MD. Configure your memory file. Day 5: Master modes and shortcuts. Build a second project faster. Day 6: Set up Git integration. Automate with tasks. Day 7: Build something real. A tool, an app, a website. Ship it. 7 days. One tool. One completely different skill set. One completely different income potential. Or 7 more days of scrolling Twitter watching other people build things while you "plan to start." Your call. ↓ This is the most important video you'll watch this year. 33 minutes. Complete Claude Code mastery. From zero to building real projects. Save this post. Come back to it every single day this week. Check off each section as you complete it. Follow Himanshu Kumarfor daily Claude Code breakdowns, advanced tutorials, and the exact workflows that are turning beginners into $10K/month builders. The only thing between you and $10K/month with Claude Code is this video and 7 days. Don't waste them. You Must Follow me Himanshu Kumar, so i can send you DM.

Himanshu Kumar

85,668 просмотров • 2 месяцев назад

THE GUY WHO WON ANTHROPIC'S HACKATHON JUST GAVE AWAY HIS ENTIRE CLAUDE CODE PLAYBOOK FOR FREE. 10 MONTHS OF WORK, ALL PUBLIC Affaan Mustafa won the Anthropic x Forum Ventures hackathon by building a full startup in 8 hours with Claude Code. Then he open-sourced the exact setup that did it. It's called Everything Claude Code, and it turns Claude from one assistant into an entire engineering team Repo: affaan-m/ecc This isn't a prompt pack. It's a system he refined over 10+ months of daily use shipping real products What's inside: A huge library of skills, dozens of specialized subagents, and ready-made commands, all working together. Each piece does one job. One subagent reviews security against OWASP standards. One optimizes memory so Claude stops forgetting earlier decisions around hour three. One learns from your past sessions and projects so the setup gets smarter the more you use it. Others handle planning, test-driven development, and language-specific code review Instead of one assistant writing code, you get an orchestrated team. A main session delegates to the right specialist when the task calls for it, the way a real dev team splits work The best part: it's not locked to one tool. It runs in Claude Code, Cursor, Codex and OpenCode, across Windows, Mac and Linux. Free, MIT licensed This is the difference between using Claude like a search box and running it like a team that ships. The guy spent 10 months figuring out what actually works so you don't have to Bookmark this

Yarchi

810,381 просмотров • 1 месяц назад

PhD Students – How to automatically identify 90% of the issues in your research paper before you submit it to a journal? This is possible through manual or automated paper review. First, let’s understand the following. 𝐖𝐡𝐚𝐭 𝐢𝐬 𝐚 𝐩𝐚𝐩𝐞𝐫 𝐫𝐞𝐯𝐢𝐞𝐰? Paper review is a process in which subject matter experts evaluate your paper based on the following criteria: 1. Significance – Is this research important? 2. Novelty – Is this research new? 3. Methodology – Is this research carried out in the correct way? 4. Verifiability – Can other researchers verify this research? 5. Presentation – Is the research presented in the right way? 𝐖𝐡𝐲 𝐭𝐨 𝐡𝐚𝐯𝐞 𝐲𝐨𝐮𝐫 𝐩𝐚𝐩𝐞𝐫 𝐫𝐞𝐯𝐢𝐞𝐰𝐞𝐝 𝐛𝐞𝐟𝐨𝐫𝐞 𝐬𝐮𝐛𝐦𝐢𝐬𝐬𝐢𝐨𝐧? ➟ Identify the critical issues in your paper ➟ Fix those issues to increase the chances of your paper acceptance 𝐇𝐨𝐰 𝐭𝐨 𝐚𝐮𝐭𝐨𝐦𝐚𝐭𝐞 “𝐬𝐞𝐥𝐟-𝐫𝐞𝐯𝐢𝐞𝐰” 𝐨𝐟 𝐲𝐨𝐮𝐫 𝐩𝐚𝐩𝐞𝐫? Paperpal just launched an amazing feature – AI Review. Using this feature, you can get instant self-feedback. This feature will help you in the following ways. ➝ Check for gaps in your logic ➝ Get feedback on the structure and flow of your writing ➝ Review your research questions ➝ Identify opportunities to strengthen your paper ➝ Increase the chances of your paper acceptance Here is a step-by-step process for using AI Review feature. Step 1: Go to and login. Step 2: Open an existing document or make a new document Step 3: Go to the right-side bar and click on checks | AI Review. Step 4: For this feature to work there should be more than 150 words. Step 5: Copy and paste your paper. Step 6: Now go to the right side and check the prompts Step 7: With these prompts, you will evaluate your paper. Step 8: You will find various prompts e.g., suggest writing feedback, check flow and structure etc. Step 9: You can select a prompt from the existing prompts or write your custom prompt and execute Step 10: Paperpal will generate feedback as per the prompt. Step 11: Read through the feedback and save it for further use. Use other specific prompts for tailored feedback. Step 12: This way you can evaluate various aspects of your paper yourself. This is a very customized and efficient way of automatically reviewing your paper. You can also go one step further to work on the feedback and improve your paper based on suggestions. Please note that AI Review feature does not replace human or expert reviewers in any way. This feature only aims to provide you with quick self-feedback. Try the AI Review feature of Paperpal. Paperpal link:

Faheem Ullah

15,270 просмотров • 1 год назад