正在加载视频...

视频加载失败

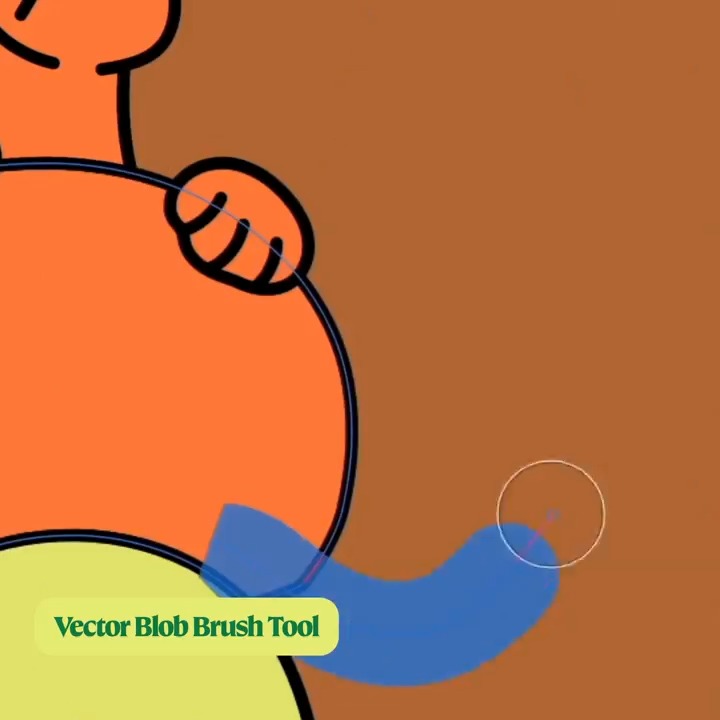
Coming to Affinity 2.1: Vector Flood Fill! Create a filled vector layer based on any overlapping curves or shapes and drag & drop colour swatches or apply bitmap fills using the same tool ⚡ To test drive 2.1 before release, sign up for our beta program:

52,660 次观看 • 3 年前 •via X (Twitter)

10 条评论

Olivier Besson 的头像
Olivier Besson3 年前

+Vector pattern fill please^^

巫鷹 的头像
巫鷹3 年前

YES! This is why I enjoy using Flash's vector drawing tools!

Dango K.🍡 的头像
Dango K.🍡3 年前

AHHHH AFFINITY! I LOVE YOU SO MUCH!!!

Dratuna 的头像
Dratuna3 年前

Let me tell you something about new versions. There is no need for an update pass or any paid updates in between versions 2 and 3. Version 3 won't be here until around 2026.

Chez Chez La Pope | Digital Mercenary 的头像
Chez Chez La Pope | Digital Mercenary3 年前

this is an awesome update but !'d love the ability to organize the colors after adding them in my swatch palettes

KeithAllen 的头像
KeithAllen3 年前

Nice new feature! This may be a silly question but will this Beta feature also be available for the iPad app?

Affinity 的头像
Affinity3 年前

Yes, it will. You can see the full feature list on our Forums:

busca 的头像
busca3 年前

@luarmendes02 !!

Joel Mayer 的头像
Joel Mayer3 年前

That‘s so awesome!!

William Fehr Creative 的头像
William Fehr Creative3 年前

👏👏👏

相关视频

🎓Learn how to create a powerful Worn Leather smart material in a matter of seconds in my latest video series (AAA) Pro Tips! This smart material can be used on virtually any 3D asset. ____________________________________________________ In this video, the steps are as follows: 1. Create a fill layer with a black mask applied. Inside its mask paint a simple pill shape and use a blur slope filter to introduce some random shapes. Apply a marble veins fill layer on top with its blending mode set to color burn. Apply a warp filter as well to introduce some randomness followed by an anchorpoint. 2. Create another fill layer using the same technique to apply some dirt in the crevices of the wear. 3. Next, Inside the main fill layer apply a tiling raw leather texture to its Color and roughness channel 4. Create an additional fill layer up top and apply a black mask to it.Inside this mask retrieve the anchorpoint information followed by a blur filter with a value of 6. Use a levels to increase the spread of the mask. Apply another marble veins matching the values of the marble veins fill layer that we previously added and set its blending mode to multiply. Lastly retrieve the anchorpoint information from the previous fill layer again but this time set its blending mode to subtract. This fill layers properties should have a dark diffuse color and a matte roughness. 5. Add another fill layer with a bright diffuse and height properties with a black mask applied to it. Inside its mask retrieve the anchorpoint information again followed by a blur slope. Apply the anchorpoint information again but this time set its blending mode to subtract. Now we have a worn leather effect wherever we paint using the paint layer created inside the callout mask! ____________________________________________________ More AAA Game Dev Tips can be found on my YouTube channel here: Stay tuned for more weekly Tips! Happy Texturing!💚 #gamedev #gameart #3dmodeling #3dartist #texturing #UE5 #unity #artstation

Cohen Brawley

88,726 次观看 • 2 年前

🎓Learn how to create a powerful Dynamic Embers smart material in a matter of seconds, in my latest video series (AAA) Pro Tips! This smart material can be used on virtually any 3D asset. ___________________________________________________ In this video, the steps are as follows: 1. Create a fill layer to then apply the base maps for our asset into it. 2. Bake out the world space, AO, Curvature, and Position maps. These maps will be crucial for the smart material to function. Also, be sure to add an emissive channel to the project. 3. Next, create another fill layer labeled (Fire animation gradient) with a black mask and inside the mask apply a paint layer. Select the paint layer and paint a simple pill shape using a soft brush. Add an anchorpoint to the mask and disable all channels in this fill layer. 4. Create a folder labeled (embers smart material) and set it to pass through. Add a paint layer inside this folder and set it to pass through as well followed by an anchorpoint. 5. Create another fill layer and apply the paint layers anchorpoint information into its color channel. From here an HSL filter should be added to desaturate and darken the colors. 6. Next, create an additional fill layer with an orange-colored emissive channel. Add a black mask to this fill layer and inside its mask apply a dirt generator. This will give us the illusion of the embers glowing from inside the charred tree. Duplicate this fill layer and tweak its emissive color to a yellowish hue and reduce its mask amount. Do this a second time but with a white-colored emissive channel. This will now create an effect of the embers appearing brighter the deeper they are inside the tree. 7. Lastly, add these layers into a folder with a black mask and apply the (Fire Animation Gradient) anchorpoint into its mask via a fill layer. Now we have a charred embers effect wherever we paint using the paint layer created inside the gradient mask! This gradient mask can also be exported into Unreal engine to create some stunning real-time dynamic animations or the new material can simply be used for in-engine vertex painting. ____________________________________________________ More AAA Game Dev Tips can be found on my YouTube channel here: Stay tuned for more weekly Tips! Happy Texturing!💚 #gamedev #gameart #3dmodeling #texturing #madewithsubstance #ue5 #unrealengine #unity #vfx

Cohen Brawley

46,070 次观看 • 2 年前