Loading video...

Video Failed to Load

Go Home

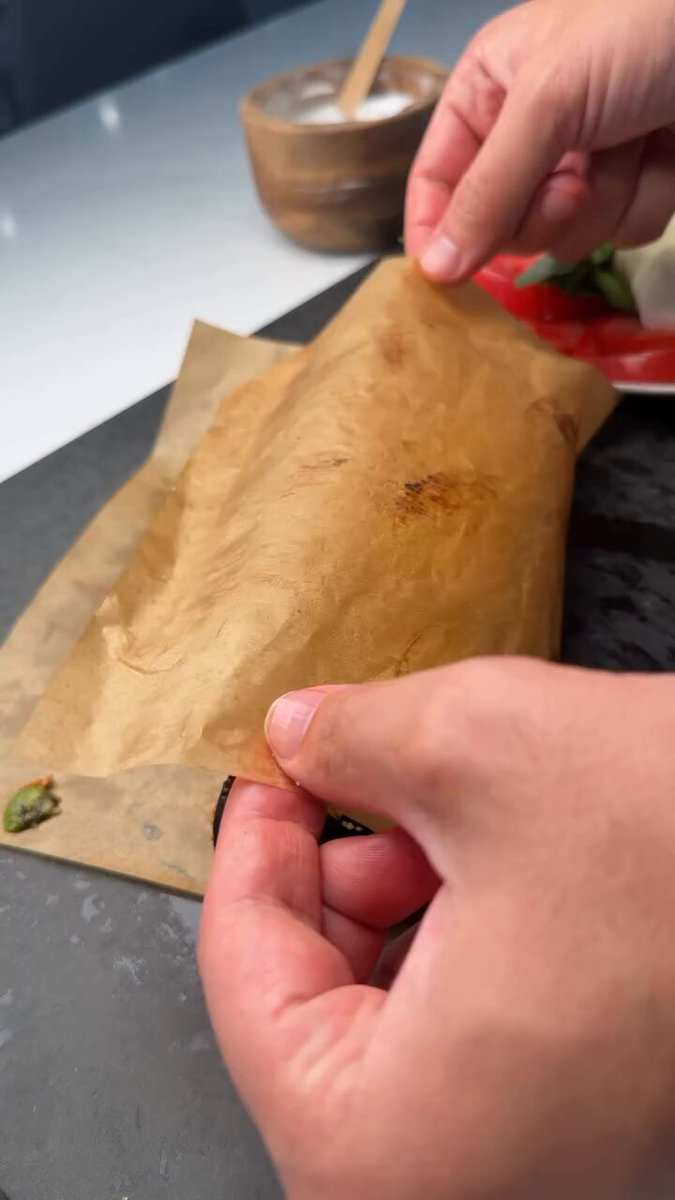
WHITE CHEDDAR CHEEZ ITS (yields 150-200 crackers) 8 oz extra sharp white cheddar cheese, shredded 1 cup all purpose flour ½ tsp salt, plus more for topping ¼ cup unsalted butter, cubed 2 tablespoons whole milk (cold) Preheat oven to 325˚F and line 2 baking sheets with parchment paper....

54,592 views • 17 days ago •via X (Twitter)

0 Comments

No comments available

Comments from the original post will appear here

Related Videos

Potato Crust Quiche (Ham, Spinach & Cheese) Ingredients: 6 medium golden potatoes Avocado oil spray Salt 6 eggs 1/2 cup ricotta Heaping 1/2 cup shredded cheddar (plus extra for topping) 1/2 cup diced ham 1 large handful spinach, finely chopped Salt + pepper Fresh chives (for topping) Flaky salt (for finishing) Directions: Start by boiling your potatoes. I cut all 6 medium golden potatoes in half before placing them in the boiling water so they cook a little faster and the skins come off easier later. Boil until fork tender, then let them cool slightly. Once cooled, peel the skins right off (they should slide off easily). Spray a springform pan with avocado oil. Take your boiled potatoes and press them into the bottom and up the sides of the pan to form a crust. I use a cup to really press and shape it evenly. Spray the crust with a little more avocado oil and sprinkle salt over the base and sides. Bake at 425°F for 20-25 minutes to pre-bake the crust until lightly golden and starting to crisp. In a bowl, whisk together: 6 eggs ricotta cheddar diced ham chopped spinach salt + pepper Mix well, then pour into your pre-baked potato crust. Top with extra shredded cheese. Bake at 425°F for 40-45 minutes, or until fully set and no longer jiggly in the center. Let it cool slightly before removing from the springform pan. Finish with fresh chives + flaky salt. The crust comes out golden, crispy, and honestly better than regular quiche crust. 🎥 itskatiebien | IG

𝕏 Cuisines

55,376 views • 1 month ago

Enjoying a Brownie Tart on this beautiful Sunday! Recipe from #TheFamilyThatCooksTogether listed below 1 cup hazelnuts, lightly toasted 1/2 cup plus 1 tablespoon unsweetened cocoa powder 1/2 teaspoon kosher salt 11/2 cups sugar, divided 1/2 pound (2 sticks) unsalted butter 1 cup bittersweet chocolate chips 3 large eggs 1 tablespoon instant coffee dissolved in 1 tablespoon of hot water 11/2 pints raspberries Pre-heat the oven to 325 degrees F. Spray a fluted 9-inch tart pan with removable bottom with non-stick cooking spray. In a food processor add hazelnuts, unsweetened cocoa powder, salt and 1/4 cup of sugar and pulse until finely ground. Set aside. In a medium saucepan, melt unsalted butter over medium heat, then cook swirling the pan occasionally, until nutty-smelling and deep golden in color, about 5 minutes. Remove from heat and add the bittersweet chocolate chips. Let stand until melted, about 2 minutes. Whisk the butter and chocolate until smooth, scraping up any browned butter solids from the bottom of the pan. Let cool slightly. In a mixing bowl fitted with the whisk attachment, beat the eggs with the remaining 11/4 cups of sugar and coffee mixture on medium speed, about 5 minutes. With mixer on low, add the chocolate-butter mixture, followed by the cocoa-hazelnut mixture. With a spatula scrape batter into prepared pan and bake for about 35 minutes, or until the top is glossy and a toothpick inserted in the center comes out with a few moist crumbs. Let cool until slightly warm. Remove the outer ring from the tart pan. In the center of the tart, place the raspberries in a circle or in the shape of a heart. Garnish with sifted powdered sugar. Serve with ice cream.

Geoffrey Zakarian

11,690 views • 4 months ago

A cake that is being called the sexiest cake ever must be eaten, right?! So, I took it as my duty to make sure it lives up to the hype. 🤤 The name doesn’t even come close! Blackberry Cake Recipe (The Sexiest Dessert Ever) Ingredients For the Cake: • 2 cups (250g) all-purpose flour • 1 ½ teaspoons baking powder • ½ teaspoon baking soda • ½ teaspoon salt • ½ cup (115g) unsalted butter, softened • 1 cup (200g) granulated sugar • 2 large eggs, at room temperature • 1 teaspoon vanilla extract • 1 cup (240ml) buttermilk, at room temperature • 1 ½ cups (180g) fresh blackberries For the Blackberry Buttercream Frosting: • ½ cup (115g) unsalted butter, softened • 3 cups (360g) powdered sugar, sifted • ¼ cup (60ml) blackberry puree (blend fresh blackberries and strain out the seeds) • ½ teaspoon vanilla extract • Pinch of salt For Decoration (Optional): • Fresh blackberries • Lemon zest • Mint leaves Instructions Preheat the Oven: Preheat your oven to 350°F (175°C). Grease and flour two 9-inch (23cm) round cake pans or line them with parchment paper. Prepare the Cake Batter: 1. In a medium bowl, sift together the flour, baking powder, baking soda, and salt. Set aside. 2. In a large mixing bowl, cream together the softened butter and granulated sugar until light and fluffy. 3. Add the eggs one at a time, beating well after each addition. Stir in the vanilla extract. 4. Gradually add the dry ingredients to the wet ingredients, alternating with the buttermilk, beginning and ending with the dry ingredients. Mix until just combined. 5. Gently fold in the fresh blackberries until evenly distributed throughout the batter. Bake the Cake: 1. Divide the cake batter evenly between the prepared cake pans. 2. Bake in the preheated oven for 25-30 minutes, or until a toothpick inserted into the center of the cakes comes out clean. 3. Remove the cakes from the oven and let them cool in the pans for 10 minutes before transferring them to wire racks to cool completely. Make the Blackberry Buttercream Frosting: 1. In a large mixing bowl, beat the softened butter until smooth and creamy. 2. Gradually add the sifted powdered sugar, blackberry puree, vanilla extract, and salt, beating until smooth and creamy. 3. Adjust the consistency by adding more powdered sugar if too thin, or more blackberry puree if too thick. Assemble the Cake: 1. Once the cakes are completely cool, place one cake layer on a serving plate or cake stand. 2. Spread a layer of blackberry buttercream frosting evenly over the top of the first cake layer. 3. Place the second cake layer on top and frost the top and sides of the cake with the remaining blackberry buttercream frosting. 4. Decorate (Optional): Garnish the top of the cake with fresh blackberries, lemon zest, and mint leaves for a beautiful presentation. To those who do not like blackberries, I suggest blueberries ~~but then it’s only the 2nd sexiest cake ever~~ 😉

CeCe

15,613 views • 2 months ago

PROTEIN STEAK WRAPS (AND FLATBREADS MADE WITH YOGURT!) Makes 4: 460 CALS, 40G PROTEIN each If you told 350lb version of me that I could eat food like this, feel good AND lose weight, I honestly wouldn’t have believed you. Ive lost over 150lbs eating incredibly tasty healthy recipes like this. It’s delicious, brings on the protein, and keeps me insanely full. If you’re watching carbs, you can sub in lupin flour for half of the flour to reduce carbs and get even more protein. Protein Flatbreads: 2/3 cup gluten free all purpose flour (or regular purpose flour) 2/3 cup Greek yogurt 1/2 tsp baking powder A couple generous pinches salt Optional topping: Olive oil + Everything Bagel Seasoning Steak: 1.25lb skirt steak 1 tsp olive oil 1/2 tbsp paprika 1/2 tbsp garlic powder 1/2 tbsp oregano Salt & pepper Yogurt spread: 1 cup Greek yogurt 1 minced garlic clove 3–4 tbsp finely chopped dill Juice of half a lemon Pinch of salt & pepper Onion salad: 1 small red onion thinly sliced 4 tbsp fresh parsley, finely chopped Juice of 1/2 lemon 1 tbsp sumac Salt 1.Season steak - drizzle with olive oil, add the spices above, mix well, then airfry at 400F for 10 mins. Remove & let rest before slicing. 2.For the flatbreads, mix flour, yogurt, baking powder, and salt until you have a nice dough. Divide into 4 equal pieces. Lay out parchment paper on a sheet pan, spray your hands & parchment paper with oil, and press each portion out into thin flatbreads. Create little spots with your fingers, and spray or brush lightly with oil, sprinkle with everything bagel, and pop in the oven at 375F for 18-20 mins (time varies by oven). Remove and let cool slightly, then cover with a towel so they stay soft. 3.Make the yogurt spread and the onion salad with the ingredients above. 4.Then just assemble! Spread yogurt sauce, add roasted red pepper slices, 5oz steak, a large handful of the onion salad, and finish with extra parsley + sumac & enjoy. If you make it, let me know on SHREDHAPPENS. ENJOY! . . . . #healthyrecipes #healthyfoodshare #goodmoodfood #mediterraneanfood #highprotein

Shredhappens

45,456 views • 2 months ago

This is Gastrin, a Bronze Age Cretan (Minoan) dessert that the Turks discovered thousands of years later, stuck a few thinner layers of pastry in between, called baklava, and then unashamedly claimed as their own invention. Gastrin dates back to the Minoan Period, making it at the very least 3,500 years old, and is considered the ancestor of baklava for obvious reasons. To this very day, it is still prepared in Crete for holidays, festivals, or as a specialty dessert. Want to make your own Gastrin? This is how: Ingredients: 1 packet of pastry 180g Butter, melted For the filling: 300 grams roughly ground hazelnuts 300 grams roasted and coarsely ground almonds 300 grams coarsely ground walnuts 100 grams of poppy seeds 100 grams roasted sesame seeds 1/2 teaspoon pepper 1/2 cup honey For the syrup: 1/4 cup petimezi (grape molasses) 1/2 cup water 1 cup honey 2 tbsps lemon juice 1) Combine all the ground nuts, poppy seeds, sesame seeds, pepper, and honey. Mix well until it holds together slightly. Divide into two equal portions. 2) Preheat oven to 180°C / 350°F (moderate heat). 3) Oil or butter a baking pan. Place the first dough sheetin the pan. Spread half the filling evenly. Add the second sheet and the remaining filling. Top with the third sheet. 4) Brush the top with melted butter. Sprinkle with sesame seeds if you want. 5) Score into diamond or square shapes with a sharp knife (do not cut all the way through yet). 6) Bake for 30–45 minutes until golden brown. 7) While baking, combine water, honey, petimezi, and lemon juice in a saucepan. Bring to a boil, then simmer 5–10 minutes until slightly thickened. Let it cool slightly. 8) When the gastrin comes out of the oven, let it cool for 5–10 minutes, then pour the warm syrup evenly over the hot pastry. It will sizzle and soak in. Allow it to fully absorb (ideally for a few hours or overnight) before serving.

Paul Antonopoulos

45,435 views • 1 month ago

💥EGGPLANT BREADWICH This is another lowcarb bread hack thats ACTUALLY good and one of my favorites. Makes two servings at 350 calories, 20g protein, and you can add chicken or steak to make the protein more substantial. But honestly, it was just as good without any of those - it gave me some serious Mediterranean food vibes with all these summer flavors. If you want a low-carb sandwich that hits the spot, this one’s for you. The cheese is actually baked into the eggplant, making a great flatbread like vessel that you can use to make your favorite lowcarb, keto-friendly sandwich. Top it up with whatever you want. Full recipe below, and you can always comment “BREAD” and I’ll send you my free mini lowcarb breadwhich ebook. Here’s how to make it (makes 2 servings): 1.Preheat your oven to 400F. Grab 1 large eggplant and thinly slice it using a knife, mandoline or vegetable peeler. 2.Season them with salt, lay the slices on a paper towel and pat them dry after 5 mins. 3.Grab an oven-safe tray, line it with parchment paper, and sprinkle a thin layer (1 serving) of shredded cheese (ideally mozzarella) directly on the paper. Lay out your eggplant slices slightly overlapping to form a rectangle. then add another 2 servings of shredded cheese on top. 4.Pop it in the oven for 27-30 mins until the edges are golden and the cheese is crisp. Let it cool slightly. 5.I used 2 tbsp of pesto as the base, added 2oz of thinly sliced fresh mozzarella, a thinly sliced tomato, a handful of arugula, a couple of basil leaves, lots of fresh cracked pepper, and a nice drizzle of balsamic glaze. 6.Carefully roll it up tightly from the bottom, pressing gently as you go to keep everything compact. Then cut into it the middle like a sharp knife, and enjoy. If you try this, be sure to let me know on SHREDHAPPENS. ENJOY! . . . . #lowcarb #lowcarbrecipes #healthyrecipes #keto #mediterraneanfood

Shredhappens

41,038 views • 2 months ago

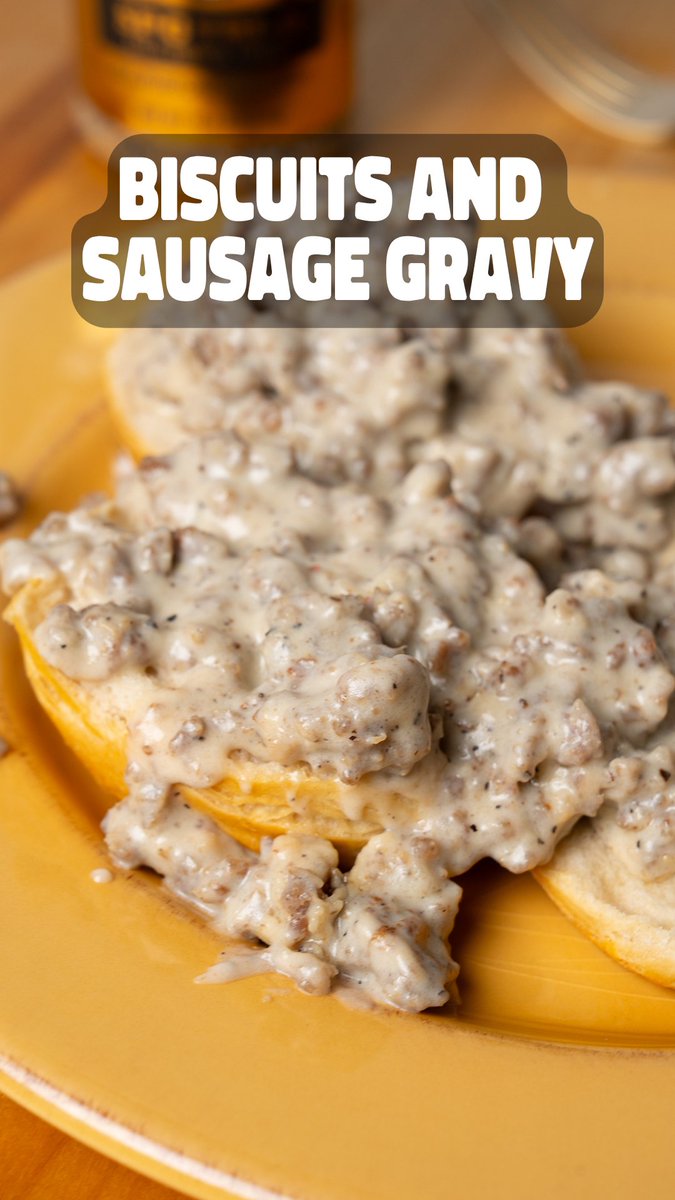
I’m takin’ a classic breakfast up a notch! Biscuits and Gravy...but we’re doing it the SPG Tri-O way!🔥 Ingredients 1 tbsp Dan-O’s SPG Tri-O (Salt, Pepper, Garlic) Seasoning 1 tbsp Dan-O’s Cajun Seasoning, 1 lb breakfast sausage 2 tbsp all-purpose flour 2 cups whole milk, divided 1 can refrigerated flaky layer biscuits Directions 1h. Bake the Biscuits Prepare and bake the canned biscuits according to the package directions. While the biscuits bake, make the sausage gravy. 2. Brown the Sausage Add the breakfast sausage to a hot pan. Chop the sausage as it cooks to create small pieces instead of large chunks. Cook for a couple of minutes. 3. Simmer the Sausage Turn the heat down to medium-low. Let the sausage simmer for a couple of minutes to draw the grease out. 4. Add the Flour Sprinkle the all-purpose flour over the sausage. Stir until the flour soaks up the grease and coats the sausage. Cook until the mixture looks drier and the flour has absorbed the grease. 5. Add the Milk Pour in the 1 cup whole milk and turn the heat up to medium-high. Stir until the mixture comes back to a simmer and starts to thicken. Add the remaining milk. Stir until it comes back to a simmer and thickens again. 6. Season the Gravy Sprinkle Generously with Dan-O’s SPG Tri-O. Turn the heat down to low. Let the gravy come together, then hold on a simmer until the biscuits are ready. 7. Build the Plate Split the biscuits open. Lay them on a plate. Spoon the sausage gravy over the top. 8. Add the Flavor Finishing and Serve Top with Dan-O’s Cajun Seasoning for extra flavor. Serve hot. Yum Yum Get Ya Sum!

Dan-O’s Seasoning

25,082 views • 5 months ago