正在加载视频...

视频加载失败

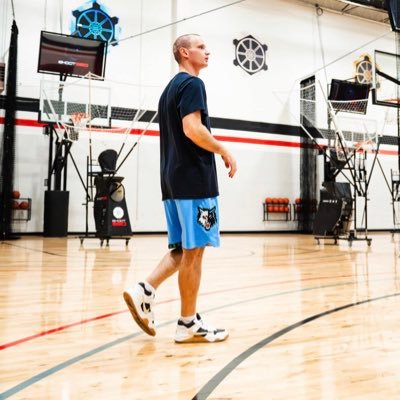
⬇️ PG SKILL-BUILDING WORKOUT ⬇️ 1. V-Dribble Passing Series (10x each way) - double cross, wrap around bounce pass - BTL>BTB, btb pass - alternate the combos/passes 2. P&R reads/passing/scoring (5x each way) - Backside hook passes, mid-range pull ups - Reverse pivots, relocate 3s 3. Touch work/jumpers (5x...

20,293 次观看 • 9 个月前 •via X (Twitter)

0 条评论

暂无评论

原始帖子的评论将显示在这里

相关视频

Skills are the quickest way to 10x the quality and consistency of what you get from Claude Code. And you don't need to be a developer to use them. Anthropic just published how they use hundreds of skills internally every day. Most skill tutorials are made for developers — if you're in marketing, sales, content ops, or GTM, you probably watched those and moved on. But skills are just as important for non-developers. A skill is just a reusable prompt with clear instructions for a specific task. Instead of prompting Claude the same way over and over, you build it once and invoke it every time. I have a skill for writing on LinkedIn. A different one for YouTube outlines. Another for X. Each platform has different rules, different voice, different structure — so each one gets its own skill. If you're doing something repeatedly, it's time to make a skill. The biggest mistake most people make: building skills as a single .md file. A single file dumps everything into context whether Claude needs it or not. Wastes tokens. Gets worse results. Skills should be folders. Here's the structure that works: skill.md — the orchestrator. Tells Claude which files to read and when. It doesn't contain rules itself — it's the playbook. instructions/ — separate files for voice, structure, scope. Claude only loads the one it needs for the current step. examples/ — good AND bad. Good examples show what success looks like. Bad examples show patterns to avoid — AI writing tells, weak hooks, generic CTAs. Most people skip bad examples. Don't. eval/ — a checklist that scores every output before you see it. "Does it have a clear hook?" "Is it free of AI buzzwords?" Pass or fail on each item. templates/ — output formatting so you get consistent structure every time. The three types of skills that matter most for non-developers: 1. Business automation. Writing a newsletter. Checking reports and drafting follow-ups. Running programmatic ad campaigns. Any workflow you repeat — build a skill for it. 2. Content templates. Landing page copy, meta ads, email sequences, SEO briefs. Each one has specific requirements. Each one gets its own skill. 3. Thinking partners. This is the one people miss. Skills don't have to produce output. They can help you think — an advisory board that reviews your work from your ICP's perspective, a coach that pressure-tests your strategy, an ideation partner that researches competitors before suggesting your next move. If you already have skills as .md files, here's the exact prompt to restructure them in the Anthropic approved format: "I want to restructure my Claude Code skill file. Right now my skill is a single .md file and I want to break it into a folder system following Anthropic's best practices. Read my current skill file, then restructure it into a folder with: a skill.md orchestrator, an instructions/ folder with separate files for each concern (voice, structure, scope), an examples/ folder with good and bad examples, an eval/ folder with a quality checklist, and a templates/ folder for output formatting. Keep all my existing rules and intent — just reorganize them into the modular structure." Paste that into Claude Code pointed at the folder where your skill lives. It handles the rest. A few caveats: 1. Don't add too many skills. Every skill adds context Claude has to process. 50 skills loaded means everything slows down. Start with 3-5 covering your most repeated workflows. 2. Vet skills before downloading. If you grab a skill from the internet, read what's inside first. Skills can include shell commands and scripts. Check what you're running. 3. Share what works. Build a skill that performs well, put it in a shared GitHub repo. Your marketing org gets shared skills for copywriting, SEO, ad copy — new hires invoke the skill instead of learning every playbook from scratch. Onboarding time drops dramatically. 4. Keep your skills updated. When you see output you love, add it as a good example. When you see a pattern you hate, add it as a bad example. The skill gets sharper every time. I made a full video walking through all of this — including a live build of two skills from scratch (no terminal, no code), the exact prompt I use to restructure old skills, and 5 pro tips from Anthropic's internal playbook. Share this with your non-developer friends that want to do more with AI; or bookmark it to come back to at a later time.

JJ Englert

29,322 次观看 • 4 个月前

ATG School Policies 1-5: [I’m not trying to reinvent schooling. There are just a handful of things I believe in which I haven’t seen in any school I’ve been around as a student, coach, or parent.] Policy #1: Each student gets to be responsible for growing some of their own food, no matter how small, and THROUGHOUT schooling (not just a quickie project here or there). Policy #2: Minimum 1:1 ratio of time NOT SITTING IN THE CLASSROOM. What you do with this is up to you. There are so many real world skills, sports, gardening, music, etc. The strict ratio in the school day is the key for me. Common sense and personal interests can take it from there. Policy #3: Daily time to read whatever you want to read about. The biggest barrier for my reading was INTEREST. Be there to ensure the book is at their level, and to help them if they don’t understand something. Other than that, LET THEM ENJOY READING, ALL THE WAY THROUGH SCHOOL, not just in early years. Policy #4: High school is a 50/50 bridge to winning in real life. Mornings are for actual work, making and SAVING UP MONEY. Afternoons are for learning finances and professional skills of YOUR INTEREST. With average work, you’ll finish school with $25,000-$100,000 in the bank, more skills than the norm, and a greater chance of creating your life and work from there on out, rather than conforming to make a paycheck. Policy #5: As part of the high school 50/50 system, ensure each student learns the adult financial red tape in your state/country before you’ve got bills, kids, etc.

KneeOverToesGuy

28,105 次观看 • 4 个月前

Develop Better Finishing and Decision Making With This Fast Break Drill Here's a great 2v1 drill to improve ball handling, passing, scoring, and decision making out of fast break advantage situations from the Youth Coaching System with Jim Huber. Even though these are youth players in the video, it's great for all ages! I actually got this drill from longtime college coach Don Kelbick. Drill Tips: -Attack and Think Lay Up! We got this drill from Don Kelbick and we teach the same mentality. You want to force the ball handler to attack and try to get a lay up. The only reason they pass is that the defender stops the ball. Personally, I’m okay if the initial ball handler takes some bad shots. I think having an assertive, attacking mentality will create more good things than bad. This mentality will eventually lead to more open passes for his teammate, because the defense will realize that they have to commit and stop the ball. -1 or 2 Pass Limit You could even add a pass limit of 1 or 2. That way, it’s more game like and they’re not going too slow. -Add a Countdown You could also introduce a time limit. If I see going too slow, I usually start saying, “3, 2, 1… “ and make a buzzer sound at zero. The kids actually enjoy it. -Make It 2v2 With a Trailing Defender It's also fun to add a trailing defender as another progression. You would simply add a 4th line somewhere in the middle of the floor. So you’d put a cone a little bit further in the middle of the court, so the trailing defender comes into the play a second or two later. -Change Offense and Defense Lines I also will switch up which lines are defense and offense, so players experience attacking the basket from all angles in transition. Give this drill a try and let us know what you think!

Joe Haefner | Breakthrough Basketball

39,863 次观看 • 1 年前

Benefits of strengthening our shoulder blade muscles: - Improves your posture. - Relieves neck and shoulder stiffness. - Resolves chronic pain. - Increases push and pull power. Focus on these forgotten heroes for the rest of December. You'll feel and look different by the end of the year. Scapular imbalances are typical in my assessments of clients with chronic pain and posture problems. They have so little muscle mass and strength there that they can barely support their shoulder blades. One side is often way too strong compared to the other. It's normal to have a more dominant side, but too much of a difference will affect you negatively over time. Do 3-5 sets of these exercises twice a week: - DB = Dumbbell. - BW = Body weight. - Rest 60s between exercises. - Rest 48-72 hours between workouts. - All exercises can be done without equipment. Week 1 and Week 3 Day 1 1 - DB Side-Lying External Rotations, 10-12 reps/arm (0:02) 2 - DB Bent-Over Scapular Retractions, 10-12 reps/arm (0:07) Day 2 3 - Unilateral DB T3 Raises, 10-12 reps/arm (0:12) 4 - Bench-Supported Reverse Flys, 10-12 reps (0:16) Week 2 and Week 4 Day 3 5 - Cable Standing 90 Degree External Rotation, 15-20 reps/arm (0:22) 6 - Standing Scapular Retraction, 15-20 reps with a 3s hold each rep (0:27) Day 4 7 - Lying Prone Y Raises, 10-12 reps with a 3s hold at the top of each rep (0:31) 8 - Bent-Over Reverse Fly, 15-20 reps (0:37) // I often discuss these exercises on my timeline because they have helped so many of my clients over the years. Focus on your shoulder blade muscles, and watch your body transform for the new year.

Alex Bernier

21,924 次观看 • 1 年前

[CLIP] by Hand ✍️ The CLIP (Contrastive Language–Image Pre-training) model, a groundbreaking work by OpenAI, redefines the intersection of computer vision and natural language processing. It is the basis of all the multi-modal foundation models we see today. How does CLIP work? Goal: 🟨 Learn a shared embedding space for text and image [1] Given ↳ A mini batch of 3 text-image pairs ↳ OpenAI used 400 million text-image pairs to train its original CLIP model. Process 1st pair: "big table" [2] 🟪 Text → 2 Vectors (3D) ↳ Look up word embedding vectors using word2vec. [3] 🟩 Image → 2 Vectors (4D) ↳ Divide the image into two patches. ↳ Flatten each patch [4] Process other pairs ↳ Repeat [2]-[3] [5] 🟪 Text Encoder & 🟩 Image Encoder ↳ Encode input vectors into feature vectors ↳ Here, both encoders are simple one layer perceptron (linear + ReLU) ↳ In practice, the encoders are usually transformer models. [6] 🟪 🟩 Mean Pooling: 2 → 1 vector ↳ Average 2 feature vectors into a single vector by averaging across the columns ↳ The goal is to have one vector to represent each image or text [7] 🟪 🟩 -> 🟨 Projection ↳ Note that the text and image feature vectors from the encoders have different dimensions (3D vs. 4D). ↳ Use a linear layer to project image and text vectors to a 2D shared embedding space. 🏋️ Contrastive Pre-training 🏋️ [8] Prepare for MatMul ↳ Copy text vectors (T1,T2,T3) ↳ Copy the transpose of image vectors (I1,I2,I3) ↳ They are all in the 2D shared embedding space. [9] 🟦 MatMul ↳ Multiply T and I matrices. ↳ This is equivalent to taking dot product between every pair of image and text vectors. ↳ The purpose is to use dot product to estimate the similarity between a pair of image-text. [10] 🟦 Softmax: e^x ↳ Raise e to the power of the number in each cell ↳ To simplify hand calculation, we approximate e^□ with 3^□. [11] 🟦 Softmax: ∑ ↳ Sum each row for 🟩 image→🟪 text ↳ Sum each column for 🟪 text→ 🟩 image [12] 🟦 Softmax: 1 / sum ↳ Divide each element by the column sum to obtain a similarity matrix for 🟪 text→🟩 image ↳ Divide each element by the row sum to obtain a similarity matrix for 🟩 image→🟪 text [13] 🟥 Loss Gradients ↳ The "Targets" for the similarity matrices are Identity Matrices. ↳ Why? If I and T come from the same pair (i=j), we want the highest value, which is 1, and 0 otherwise. ↳ Apply the simple equation of [Similarity - Target] to compute gradients of for both directions. ↳ Why so simple? Because when Softmax and Cross-Entropy Loss are used together, the math magically works out that way. ↳ These gradients kick off the backpropagation process to update weights and biases of the encoders and projection layers (red borders).

Tom Yeh

67,864 次观看 • 2 年前

Perfect 1v1 Drill For Finding Your LOCKDOWN Defenders! Coach LoGalbo takes you through a drill that is perfect for finding your lockdown defenders that you can rely on when the lights turn on. As Nick LoGalbo says, it's a great way to find your "Rambo" which is a defender that you can rely on to defend your opponent’s best ball handler in the full court. And, an added offensive benefit to this drill, is that it allows for offensive players to work on their ball handling in the face of defensive pressure! This 1 on 1 Contain Drill is from Nick LoGalbo's Outer Third Defense (No Middle Defense). That's why the goal of this basketball drill is to force the opponent's primary ball handlers to the outer thirds of the basketball court (and out of the middle!) as soon as they catch the ball. By doing this, it allows the defense to dictate the entry pass to one side of the floor. By keeping the ball on the outer third of the basketball court, you can overload the backside of the defense which helps control the opponents passing lanes, deters easy passes and helps eliminate the dribble drive. You can incorporate this drill every other day in practice to re-emphasize to your defenders the importance of keeping the ball handlers out of the middle of the basketball court. Instructions and Keys to the 1 on 1 Contain Drill: - Give the ball handler a cushion. This makes it easier to contain them in the outer thirds. - Chest and contest a crossover to the middle. You do not turn your body. You must beat the offensive player to the spot and turn them back to the outer thirds. - If you get beat, you sprint ahead of the ball. You do not continue shuffling. - Keep the ball in the outer thirds the entire length of the court. It does not stop after the offensive player gets past half court. - The goal of the drill is to simply keep the ball handler in the outer thirds. - The defense should focus on beating the ball to the spot and chest to contest defense. - As soon as the first group gets to halfcourt, the second group begins. - After a group makes it all the way to the opposite baseline, they switch positions and get in line to repeat the drill going the opposite direction. Coaching Tips - Once a player gets chest to contest, they must spring back to get in front of the ball. Your goal is not to be running side by side. You must get in front of the offensive player. This prevents the offensive player from getting an angle to the basket. - After running through the drill for a specified amount of time, switch directions so the offensive players must focus on using both hands as their primary dribbling hand. - It is important to mix up players rather than like positions always competing against each other, so that players get used to guarding a wide variety of positions. It forces the players to adjust defensively regarding speed and skill. - Another positive of this drill is it gives you the ability to assess who your Rambo is: players who can work the point guard up the floor.

Joe Haefner | Breakthrough Basketball

38,092 次观看 • 1 年前