Video yükleniyor...

Video Yüklenemedi

Ana Sayfaya Dön

New clean 3D AI workflow Control Rig physics in UEFN! Been exploring some more hybrid AI workflows lately, and for 3D assets splitting the model into parts is kinda essential. This video shows my first test using AssetHub, one of the cleanest ways i've used to keep the whole...

83,297 görüntüleme • 5 ay önce •via X (Twitter)

40 Yorum

Sʀᴇʟɪᴀᴛᴀ profil fotoğrafı
Sʀᴇʟɪᴀᴛᴀ5 ay önce

@assethub_io .. oh my god!? But you did retopology yourself, I assume?

Jerome | InsaneUnreal profil fotoğrafı
Jerome | InsaneUnreal5 ay önce

@assethub_io nope, all Hunyuan 3D. Its not perfect yet but pretty close for most parts. With AI UV unwrapping i can work with it, selecting/manipulating

Sʀᴇʟɪᴀᴛᴀ profil fotoğrafı
Sʀᴇʟɪᴀᴛᴀ5 ay önce

@assethub_io b.. but the textures??? O.O the face one in particular? No way this is ai.. ?

Leonard profil fotoğrafı
Leonard5 ay önce

@assethub_io so what about a short yt video on that?

Jerome | InsaneUnreal profil fotoğrafı
Jerome | InsaneUnreal5 ay önce

@leo_trd1 @assethub_io you mean more of a tutorial right?

Leonard profil fotoğrafı
Leonard5 ay önce

@assethub_io yeah

Jerome | InsaneUnreal profil fotoğrafı
Jerome | InsaneUnreal5 ay önce

@leo_trd1 @assethub_io good idea

Vzu profil fotoğrafı
Vzu5 ay önce

@assethub_io very clean and organized! i would like to test!

Jerome | InsaneUnreal profil fotoğrafı
Jerome | InsaneUnreal5 ay önce

@assethub_io thanks! yeah feel free to send a DM so i can give an invitation code.

Takuya profil fotoğrafı
Takuya5 ay önce

@assethub_io 🔥🔥🔥

AssetHub profil fotoğrafı
AssetHub5 ay önce

glad to be able to help your workflow:))

Jerome | InsaneUnreal profil fotoğrafı
Jerome | InsaneUnreal5 ay önce

definitely helped!

Infinite Detail profil fotoğrafı
Infinite Detail5 ay önce

@assethub_io would love to get access!

Jerome | InsaneUnreal profil fotoğrafı
Jerome | InsaneUnreal5 ay önce

@assethub_io 🔥

JASPER profil fotoğrafı
JASPER5 ay önce

@assethub_io Sheesh 🔥

NBR Studios profil fotoğrafı
NBR Studios5 ay önce

@assethub_io Hello, we would really like to try it!

Scott (Human) - 𐌃𐌏ᖇ𐌉乙乙𐌃𐌕 profil fotoğrafı
Scott (Human) - 𐌃𐌏ᖇ𐌉乙乙𐌃𐌕5 ay önce

@assethub_io ngl. you can tell this is ai-gen 3d assets.. BUT... if you were to hand these parts to a ZBrush artists to tidy up, retopo and feed back into a pipeline. Easily huge cost saving.

Jerome | InsaneUnreal profil fotoğrafı
Jerome | InsaneUnreal5 ay önce

@assethub_io oh yeah. it could be a great base to work from

bommer GG profil fotoğrafı
bommer GG5 ay önce

@assethub_io Amzing

juan profil fotoğrafı
juan5 ay önce

@assethub_io The amount of detail is insane.

wangxiaocong profil fotoğrafı
wangxiaocong5 ay önce

@assethub_io i want to a try

JoshStrong profil fotoğrafı
JoshStrong5 ay önce

@assethub_io Wow 🤯

hayzSapiens 🎮📡 profil fotoğrafı
hayzSapiens 🎮📡5 ay önce

@assethub_io Looking good, would love to play with this 😉

Jerome | InsaneUnreal profil fotoğrafı
Jerome | InsaneUnreal5 ay önce

@assethub_io nice! send me a message, I'll share an invitation code

hayzSapiens 🎮📡 profil fotoğrafı
hayzSapiens 🎮📡5 ay önce

@assethub_io Check ✅

*_* profil fotoğrafı
*_*5 ay önce

@assethub_io 흥미로워요. 저도 사용해보고 싶은데, 가능할까요?

Jerome | InsaneUnreal profil fotoğrafı
Jerome | InsaneUnreal5 ay önce

@assethub_io yes! can you send a DM? I'll share the invitation code

Klaus Brave (❤️,⚡️) profil fotoğrafı
Klaus Brave (❤️,⚡️)5 ay önce

@assethub_io Amazing work. Would love an invite code.

roc-chiang profil fotoğrafı
roc-chiang5 ay önce

@assethub_io great!

Dirt Jordan profil fotoğrafı
Dirt Jordan5 ay önce

@assethub_io Auto-pose detection into parts? That streamlines iteration significantly. How's Hunyuan's retopo quality on complex meshes?

juan profil fotoğrafı
juan5 ay önce

@assethub_io It's impressive to see that artificial intelligence is evolving more and more.

HOS技研 profil fotoğrafı
HOS技研5 ay önce

@assethub_io ちょうど私も3D AIワークフローをテストしていたところで、モデル分割が結構手間になっていました。 ぜひテストしてみたいのですが、DM送ってもよろしいでしょうか?

Jerome | InsaneUnreal profil fotoğrafı
Jerome | InsaneUnreal5 ay önce

@assethub_io sure!

HOS技研 profil fotoğrafı
HOS技研5 ay önce

@assethub_io ありがとうございます!

KORYOS : SonsOfMars(WISHLIST) profil fotoğrafı
KORYOS : SonsOfMars(WISHLIST)5 ay önce

@assethub_io Are you importing the high pooy to huanyuan to get a low ?

Jerome | InsaneUnreal profil fotoğrafı
Jerome | InsaneUnreal5 ay önce

@assethub_io this time yes

Melison profil fotoğrafı
Melison17 gün önce

@AssetHub_io how to assemble them seamlessly? Got stuck here 😭

Tim profil fotoğrafı
Tim5 ay önce

@assethub_io You can try dropping 3D assets into the real world like Pokemon Go for creators 😆

Aeon profil fotoğrafı
Aeon5 ay önce

@assethub_io @IsThisA3DModel Do your whiny take on AI again, say the line Bart.

Клауд profil fotoğrafı
Клауд5 ay önce

@assethub_io Сорри братан но это не стоит внимания. Нейрослоп.

Benzer Videolar

I started using Blender through MCP about two weeks ago, and I quickly realized that you can build almost anything with AI. This model was created using Blender, Hunyuan3D, Gemini, and ChatGPT. Here’s how I did it: I opened Gemini, uploaded an image of the Gundam model, and asked it to generate a clean front-view image. I uploaded that front view to ChatGPT and asked it to generate two additional angles: a back view and a 45-degree front-left view. I went to: I signed up with my email and translated the page into English. Then I opened Image to 3D and selected the multi-image option. You’ll see a diagram of a whale from several angles. Upload each reference image in its corresponding position, such as front, 45-degree front-left, and back. I selected the 1.5M-face option. This produces a very high-poly model, but don’t worry, we’ll fix that next. Once the generation is complete, download the model as a GLB file. From the Hunyuan homepage, open 3D Studio using one of the dropdown menus. Select the topology or retopology tool and upload your GLB. I chose the High setting to preserve as much detail as possible. After a few seconds, the model was retopologized. It kept most of its visual detail while using far fewer polygons. The original head and rifle didn’t look very good, so I generated them separately. I returned to ChatGPT and created dedicated reference images for the Gundam’s head and rifle. I generated each part individually in Hunyuan at the 1.5M setting, then ran both through the same retopology process. Next came the textures. Open the texture section, select the multi-image option, and upload the same reference images according to the whale orientation indicators. However, instead of using the original clean textures, I asked ChatGPT to recreate them with wear, rust stains, scratches, and other surface damage. This gave the Gundam a much older and more authentic appearance. Once every part was textured, I imported everything into Blender. You can ask Codex through MCP to remove the original head and rifle, or you can do it manually. Select the main model and press Tab to enter Edit Mode. Press 3 to enable face selection, then press C to activate Circle Select. Paint over the faces belonging to the original helmet or rifle. You can press X to delete those faces or P to separate them into another object. Then position the newly generated, more detailed head and rifle in their place. I demonstrate this process in one of my older videos. And that’s it. You now have a very cool 3D Gundam model! Afterward, I created the cockpit, separated the model into movable sections, and rigged everything for use in my Three.js game. That process deserves its own tutorial, though. If anyone wants to see it, let me know. Or just ask your AI, I guess. They seem to know everything these days. xD

Spectro

80,433 görüntüleme • 1 ay önce

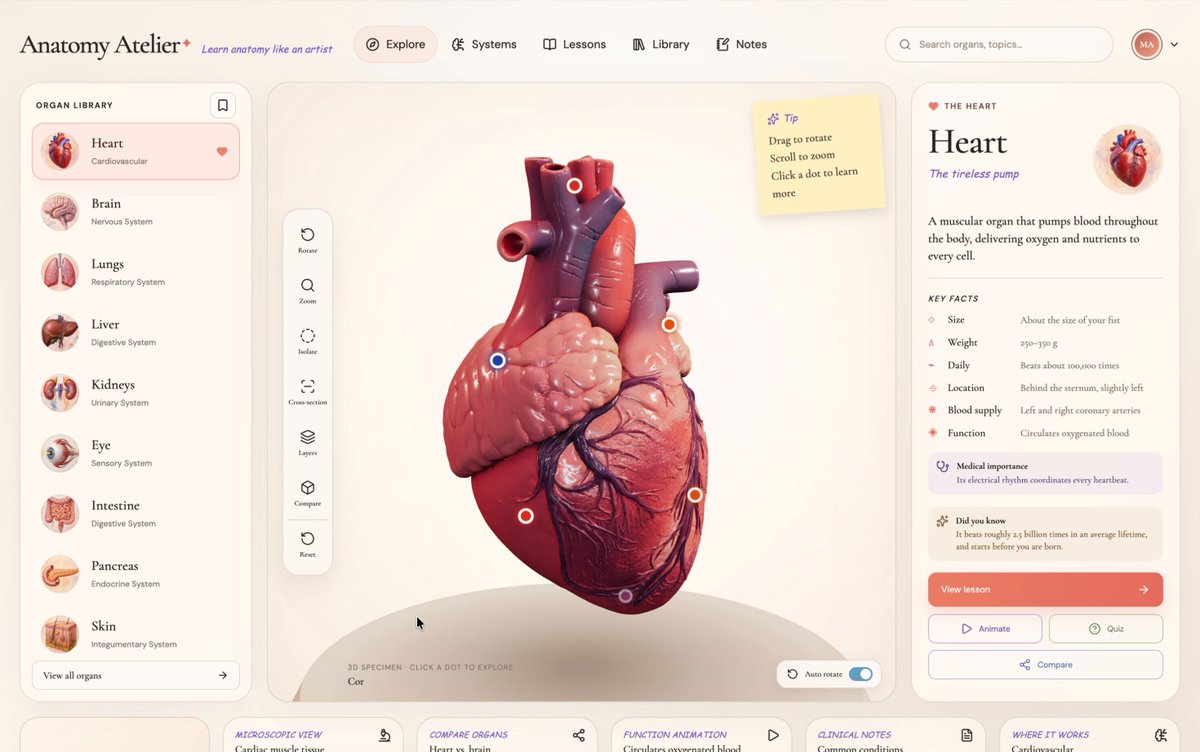
Only if education could be this interactive ❤️‍🔥 I've had a looong wish to build something genuinely useful through vibe coding, and I finally did it. A 3D human anatomy application built with Three.js using GPT 5.6 Sol. It all started with a single design image that I created using GPT Image 2.0. I then used it to generate every 3D organ image, one by one. Next, I converted each of those images into 3D models using Tripo (and no, they didn't sponsor this 😄). After that, I opened Codex, wrote a master prompt based on the design, and gave it the prompt, the design image, and all the 3D models. Codex built the first version beautifully, but there was one big problem. Every single 3D model was nearly 120-150 MB. That obviously wasn't practical for the web and was giving a performance of 16fps. After a few iterations, Codex optimized each model down to roughly 2–5.5 MB while preserving the visual quality, reducing the total asset size from ~900 MB to just 28.6 MB. And each model loads on demand. Along the way, Codex also generated those anatomical illustrations showing where each organ sits in the human body, and even created the interactive hotspot markers that explain different parts of every organ. It handled all of that. The process wasn't exactly one shot, but it also wasn't difficult. You just have to do it step by step. It genuinely felt like building something that could make learning anatomy much more engaging. The inspiration came from Dilum Sanjaya's 3D animal plant cell project. I remember seeing it and thinking, "I want to build something like this one day." And I did it :D Live: Code:

The Bugged Dev

2,099,446 görüntüleme • 1 ay önce

This is probably the most complex workflow I’ve ever built, only with open-source tools. It took my 4 days. It takes four inputs: author, title, and style; and generates a full visual animated story in one click in ComfyUI . I worked on it for four days. There are still some bugs, but here’s the first preview. Here’s a quick breakdown: - The four inputs are sent to LLMs with precise instructions to generate: first, prompts for images and image modifications; second, prompts for animations; third, prompts for generating music. - All voices are generated from the text and timed precisely, as they determine the length of each animation segment. - The first image and video are generated to serve as the title, but also as the guide for all other images created for the video. - Titles and subtitles are also added automatically in Comfy. - I also developed a lot of custom nodes for minor frame calculations, mostly to match audio and video. - The full system is a large loop that, for each line of text, generates an image and then a video from that image. The loop was the hardest part to build in this workflow, so it can process either a 20-second video or a 2-minute video with the same input. - There are multiple combinations of LLMs that try to understand the text in the best way to provide the best prompts for images and video. - The final video is assembled entirely within ComfyUI. - The music is generated based on the LLM output and matches the exact timing of the full animation. - Done! For reference, this workflow uses a lot of models and only works on an RTX 6000 Pro with plenty of RAM. My goal is not to replace humans, as I’ll try to explain later, this workflow is highly controlled and can be adapted or reworked at any point by real artists! My aim was to create a tool that can animate text in one go, allowing the AI some freedom while keeping a strict flow. I don’t know yet how I’ll share this workflow with people, I still need to polish it properly, but maybe through Patreon. Anyway, I hope you enjoy my research, and let’s always keep pushing further! :)

Lovis Odin

58,841 görüntüleme • 1 yıl önce