Loading video...
Video Failed to Load
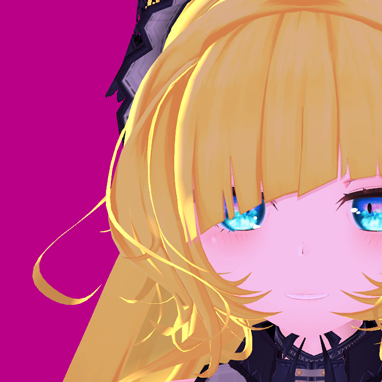
I've added a function to propagate a gradient across the mesh (it follows the curvature of the hair), and then copy that gradient to the Windows clipboard as a transparent picture, for use as a selection mask in the image editor
13,311 views • 1 year ago •via X (Twitter)
5 Comments

TouchMe1 year ago
Can this be used to created pathing maps for poiyomi? As there hasn’t really been a good way to do that prior.

Haï~1 year ago
I managed to build a Poiyomi "Merged Channels" path map with this

vaizor1 year ago
you never miss i stg

zSkull1621 year ago
that’s nuts. i didn’t know editor scripting can do so much

Xirael1 year ago
How reliant is it on each strand being its own island or mesh?


![CSS Tip! 🤙 You can use mask-composite and some JavaScript to create this pointer proximity following glow border ✨ .glow { mask-composite: intersect; mask-clip: padding-box, border-box; mask: linear-gradient(#0000, #0000), conic-gradient(#0000 0deg, #fff, #0000 45deg); } The trick is to mask a background-image with a combination of mask layers. mask-composite: intersect; means the mask used will be the intersection of the layers 🔥 use source-in, xor; in browsers that don't support intersect; In this demo, you can use pseudoelements and rely on scoped custom properties to do a lot of the heavy lifting for you 🙌 Once you've masked the background, you need to update the starting angle of the conic-gradient on pointermove 👆 You can work that out by getting the center point of each card and then calculating the angle between that and the pointer with Math.atan2 🤓 let ANGLE = Math.atan2( event?.y - CARD_CENTER[1], event?.x - CARD_CENTER[0] ) * 180 / Math.PI ANGLE = ANGLE < 0 ? ANGLE + 360 : ANGLE; CARD.style.setProperty('--start', ANGLE + 90) You plug that into your conic-gradient mask as a custom property accounting for --spread ⚡️ conic-gradient(from calc((var(--angle) - (var(--spread) * 0.5)) * 1deg), #000 0deg, #fff, #0000 calc(var(--spread) * 1deg)); To get the blur, you apply a blur to the glow container on each card 🤙 .glows { filter: blur(calc(var(--blur) * 1px); } That's it! Layers of masks that are clipped and composited before being blurred 😎 The added trick is to fade each one in when the pointer is in the defined proximity of the card. For example, don't show unless within 100px of a card. You can see that in the video. Check out the JavaScript code for that 🫶 Couldn't resist making this one 😁 CodePen.IO link below! 👇](https://image.24vids.com/tw-1734369933558010226/ext_tw_video_thumb/1734365662590418944/pu/img/320Dgq_k3RZoZOFV.jpg)


![CSS Tip! ✨ It's 2024 and you have a new way to make animated borders 🚀 .glow::after { offset-path: rect(0 100% 100% 0 round var(--radius)); animation: loop; } @keyframes loop { to { offset-distance: 100%; }} Using the offset-* properties you can animate elements along the perimeter of others 😍 The rect() value gained support in Safari 17.2 🙌 To start, you create an element and put it inside your main element. For example, you put a span inside the button 🤙 Click me! Make the element fill its parent with absolute positioning and inset [data-glow] { position: absolute; inset: 0; } Now the good part, you use a pseudoelement on that element and define an offset-path [data-glow]::after { content: ""; offset-path: rect(0 auto auto 0 round var(--radius)); animation: loop 2.6s infinite linear; } With the rect value, you are saying the path fills the parent container: top: 0 right: auto || 100% bottom: auto || 100% left: 0 Then you can use round to make sure the path uses the same radius as whatever the parent has The @keyframes animation merely animates the offset-distance of that pseudoelement to 100% @keyframes loop { to { offset-distance: 100%; }} You can see this more clearly in the video 🫶 The offset-* properties also include an offset-anchor property. This allows you to dictate which point of the element follows the path. For example: anchor-offset: 100% 50%; This means that the "right, center" of the element will follow the perimeter of the parent element 🤙 Lastly, the visuals 🎨 For color, you can use a gradient such as a linear gradient to fill the pseudo-element. [data-glow]::after { background: radial-gradient( circle at right, hsl(320 90% 100%), transparent 50% ); } Then clip away everything so you only have the border and can still have translucent backgrounds, etc. Use a mask with mask-composite ✨ A little transparent border trick: [data-glow] { border: 2px solid transparent; mask: linear-gradient(transparent, transparent), linear-gradient(white, white); mask-clip: padding-box, border-box; mask-composite: intersect; } Bit of a long one. Hope you find it useful 🙏 CodePen.IO link below 👇](https://image.24vids.com/tw-1752903535488823789/ext_tw_video_thumb/1752900027591151616/pu/img/d0sViTqgbe8N-yux.jpg)


